How to Take Better Photographs Indoors

تقليص
X
 
  • تصفية - فلترة
  • الوقت
  • عرض
إلغاء تحديد الكل
مشاركات جديدة

  • How to Take Better Photographs Indoors

    How to Take Better Photographs Indoors

    Many new photographers find that while shutter speed, aperture, and ISO make sense in theory, it is hard to know where to start in practice. Even if you understand basic camera settings, getting high quality photographs – especially indoors – is not always an easy task.

    In other words, maybe you have a basic understanding of the exposure triangle… but now what? How do you actually take a good photograph in low light or bad lighting conditions, like those often found indoors?

    That’s what I’m going to cover today. However, instead of a list of tips, I’m going to go through some common problems in indoor photography, followed by the best solutions to those problems.
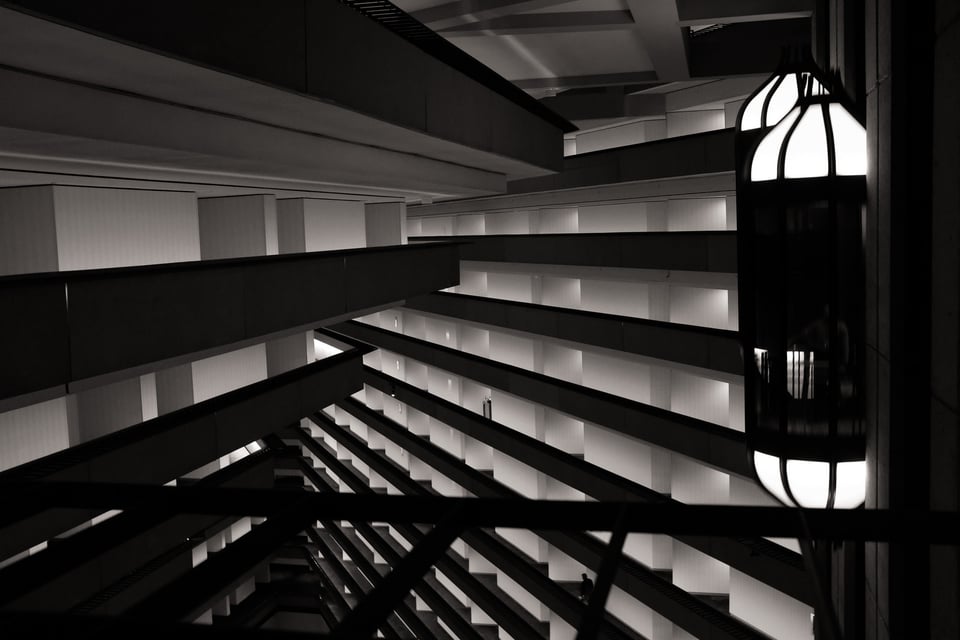
    X100F @ 23mm, ISO 3200, 1/25, f/4.5

  • #3
    Problem: My Indoor Photos Are Blurry

    The Shutter Speed of 1/20th is much too slow to photograph this active puppy (X-T3 + XF16mmF1.4 R WR @ 16mm, ISO 1600, 1/20, f/2.0)
    Blurry images, especially when photographing moving subjects (think pets and children), are common when taking pictures indoors. The reason? You simply don’t have very much light to work with! Indoor lighting is usually not nearly as bright as outdoor sunlight. Although you can use a longer shutter speed to capture back some of this light, longer shutter speeds inevitably capture more motion blur. You can see that in the image above, where I used a shutter speed of 1/20 second to capture enough light – but ended up capturing a blurry subject along the way.

    تعليق


    • #4
      Solution: Use the widest possible aperture (lower f/stop number) and then increase your ISO.

      Increasing the ISO and using a wider aperture allowed for a faster shutter speed (X-T3 + XF16mmF1.4 R WR @ 16mm, ISO 6400, 1/150, f/1.4)
      To fix motion blur, you need to use a faster shutter speed. The risk is that your photos now will be too dark, so it’s important to adjust your other two camera settings – aperture and ISO – to compensate. That’s what I did for the photo above. Start by using the widest aperture on your lens, then boost your ISO until you can use a fast enough shutter speed to get a sharp image.

      What counts as a fast enough shutter speed? It depends on how much your subject is moving. If you are photographing a moving subject – indoors or out – you usually need a shutter speed of at least 1/250th of a second. More if your subject is moving quickly, although you might get away with less if it is moving slowly.

      تعليق


      • #5
        Even if your subject is completely still, shooting handheld is enough to introduce camera shake and limit what shutter speeds you can use. (As you may have heard, the general rule is that you can shoot at “1/focal length of your lens” or faster – which we’ve discussed before.) Image stabilization can also help, and using a tripod can all but eliminate the problem of camera shake. Neither, of course, helps with subject movement. As a result, you’ll still usually need to raise your ISO and use a wider aperture when shooting indoors.

        تعليق


        • #6
          Problem: My Indoor Photographs Are Too Noisy


          Noise is another problem that often plagues indoor photographs, although it can just as easily affect any image taken in low light. Noise is the result of not capturing enough light in the first place. It becomes very visible if you need to boost your ISO or brighten the image in post-processing to get a bright enough image – things that happen all the time when taking pictures indoors.

          تعليق


          • #7
            Solution: Use the widest aperture possible and don’t underexpose your image.

            تعليق


            • #8
              The tricky part about the exposure triangle isn’t understanding how it works; it’s that each of the settings has different trade-offs. In difficult lighting situations, you can be forced into a situation where your only option is to choose the lesser of two evils.

              It is critical to make sure your shutter speed is fast enough to prevent motion, so don’t sacrifice on that setting. Instead, using a wider aperture is generally a better option – although it only works if your lens has a wider maximum aperture in the first place. Many kit lenses aren’t going to have much low-light capability and aren’t ideal for dark indoor shots. Instead, most camera manufacturers offer an inexpensive 50mm prime lens with a nice wide f/1.8 aperture that is perfect for indoor and low light photography (Canon, Nikon, Sony).

              What most photographers are left with is to increase the ISO. Depending on your camera, you may be able to increase the ISO higher without the image looking too bad. Entry-level mirrorless and DSLR cameras tend to start looking pretty noisy around ISO 1600 or so, especially on older cameras. Professional cameras with larger full-frame or medium format sensors can go higher than that before running into trouble.

              One mistake I have often seen photographers make is to underexpose their images (make them too dark) out of a fear of increasing their ISO too high. But underexposing your image and then correcting the exposure with software will almost always lead to more noise than just increasing the ISO for a proper exposure.

              Noise reduction in post processing can also help a lot. The built-in noise reduction in Adobe Lightroom is now quite good, and for the most difficult of cases I like Topaz DeNoise software.

              تعليق


              • #9
                Problem: My Indoor Photographs Are Too Dark


                The biggest challenge of indoor photography is getting enough light. While some indoor spaces are blessed with abundant natural light, most of the time photographing indoors is a constant struggle to find enough light to make a good exposure.

                تعليق


                • #10
                  Solution: Learn how to find the light and move closer to it.


                  Photography is all about light. I can’t overstate the importance of learning to see the pockets of good light in the spaces you photograph.

                  You can also modify your surroundings to make the light brighter or better in quality. Open window blinds, pull back curtains, and learn what times of day the light is most abundant throughout your indoor shooting spaces. Knowing what direction the windows face in your house – or in any space where you’re taking pictures – can clue you in to where you might find the best light at various times of day. The side of my house with east-facing windows gets the most beautiful morning light, while my north-facing living room gets nice, soft light for most of the day.

                  تعليق


                  • #11
                    Once you know where the light is, try to position your subject closer to that light source. The inverse square law of light tells us that when you halve the distance to a light source, you quadruple the intensity of the light. For example, if your subject is 12 feet from your window, move 6 feet closer and you will have four times as much light to work with. This can make a huge difference when photographing indoors.

                    تعليق


                    • #12
                      Problem: My Subject Is Dark When I Capture Them Near a Window


                      You have a great big window with abundant natural light. You position your subject right in front of the window and take the perfect picture you had in mind… but your subject is dark, and the window around them is too bright! What just happened?

                      تعليق


                      • #13
                        Solution: Position yourself so that your own back is to the light source.

                        تعليق


                        • #14
                          Whatever your light source, if you position your subject in front of it, you’re not actually lighting your subject. You are simply lighting their back – the part the camera doesn’t see.

                          Instead, you must make sure the light is falling properly on your subject in the first place, generally on their face. One easy way to do this is to stand so that your own back is to the window (or any other light source) and position your subject so that they are facing the light, preferably at a slight angle. If the light is to your back, that means it’s falling onto your subject, and you’ll end up with a much better photograph.

                          Once you have the light falling in your subject, you can experiment with the angle and direction of the light by moving yourself and your subject around to create different lighting effects. Start with the subject facing the light source, then turn them slowly to experiment with a variety of angles.

                          If one side of your subject is lit up more than the other, you may want to use a reflector to bounce light back at the unlit side of your subject. This doesn’t need to be a dedicated photographic reflector; any bright object works, like a poster board or white wall. Reflectors can also be very useful when you do need to position the subject with their back to the window, so that some light still reaches their face.

                          تعليق


                          • #15
                            Naturally, there are some exceptions. The biggest exception is if you are deliberately trying to create silhouettes or some other backlighting effect. In the image below, for example, I used a completely blown-out window to create a flat, white background for the subject.

                            تعليق

                            يعمل...