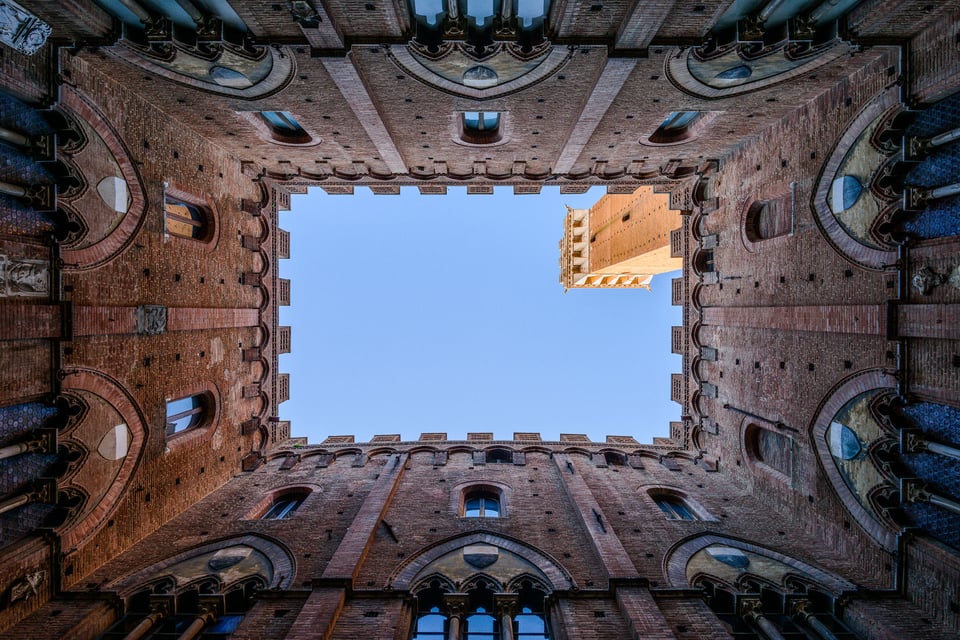
دروس التصوير المعماري Architectural Photography Tutorial

تقليص
X
 
  • تصفية - فلترة
  • الوقت
  • عرض
إلغاء تحديد الكل
مشاركات جديدة

  • دروس التصوير المعماري Architectural Photography Tutorial

    دروس التصوير المعماري
    Architectural Photography
    Tutorial


    الضوء والأشكال والخطوط والأشكال - أسس التصوير الفوتوغرافي. بغض النظر عن الأهداف التي تقوم بتصويرها، فسوف ينتهي بك الأمر إلى العمل بهذه الميزات لكل صورة تلتقطها. ومع ذلك، فإن التصوير الفوتوغرافي المعماري يأخذه إلى مستوى آخر، بخطوطه وأشكاله الهندسية المثالية التي يصعب العثور عليها في أي مكان آخر في العالم. في هذه المقالة، سأغطي كل شيء بدءًا من التصوير المعماري الداخلي وحتى "المناظر الطبيعية الحضرية" الخارجية ومناظر المدينة، بما في ذلك بعض النصائح والحيل التي أستخدمها طوال الوقت في صوري الخاصة.

    ملاحظة سريعة: نعتذر عن عدم نشر مقال في الأسبوع الماضي. لقد كنت أنا ونسيم في نيوزيلندا منذ بداية شهر ديسمبر، ولم يكن من الممكن نشر أي شيء دون اتصال موثوق بالإنترنت. قد تظل مقالاتنا متقطعة حتى نعود إلى المنزل في نهاية شهر ديسمبر، لذلك نقدر سعة صدرك. في الوقت الحالي، قمنا بنشر مقالاتنا المتراكمة من الأيام الأخيرة. نأمل أن تكون الصور التي نعيدها من هذه الرحلة تستحق العناء!

    جدول المحتويات

    معدات الكاميرا
    إعدادات الكاميرا
    العمل مع الضوء
    التخلص من الأشخاص
    الخاتمة


    Light, shapes, lines, forms — the foundations of photography. No matter what subjects you shoot, you’ll end up working with these features for every photo that you take. Architectural photography, though, takes it to another level, with its perfect geometrical lines and shapes that are hard to find anywhere else in the world. In this article, I will cover everything from indoor architectural photography to outdoor “urban landscapes” and cityscapes, including some tips and tricks that I use all the time in my own photos.

    A quick note: Apologies that we have not posted an article this past week. Nasim and I have been in New Zealand since the beginning of December, and it has not been possible to publish anything without a reliable Internet connection. Our articles may still be sporadic until we get home at the end of December, so we appreciate your patience. For now, we have published our backlogged articles from recent days. Hopefully, the photos we bring back from this trip will be worth it!


    Table of Contents

  • #2
    1) معدات الكاميرا

    بغض النظر عن الصور التي تريد التقاطها، فإن أول ما يفكر فيه الكثير من الناس هو معدات الكاميرا. بالنسبة للتصوير المعماري، يمكنك التقاط صور جيدة باستخدام أي معدات، ولكن هناك بعض المعدات التي تعمل بالتأكيد بشكل أفضل من غيرها.

    حوامل ودعم
    أولاً، أهم قطعة من المعدات التي يمكنك امتلاكها كمصور معماري هي نوع من دعم الكاميرا. ويساعدك هذا على التقاط صور جيدة الإضاءة وحادة حتى في المباني المظلمة، أو لالتقاط صور ليلية في الهواء الطلق. الحامل ثلاثي القوائم هو الخيار الأكثر وضوحًا، وهو ما أستخدمه أكثر من أي شيء آخر. ومع ذلك، فإن بعض الأماكن (خاصة الكثير من الكاتدرائيات والمتاحف) تقيد استخدام الحامل ثلاثي القوائم. لذا، عليك أن تختار شيئًا آخر من شأنه أن يعمل في مثل هذه البيئات المقيدة.

    من ناحية، ينجذب الكثير من الأشخاص نحو monopods، وهي طريقة جيدة لإضافة المزيد من الاستقرار إلى لقطاتك. ومع ذلك، لا تقف monopods ثابتة تمامًا، لذا فهي ليست الخيار المثالي في مواقف الإضاءة المنخفضة. بالمقارنة مع الإمساك باليد، فهي جيدة، لكن الحامل ثلاثي الأرجل الصلب سيسمح لك باستخدام سرعات غالق أطول بكثير. (راجع: كيفية استخدام Monopod.)

    ويفضل أشخاص آخرون استخدام حامل ثلاثي القوائم مصغر بدلاً من ذلك. في كثير من الأحيان، تكون المباني التي تقيد الحوامل ثلاثية القوائم كاملة الحجم مناسبة تمامًا للمباني الصغيرة، لأنها لا تشغل مساحة كبيرة أو تزعج الزوار الآخرين. وهذا يختلف من مكان إلى آخر، لكنه ينطبق في أغلب الأحيان. ومع ذلك، فإن الحوامل الثلاثية المصغرة تقيد وضع الكاميرا بزوايا منخفضة جدًا، إلا إذا قمت بتثبيت الحامل ثلاثي القوائم على شيء مثل الحائط أو المقعد (مما قد يؤدي إلى صور ضبابية إذا لم تكن ثابتًا تمامًا).

    وأخيرًا، فكر في شيء مثل مشبك التثبيت. هناك إصدارات متاحة من Manfrotto (تتطلب محولات إضافية، وهي كبيرة نسبيًا) وReally Right Stuff. تتيح لك هذه القطعة من المعدات توصيل الكاميرا مباشرةً بالسور والطاولات والمقاعد وما إلى ذلك - مما يتيح مرونة أكبر قليلًا من الحامل ثلاثي الأرجل المصغر. هذه مسموح بها في كل مكان تقريبًا، حيث من الواضح أنها ليست حوامل ثلاثية القوائم ولا تشغل مساحة كبيرة للحد من حركة الأشخاص الآخرين. ومع ذلك، يجب أن تكون في مكان به الأماكن المناسبة لتثبيت معداتك، وإلا فلن تتمكن من استخدامها على الإطلاق.


    1) Camera equipment


    No matter which images you want to capture, the first thing that many people consider is camera equipment. For architectural photography, you can take good photos with any equipment, but there is some gear that certainly works better than others.

    Tripods and Support
    First, the most important piece of equipment you can own as an architectural photographer is some type of camera support. This helps you take well-lit and sharp photos even in dark buildings, or for nighttime shots outdoors. A tripod is the most obvious choice, and it’s what I use more than anything else. However, some places (especially a lot of cathedrals and museums) restrict your tripod use. So, you have to pick something else that would work in such limiting environments.

    On one hand, a lot of people gravitate towards monopods, which are a good way to add some extra stability to your shots. However, monopods don’t stand completely still, so they aren’t the ideal choice in low-light situations. Compared to handholding, they’re good, but a solid tripod will let you use much longer shutter speeds. (See: How to Use a Monopod.)

    Other people prefer to use a miniature tripod instead. Often, buildings that restrict full-size tripods are perfectly fine with small ones, since they don’t take up as much space or bother other visitors. This varies from place to place, but it holds true more often than not. However, miniature tripods restrict your camera position to very low angles, unless you hold your tripod against something like a wall or bench (which may lead to blurry photos if you aren’t perfectly steady).

    Finally, consider something like a stabilizing clamp. There are versions available from Manfrotto (requires additional adapters, and is relatively large) and Really Right Stuff. This piece of equipment lets you attach your camera directly to railings, tables, benches, and so on — allowing a bit more flexibility than a miniature tripod. These are permitted almost everywhere, since they clearly aren’t tripods and they don’t take up much space to limit movement of other people. However, you need to be somewhere that has the right places to clamp your gear, or you simply won’t be able to use them at all.

    تعليق


    • #3
      العدسات
      كما هو الحال بالنسبة لكل أنواع التصوير الفوتوغرافي، تعد العدسات ذات أهمية بالغة للهندسة المعمارية ومناظر المدينة. تتيح لك العدسات واسعة الزاوية التركيز على اتساع الجزء الداخلي، وتتيح لك العدسات المقربة تكبير التفاصيل الدقيقة في المناظر الطبيعية الحضرية البعيدة.

      لا تقيد نفسك - يمكن التقاط صور معمارية جيدة بأي طول بؤري. على الرغم من أن الزوايا الواسعة أكثر شيوعًا (نظرًا لأنها تميل إلى العمل بشكل أفضل في الداخل)، إلا أنني أوصي دائمًا بحمل عدسة مقربة معك أيضًا. لقد حصلت على العديد من اللقطات المعمارية المفضلة لدي من خلال التركيز على التفاصيل الصغيرة والمثيرة للاهتمام من مسافة بعيدة.

      كاميرا نيكون D7000 + 105 مم f/2.8 @ 105 مم، ISO 1600، 1/15، f/2.8

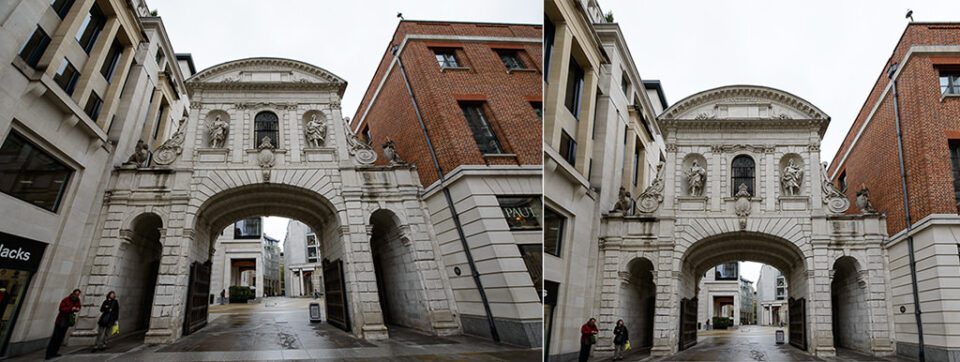
      ومع ذلك، فإن المعيار الذهبي للتصوير المعماري هو عدسة قابلة للإمالة. تتيح لك هذه العدسات إصلاح مشكلة شائعة عند تصوير الهندسة المعمارية: يبدو المبنى مائلاً إلى الخلف. يمكنك بالتأكيد تصحيح هذه المشكلة في مرحلة ما بعد المعالجة، لكنك ستفقد التفاصيل وقد لا تحصل على تصحيح مثالي. ألق نظرة على المقارنة أدناه:


      في هذه الحالة، تبدو الصورة على اليسار مائلة بشكل واضح، في حين أن الصورة على اليمين - على الرغم من أنها ليست مثالية - تبدو أكثر استقامة. تقوم عدسات الإمالة بهذا الأمر داخل الكاميرا وليس في مرحلة ما بعد الإنتاج، مما يؤدي غالبًا إلى تكوين أفضل، حيث يمكنك تصحيح التشوه على الفور.

      لسوء الحظ، عدسات الإمالة باهظة الثمن للغاية. أحدث عدسة نيكون ذات خاصية الإمالة مقاس 19 ملم يبلغ سعرها 3400 دولار! حتى التحولات المستخدمة من العلامات التجارية الكبرى يمكن أن تتراوح ما بين 1500 إلى 2000 دولار، مما يجعلها خارج الميزانية بالنسبة لمعظم المصورين.

      ولهذا السبب لا أستخدم عدسة قابلة للإمالة؛ أنا ببساطة أستخدم العدسة واسعة الزاوية التي أملكها بالفعل. على الرغم من أنني أحتاج أحيانًا إلى تصحيح منظور الصورة في مرحلة ما بعد المعالجة، إلا أن هذا يعد حلاً جيدًا بدرجة كافية في معظم المواقف.

      إذا كان لديك زاوية واسعة ومقربة، فهذا كل ما تحتاجه حقًا. يحب بعض المصورين أيضًا استخدام العدسات متوسطة المدى للقطات المعمارية؛ يعتمد الأمر ببساطة على تفضيلاتك الشخصية. بالنسبة لي، على الرغم من ذلك، فإن شيئًا مثل 16-35 مم يعمل للتصوير الفوتوغرافي الداخلي، وتعمل عدسة مقربة مثل 70-200 مم لمناظر المدينة. لا يمكنك أن تخطئ في استخدام أي مجموعة تغطي نطاقًا مماثلاً.


      Lenses
      As is true for every genre of photography, lenses are critically important for architecture and cityscapes. Wide angle lenses let you emphasize the spaciousness of an interior, and telephotos let you zoom into tiny details in distant urban landscapes.

      Don’t restrict yourself — good architectural photos can be taken at any focal length. Although wide-angles are more popular (since they tend to work better indoors), I always recommend carrying a telephoto lens with you as well. I have gotten many of my favorite architectural shots by focusing on small, interesting details in the distance.
      NIKON D7000 + 105mm f/2.8 @ 105mm, ISO 1600, 1/15, f/2.8
      The gold standard for architectural photography, however, is a tilt-shift lens. These lenses let you fix a common problem when photographing architecture: the building appears to lean backwards. You definitely can correct this issue in post-processing, but you’ll lose detail and may not get a perfect correction. Take a look at the comparison below:


      In this case, the photo on the left clearly looks tilted, while the photo on the right — although not perfect — appears much straighter. Tilt-shift lenses do this in-camera rather than in post-production, which often leads to better composition, since you can correct distortion on the spot.

      Unfortunately, tilt-shift lenses are quite expensive. Nikon’s newest 19mm tilt-shift lens is $3400! Even used tilt-shifts from the big brands can run in the $1500 to $2000 range, putting them out of budget for most photographers.

      That’s why I don’t use a tilt-shift lens; I simply use the wide-angle lens I already own. Although I sometimes need to correct a photo’s perspective in post-processing, that’s a good enough solution in most situations.

      If you have a wide-angle and a telephoto, that’s all you really need. Some photographers also like using mid-range lenses for architectural shots; it simply depends upon your personal preferences. For me, though, something like a 16-35mm works for indoor photography, and a telephoto like the 70-200mm works for cityscapes. You can’t go wrong with any kit that covers a similar range.

      تعليق


      • #4
        الكاميرات
        بالنسبة للتصوير المعماري، الكاميرا ليست ذات أهمية كبيرة. لا تحتاج إلى نظام تركيز متطور لالتقاط المشاهد الداخلية، وجميع الكاميرات الحديثة تحتوي على ما يكفي من وحدات البكسل لالتقاط الكثير من التفاصيل. كل ما لديك حاليا ينبغي أن يكون كافيا.

        هناك بعض الميزات الرائعة للتصوير المعماري. إذا كانت الكاميرا الخاصة بك تحتوي على شاشة LCD قابلة للإمالة، على سبيل المثال، فستتمكن من التقاط صور للأسقف بسهولة أكبر. الميزة اللطيفة الأخرى هي النطاق الديناميكي. إذا كان لديك كاميرا جديدة ذات نطاق ديناميكي رائع، فستتمكن من التقاط الصور دون اللجوء إلى تقنية HDR أو مزج التعريض الضوئي في المواقف الصعبة (وهو ما قد يحدث كثيرًا عندما تكون هناك نوافذ في صورتك).

        أخيرًا، إذا كنت تخطط لالتقاط الكثير من الصور المعمارية المحمولة باليد، فمن الواضح أن أداء الكاميرا في الإضاءة المنخفضة مهم (كما هو الحال مع تقليل اهتزاز العدسة). ومع ذلك، نأمل أن تتمكن من استخدام أحد أشكال دعم الكاميرا في معظم الأوقات.

        بشكل عام، كما هو مذكور أعلاه، يمكنك التقاط صور جيدة للمناظر الطبيعية باستخدام أي معدات. من المهم جدًا العثور على مباني مثيرة للاهتمام وإضاءة جيدة. استخدم أفضل المعدات بالطبع، لكن لا تثبط عزيمتك إذا فاتك عنصر أو عنصرين.


        Cameras
        For architectural photography, your camera isn’t hugely important. You don’t need a top-of-the-line focusing system to capture indoor scenes, and all modern cameras have enough pixels to capture lots of detail. Whatever you currently have should be enough.

        There are a few features that are nice for architectural photography, though. If your camera has a tilting LCD screen, for example, you’ll be able to take photos of ceilings much more easily. The other nice feature is dynamic range. If you have a new camera with great dynamic range, you’ll be able to take photos without resorting to HDR or exposure blending in difficult situations (which, when there are windows in your photo, could happen pretty often).

        Finally, if you plan to shoot a lot of handheld architectural photos, your camera’s low-light performance is obviously important (as would be your lens’s vibration reduction). Hopefully, though, you will be able to use some form of camera support most of the time.

        Overall, though — as mentioned above — you can take good landscape photos with any equipment. It’s much more important to find interesting buildings and good light. Use the best gear you can, of course, but don’t be discouraged if you’re missing an item or two.

        تعليق


        • #5
          2) إعدادات الكاميرا

          من المهم استخدام إعدادات الكاميرا المناسبة لأي نوع من أنواع التصوير الفوتوغرافي، والتصوير المعماري ليس استثناءً. في الواقع، مع كل الاختلافات الشديدة في الضوء التي قد تواجهها، يمكن القول إن التعرض المناسب هنا أكثر أهمية من المعتاد.

          المشكلة الرئيسية في التصوير المعماري هي السطوع الشديد لضوء النافذة. إذا كنت تريد الحصول على تفاصيل داخل النافذة وخارجها، فيجب عليك اللجوء إلى الاسترداد الشديد في مرحلة ما بعد المعالجة، أو في أغلب الأحيان، مزج التعريضات المتعددة معًا في واحدة.

          وبطبيعة الحال، بعض المباني أبسط من ذلك بكثير. إذا كنت لا تتعامل مع الاختلافات الشديدة في النطاق الديناميكي، فما عليك سوى كشف ما تفعله عادةً. اضبط الكاميرا على ISO الأساسي الخاص بها (بافتراض أنك على حامل ثلاثي الأرجل)، واستخدم فتحة تعطي عمق المجال المطلوب، ودع سرعة الغالق تنخفض أينما تمنحك التعرض المناسب.

          إذا كنت بحاجة إلى العمل مع تعريضات ضوئية متعددة، فستحتاج إلى وضع صورك بين قوسين. حافظ على حساسية ISO وفتحة العدسة نفسها لكل لقطة، ولكن استخدم مجموعة من سرعات الغالق المختلفة - واحدة تعرض النافذة بشكل صحيح، وواحدة تعرض الجزء الداخلي من المبنى، وأي عدد تريده بينهما (افصل بين كل صورة بمقدار 2). /3 أو نقطة كاملة من الضوء).

          أخيرًا، نداء: أكثر من أي نوع آخر من أنواع التصوير الفوتوغرافي، يسيء الناس استخدام تقنية HDR بلا حدود للصور المعمارية. إذا قمت بدمج تعريضات متعددة معًا، فحاول عدم الانتقال إلى ألوان Candy Land. أبذل قصارى جهدي دائمًا لجعل الصورة تبدو طبيعية تمامًا، حتى عندما يتم دمج التعريضات الضوئية المتعددة في صورة واحدة. (تعد ميزة HDR الجديدة في Lightroom واحدة من أفضل الميزات المتاحة إذا كنت تحاول الحفاظ على الإحساس بالواقع.)


          2) Camera settings


          It is important to use the right camera settings for any genre of photography, and architectural photography is no exception. In fact, with all the extreme variations of light that you may encounter, proper exposure here is arguably even more important than usual.

          The main problem with architectural photography is the extreme brightness of window light. If you want details both inside and outside a window, you must resort to extreme recovery in post-processing, or, more often, blending multiple exposures together into one.

          Of course, some buildings are much simpler. If you aren’t dealing with extreme differences in dynamic range, simply expose how you normally would. Set your camera to its base ISO (assuming you are on a tripod), use an aperture that gives the desired depth of field, and let your shutter speed fall wherever it gives you the proper exposure.

          If you do need to work with multiple exposures, you’ll need to bracket your photos. Keep your ISO and aperture the same for each shot, but use a range of different shutter speeds — one that exposes the window properly, one that exposes the interior of the building, and as many as you need in between (separating each photo by 2/3 or one full stop of light).

          Finally, a plea: more than any other genre of photography, people abuse HDR without limits for architectural images. If you do combine multiple exposures together, try not to cross over into Candy Land colors. I always work my hardest to make an image look completely natural, even when multiple exposures are combined into one. (Lightroom’s new HDR feature is one of the best available if you are trying to maintain a sense of reality.)

          تعليق


          • #6


            3) العمل بالضوء

            التصوير الفوتوغرافي خفيف - الأمر بهذه البساطة. عندما تلتقط صورًا معمارية، فإن أفضل طريقة للحصول على صورة جيدة هي تحقيق أقصى استفادة من الضوء في المشهد الخاص بك.

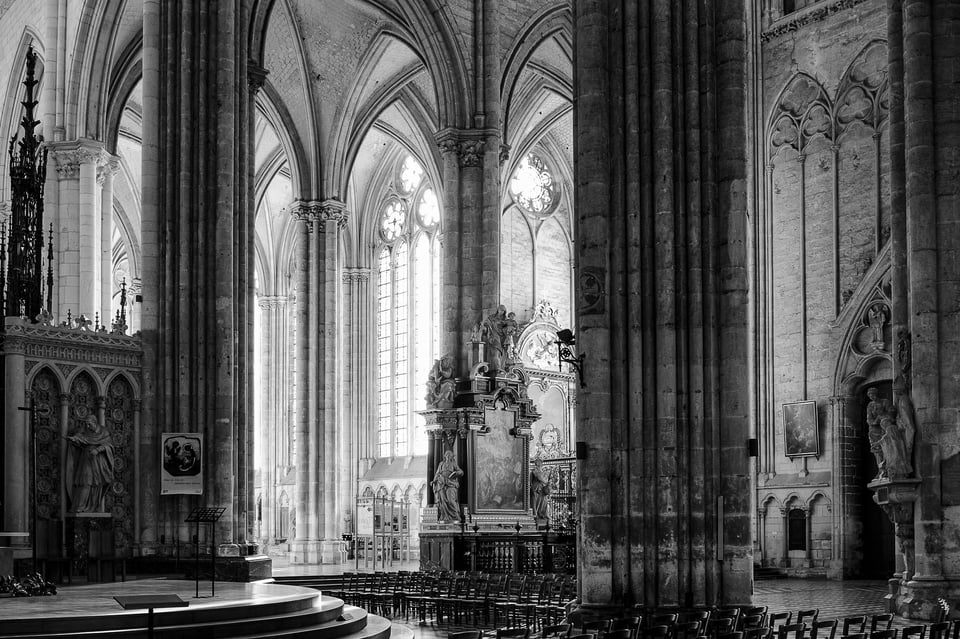
            في الداخل، هذا يعني أنه يجب عليك تصوير مشهد بالضوء الذي يكمل تصميم المبنى. في المباني الحديثة، من المحتمل أن يبذل المهندس المعماري الكثير من الجهد في شكل ومظهر الضوء، ولن تواجه أي مشاكل كبيرة. قد لا تعمل المباني القديمة بشكل جيد، ولكن، كما هو الحال دائمًا، يعتمد الأمر على المكان. على سبيل المثال، بعض من أفضل الإضاءة التي يمكن أن تجدها على الإطلاق موجودة في الكنائس والكاتدرائيات التي يعود تاريخها إلى قرون مضت والمضاءة بالكامل بواسطة النوافذ الكبيرة.

            كاميرا نيكون D7000 + 24 مم f/1.4 @ 24 مم، ISO 200، 1/80، f/2.5

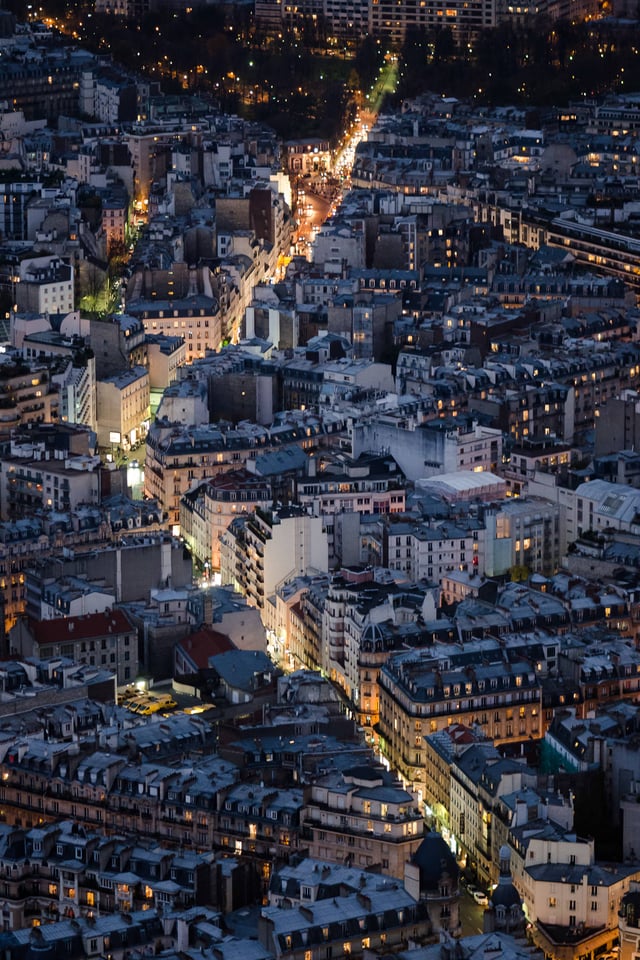
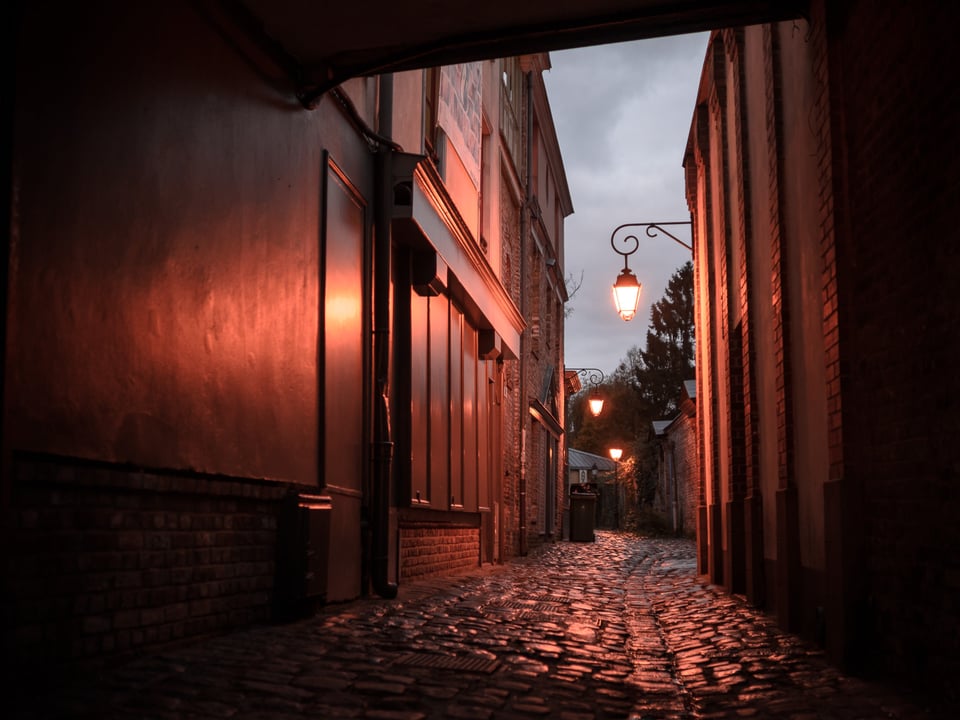
            بالنسبة للتصوير المعماري الخارجي، كل شيء يدور حول التفاعل بين الشمس وأضواء المبنى. بعد غروب الشمس، على سبيل المثال، يمكن للسماء المظلمة والأضواء البرتقالية الساطعة أن تكمل بعضها البعض بشكل جميل، مما يؤدي إلى صور رائعة. هذا هو أحد الأوقات المفضلة لالتقاط صور مناظر المدينة.

            كاميرا نيكون D7000 + 24 مم f/1.4 @ 24 مم، ISO 360، 1/50، f/1.4

            وفي أحيان أخرى، قد تقوم بتصوير مبنى لا يحتوي على أي أضواء خارجية مدمجة. في هذه الحالة، تمامًا مثل التصوير الفوتوغرافي الطبيعي للمناظر الطبيعية، فإن الشمس هي كل ما يهم. حاول تصوير المباني مثل هذه عند غروب الشمس أو شروقها، وهي الأوقات من اليوم التي يكون فيها الضوء والألوان غير عادية في السماء.

            كاميرا نيكون D800E + 20 مم f/1.8 @ 20 مم، ISO 100، 1/60، f/8.0

            أخيرًا، تذكر أن التصوير المعماري يدور حول الهندسة. حقق أقصى استفادة من الخطوط والأشكال والتماثل - هناك عدد قليل جدًا من أنواع التصوير الفوتوغرافي التي تتيح لك العمل باستخدام مثل هذه الأشكال والأنماط المثالية. في الواقع، الكثير من التصوير الفوتوغرافي المعماري ينتهي به الأمر إلى الظهور بمظهر تجريدي، وهو ما أعتقد أنه رائع. إذا وجدت تفاصيل مثيرة للاهتمام في أحد المباني، حتى لو كان من الصعب وضعها في السياق، فقد ينتهي بك الأمر إلى الحصول على بعض الصور الرائعة.


            3) Working with the light


            Photography is light — it’s as simple as that. When you’re taking architectural photos, the best way to get a good image is to make the most of the light in your scene.

            Indoors, this means that you should photograph a scene with light that complements the building’s design. In modern buildings, the architect likely put a lot of effort into the shape and appearance of the light, and you won’t have any major problems. Older buildings might not work as well, but, as always, it depends upon the place. For example, some of the best light you’ll ever find is in centuries-old churches and cathedrals lit entirely by large windows.
            NIKON D7000 + 24mm f/1.4 @ 24mm, ISO 200, 1/80, f/2.5
            For outdoor architectural photography, everything is about the interaction between the sun and the building’s own lights. After sunset, for example, the dark sky and bright orange lights can complement each other beautifully, leading to fantastic images. This is one of my favorite times to take cityscape photos.
            NIKON D7000 + 24mm f/1.4 @ 24mm, ISO 360, 1/50, f/1.4
            Other times, you may be photographing a building that doesn’t have any built-in external lights. In that case, just like normal landscape photography, the sun is all that matters. Try photographing buildings like this at sunset or sunrise — the times of day with the most unusual light and colors in the sky.
            NIKON D800E + 20mm f/1.8 @ 20mm, ISO 100, 1/60, f/8.0
            Finally, remember that architectural photography is all about geometry. Make the most of lines, shapes, and symmetry — very few genres of photography let you work with such perfect forms and patterns. In fact, a lot of architectural photography ends up looking abstract, which I think is fantastic. If you find an interesting detail in a building, even if it is difficult to put into context, you could end up with some great images.

            تعليق


            • #7
              4) التخلص من الناس

              إذا كنت تقوم بتصوير مبنى مشهور، فمن المحتمل أن ينتهي الأمر بالأشخاص في صورتك. في بعض الأحيان، لا يوجد شيء خاطئ في هذا. في الواقع، لقد رأيت العديد من الصور الرائعة التي تظهر شخصًا داخل عمل معماري كبير، مما يضع الصورة بأكملها في نطاق واسع وتوفر مركزًا للاهتمام. ومع ذلك، في أوقات أخرى، ستحتاج إلى ألا تتضمن صورك المعمارية سوى الهندسة المعمارية، وهذا صحيح أيضًا.

              إن أبسط طريقة لإزالة الأشخاص الموجودين في صورتك، على افتراض أنهم صغار نسبيًا وغير مزعجين، هي مجرد استنساخهم في Photoshop. ومع ذلك، لا يحب الجميع استخدام Photoshop لتغيير طريقة ظهور المشهد، ولا تعمل الصور الأخرى بشكل جيد مع هذا النوع من التلاعب - فقد يغطي الأشخاص الموجودون في صورتك تفاصيل مهمة لا يستطيع Photoshop استعادتها بنجاح.

              ولهذا السبب، يحب الكثير من المصورين المعماريين امتلاك مرشحات ذات كثافة محايدة. هذه المرشحات عبارة عن ألواح زجاجية داكنة، غير ملونة بأي لون، مما يجبر الكاميرا على استخدام سرعات غالق أطول من المعتاد. لا يبدو هذا حلاً رائعًا، لكنه في الواقع يعمل بشكل جيد. إذا كان مرشح الكثافة المحايدة الخاص بك يسمح لك بالتعريض لمدة 30 ثانية، فإن أي شيء يتحرك في الصورة سيبدو غير مرئي تمامًا! لذلك، سيتم طمس وجود جميع الأشخاص الموجودين في مشهدك، على افتراض أنهم لا يجلسون أو يقفون ساكنين خلال معظم فترة التعريض الضوئي.

              أخيرًا، إذا لم يكن لديك مرشح ذو كثافة محايدة، فيمكنك محاكاة تأثيراته عن طريق التقاط صور متعددة من نفس الموضع، والانتظار بضع دقائق من لقطة إلى أخرى. ثم افتح الصور الناتجة كطبقات في Photoshop. بالنسبة لكل شخص في الإطار، ما عليك سوى مسحه أو إخفاءه، وكشف الطبقات الموجودة بالأسفل (حيث، منذ التقاطه بعد بضع دقائق، ابتعد أي شخص عن الطريق).

              لا يعد أي من هذه الحلول مثاليًا، ولكن يتعين عليك القيام بشيء ما إذا كان هناك أشخاص يحظرون أجزاء مهمة من صورتك. بالنسبة للتصوير المعماري أكثر من أي نوع آخر، ستحتاج إلى وضع هذه الأدوات في الاعتبار.


              4) Getting rid of people


              If you’re photographing a popular building, chances are good that people will end up in your photo. Sometimes, there’s nothing wrong with this. In fact, I have seen several great images that feature a person inside a grand work of architecture, putting the entire image into scale and providing a center of interest. Other times, though, you’ll want your architectural photos to include nothing but architecture, and that’s also valid.

              The simplest way to remove people in your photo, assuming that they are relatively small and unobtrusive, is just to clone them out in Photoshop. However, not everyone likes using Photoshop to change the way a scene appeared, and other photos simply don’t work well for this type of manipulation — the people in your photo may cover important details that Photoshop cannot successfully bring back.

              For that reason, a lot of architectural photographers like to own neutral density filters. These filters are simply dark sheets of glass, not tinted any color, that force your camera to use longer shutter speeds than normal. This doesn’t sound like a great solution, but it actually works quite well. If your neutral density filter lets you take a 30 second exposure, anything moving in the image will appear completely invisible! So, all the people in your scene will be blurred our of existence, assuming that they don’t sit or stand still during most of the exposure.

              Finally, if you don’t have a neutral-density filter, you can simulate its effects by taking multiple photos from the same position, waiting a few minutes from shot to shot. Then, open the resulting images as layers in Photoshop. For every person in the frame, simply erase or mask them out, revealing the layers below (where, since they were taken a few minutes later, any people have moved out of the way).

              None of these solutions is perfect, but you need to do something if there are people blocking important parts of your photo. For architectural photography more than any other genre, you’ll want to keep these tools in mind.

              تعليق


              • #8

                5. الخلاصة

                يعد التصوير الفوتوغرافي المعماري قدرًا هائلاً من المرح، وهو شيء ستتمكن من ممارسته في كل مدينة تزورها تقريبًا. إذا كنت تعيش في مدينة، ففكر في التقاط بعض الصور المعمارية للمباني القريبة - إنها طريقة رائعة للحفاظ على عينك الفوتوغرافية في الممارسة العملية.

                يعمل التصوير المعماري بشكل أفضل إذا كنت مهتمًا بالأساسيات: الخطوط والأنماط والضوء. إنه أيضًا نوع رائع إذا كنت تستمتع بالتصوير التجريدي، نظرًا لأن العديد من المباني مزخرفة بطرق تبدو غير عادية جدًا عند إخراجها من سياقها.

                مع كل هذه الإيجابيات، فلا عجب أن يحظى التصوير المعماري بشعبية كبيرة. نأمل أن تساعدك النصائح الواردة في هذه المقالة على تحقيق أقصى استفادة من جلسة التصوير القادمة.


                5) Conclusion


                Architectural photography is a tremendous amount of fun, and it’s something you will be able to practice in nearly every city that you visit. If you live in a city, consider taking some architectural photos of nearby buildings — it’s a great way to keep your photographic eye in practice.

                Architectural photography works best if you are interested in the basics: lines, patterns, and light. It’s also a fantastic genre if you enjoy abstract photography, since many buildings are patterned in ways that seem very unusual when taken out of context.

                With all these positives, it’s no wonder that architectural photography is so popular. Hopefully, the tips in this article will help you make the most of your next shoot.

                تعليق

                يعمل...
                X