١٣ نصيحة لتصوير الحياة البرية للمبتدئين13 Wildlife Photography Tips for Beginners

تقليص
X
 
  • تصفية - فلترة
  • الوقت
  • عرض
إلغاء تحديد الكل
مشاركات جديدة

  • ١٣ نصيحة لتصوير الحياة البرية للمبتدئين13 Wildlife Photography Tips for Beginners

    13 Wildlife Photography Tips for Beginners

    These are some of the most important things to know when you're starting wildlife photography!


    One of the great challenges of wildlife photography is that there are so many things to consider in such a short amount of time. Even if you do everything right, the uncontrollable stuff can still stop you from getting “the shot.” However, there are some basic tips that are easy to remember and will bring your wildlife photography to the next level. In this article, I’ll share thirteen of my favorite wildlife photography tips that I use again and again.
    13 نصيحة لتصوير الحياة البرية للمبتدئين

    هذه بعض أهم الأشياء التي يجب عليك معرفتها عند بدء تصوير الحياة البرية!


    ​

    أحد التحديات الكبيرة في تصوير الحياة البرية هو أن هناك الكثير من الأشياء التي يجب مراعاتها في مثل هذا الوقت القصير. حتى لو فعلت كل شيء بشكل صحيح، فإن الأشياء التي لا يمكن السيطرة عليها يمكن أن تمنعك من الحصول على "اللقطة". ومع ذلك، هناك بعض النصائح الأساسية التي يسهل تذكرها والتي ستنقل تصوير الحياة البرية إلى المستوى التالي. في هذه المقالة، سأشارك ثلاثة عشر نصيحة من نصائحي المفضلة لتصوير الحياة البرية والتي أستخدمها مرارًا وتكرارًا.

  • #3
    جدول المحتويات

    لا تقم بالتصوير في شمس منتصف النهار القاسية قم بترقية عدستك قبل الكاميرا الخاصة بك جرب مواقع جديدة التقط الصور على مستوى العين راقب سرعة الغالق الخاص بك قم بتقييم إمكانيات الخلفية باستمرار جرب أطوالًا بؤرية مختلفة جرب موضوعات مختلفة جرب أنواعًا مختلفة من التصوير الفوتوغرافي تعرف على متى تستخدم تعويض التعريض الضوئي التقط صورًا خامًا حاول دمج سلوك مثير للاهتمام التقط صورًا أقل استنتاج

    تعليق


    • #4
      1. Don’t Shoot in Harsh, Direct Midday Sun


      If I could only keep one rule on this list, it would be this one: Don’t shoot wildlife directly illuminated by the unobstructed, midday sun. It is almost impossible to get a good shot under conditions like that. You’ll usually end up with harsh shadows on your subject and no catchlights in their eyes. Harsh lighting also often gives a reduction in apparent sharpness due to glowing effects from feathers and fur.

      And it’s not just the subject. Backgrounds in such light will often have harsh, specular highlights, stealing attention away from your subject (as in the shot below). When I’m editing my pictures, I rate my photos from 0 to 5 stars, and midday sun shots almost always get 0 stars!
      Harsh light can lead to unwanted shadows on your subject and highlights in the background. Nikon D500 + 500PF @ 500mm, ISO 640, 1/500, f/5.6Much better light! No harsh sunlight here. NIKON D500 + 300mm f/2.8 @ 300mm, ISO 2000, 1/1000, f/6.3
      Can you ever shoot when the sun is high? If there are clouds softening the sun, or you are deep in a forest, you can sometimes do something during these difficult times of day. And the harsh look occasionally works for very specific subjects. But as a rule, probably more than 95% of my good shots are taken a few hours after sunrise or a few hours before sunset – generally when the sun is not more than 30 degrees in the sky.

      تعليق


      • #5
        1. لا تلتقط الصور في شمس منتصف النهار القاسية والمباشرة

        إذا كان بإمكاني الاحتفاظ بقاعدة واحدة فقط في هذه القائمة، فستكون هذه القاعدة: لا تقم بتصوير الحياة البرية المضاءة مباشرة بشمس منتصف النهار دون عائق. يكاد يكون من المستحيل الحصول على تسديدة جيدة في ظل ظروف كهذه. سينتهي بك الأمر عادةً بظلال قاسية على موضوعك وعدم وجود أضواء كاشفة في أعينهم. غالبًا ما تؤدي الإضاءة القاسية أيضًا إلى تقليل الحدة الظاهرة بسبب تأثيرات التوهج الناتجة عن الريش والفراء.

        وهذا ليس الموضوع فقط. غالبًا ما تحتوي الخلفيات في مثل هذا الضوء على إضاءات قاسية ومرآة، مما يسرق الانتباه بعيدًا عن موضوعك (كما في اللقطة أدناه). عندما أقوم بتحرير صوري، أقوم بتقييم صوري من 0 إلى 5 نجوم، ودائمًا ما تحصل لقطات الشمس في منتصف النهار على 0 نجوم!

        يمكن أن يؤدي الضوء القاسي إلى ظهور ظلال غير مرغوب فيها على موضوعك وإبرازات في الخلفية. كاميرا Nikon D500 + 500PF @ 500 مم، ISO 640، 1/500، f/5.6 إضاءة أفضل بكثير! لا يوجد ضوء الشمس القاسي هنا. نيكون D500 + 300 مم f/2.8 @ 300 مم، ISO 2000، 1/1000، f/6.3

        هل يمكنك إطلاق النار عندما تكون الشمس مرتفعة؟ إذا كانت هناك غيوم تلطف أشعة الشمس، أو كنت في أعماق الغابة، فيمكنك أحيانًا القيام بشيء ما خلال هذه الأوقات الصعبة من اليوم. والمظهر القاسي يعمل أحيانًا في موضوعات محددة جدًا. ولكن كقاعدة عامة، ربما يتم التقاط أكثر من 95% من اللقطات الجيدة بعد ساعات قليلة من شروق الشمس أو قبل بضع ساعات من غروب الشمس - بشكل عام عندما لا تزيد درجة حرارة الشمس عن 30 درجة في السماء.

        تعليق


        • #6

          2. Upgrade Your Lens Before Your Camera


          Most of the time, a better lens will go farther than a better body. For example, if your maximum focal length is 300mm, getting a lens that goes to 500mm will be so much more beneficial than upgrading to the latest and greatest body.

          As a general rule, a good time to upgrade your lens is if you find yourself cropping a lot or boosting ISO values too high. A new camera may offer you a few more pixels to crop or slightly better high ISO performance, but the improvement you’ll get from a better lens is far more significant. The difference between, say, f/5.6 and f/2.8 can be night and day. Likewise for the difference between something like 200mm and 500mm.
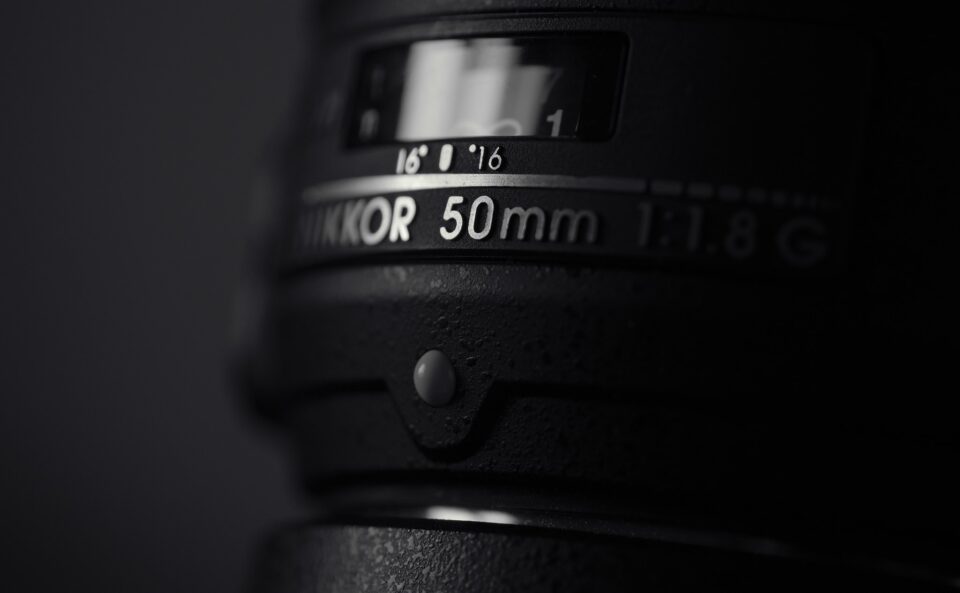
          If this is your wildlife lens (a 50mm f/1.8), you might want to upgrade

          تعليق


          • #7
            2. قم بترقية العدسة الخاصة بك قبل الكاميرا

            في معظم الأحيان، العدسة الأفضل ستذهب إلى أبعد من الجسم الأفضل. على سبيل المثال، إذا كان الحد الأقصى للبعد البؤري لديك هو 300 مم، فإن الحصول على عدسة يصل طولها إلى 500 مم سيكون أكثر فائدة بكثير من الترقية إلى أحدث وأكبر هيكل.

            كقاعدة عامة، الوقت المناسب لترقية عدستك هو إذا وجدت نفسك تقوم بقص الكثير من الصور أو رفع قيم ISO بدرجة عالية جدًا. قد توفر لك الكاميرا الجديدة عددًا قليلًا من وحدات البكسل الإضافية للاقتصاص أو أداء ISO عاليًا أفضل قليلاً، ولكن التحسين الذي ستحصل عليه من عدسة أفضل يعد أكثر أهمية بكثير. يمكن أن يكون الفرق بين f/5.6 وf/2.8 مثلاً ليلاً ونهاراً. وبالمثل بالنسبة للفرق بين شيء مثل 200 مم و 500 مم.

            إذا كانت هذه هي عدسة الحياة البرية الخاصة بك (50 مم f/1.8)، فقد ترغب في الترقية

            تعليق


            • #8
              3. Try New Locations


              A can think of dozens of beautiful places that are pretty bad for wildlife photography. Sometimes it’s because the animals have favorite spots that are too far away, and sometimes it’s because there are too many distracting background elements.

              Often, animals are easier to see in edge habitats: those are the places in which two different habitats meet, like a river in a forest, or a grassy plain next to a lake. For birders, I highly recommend eBird.org, which will allow you to browse hotspots. Although these hotspots are more for finding birds rather than finding photo spots, I’ve found a lot of great places for photography this way.

              I recently looked at eBird’s complete list of birds from most to least photographed, and it was interesting to see that some supposedly “common” birds are rarely photographed if they only reside outside the United States. So, if you live or travel outside the US, it might be worth taking an especially close look at resources like this one.
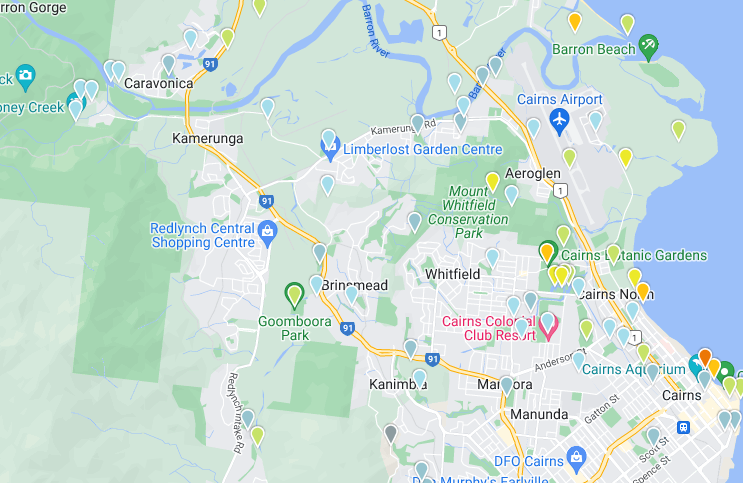
              eBird’s hotspot maps can show you new places to go for bird photography
              So, if your photos aren’t coming out the way you expect, don’t immediately think you need to upgrade your camera gear. Finding a new spot can get you much better shots for a lot less expense than buying a new camera.

              And even though eBird is the one I’ve used the most, there are similar sites and forums to help you search for other wildlife subjects. For example, there are people who track recent bear and wolf sightings in various National Parks and post them online. All you need to know is the type of wildlife you want to photograph, and you’ll probably find good, new locations to photograph them if you look carefully!

              تعليق


              • #9
                3. جرب مواقع جديدة

                يمكن للمرء أن يفكر في العشرات من الأماكن الجميلة التي تعتبر سيئة للغاية بالنسبة لتصوير الحياة البرية. في بعض الأحيان يكون السبب في ذلك هو أن الحيوانات لديها مواقع مفضلة بعيدة جدًا، وفي بعض الأحيان يكون ذلك بسبب وجود عدد كبير جدًا من عناصر الخلفية المشتتة للانتباه.

                في كثير من الأحيان، يكون من الأسهل رؤية الحيوانات في الموائل الحافة: تلك هي الأماكن التي يلتقي فيها بيئتان مختلفتان، مثل نهر في غابة، أو سهل عشبي بجوار بحيرة. بالنسبة إلى مراقبي الطيور، أوصي بشدة بـ eBird.org، الذي سيسمح لك بتصفح نقاط الاتصال. على الرغم من أن هذه النقاط الساخنة مخصصة للعثور على الطيور أكثر من العثور على أماكن لالتقاط الصور، فقد وجدت الكثير من الأماكن الرائعة للتصوير الفوتوغرافي بهذه الطريقة.

                لقد ألقيت مؤخرًا نظرة على قائمة eBird الكاملة للطيور من الأكثر إلى الأقل تصويرًا، وكان من المثير للاهتمام أن نرى أن بعض الطيور التي يُفترض أنها "شائعة" نادرًا ما يتم تصويرها إذا كانت تعيش خارج الولايات المتحدة فقط. لذا، إذا كنت تعيش أو تسافر خارج الولايات المتحدة، فقد يكون من المفيد إلقاء نظرة فاحصة على موارد مثل هذا.

                يمكن لخرائط النقاط الساخنة الخاصة بـ eBird أن تعرض لك أماكن جديدة يمكنك الذهاب إليها لتصوير الطيور

                لذا، إذا لم تظهر صورك بالطريقة التي تتوقعها، فلا تعتقد على الفور أنك بحاجة إلى ترقية معدات الكاميرا الخاصة بك. إن العثور على مكان جديد يمكن أن يمنحك لقطات أفضل بكثير وبتكلفة أقل بكثير من شراء كاميرا جديدة.

                وعلى الرغم من أن موقع eBird هو أكثر موقع استخدمته، إلا أن هناك مواقع ومنتديات مماثلة لمساعدتك في البحث عن موضوعات أخرى للحياة البرية. على سبيل المثال، هناك أشخاص يتتبعون مشاهدات الدببة والذئاب الأخيرة في العديد من المتنزهات الوطنية وينشرونها عبر الإنترنت. كل ما تحتاج إلى معرفته هو نوع الحياة البرية التي تريد تصويرها، وربما ستجد مواقع جيدة وجديدة لتصويرها إذا نظرت بعناية!

                تعليق


                • #10

                  4. Shoot at Eye Level


                  Shooting at or close to eye level will improve most shots by an order of magnitude. This does two things: It gives a much better perspective on the animal, and it gives you a more distant background (and hence more subject isolation).
                  Nikon D500 + 500PF @ 500mm, ISO 280, 1/1000, f/5.6
                  For subjects close to the ground, this usually means getting close to the ground yourself. I am constantly sitting and kneeling to get eye-level shots. Cameras with a rear tilting screen have a huge advantage here, since you can place the camera low – such as on a short tripod – and just tilt out your screen to compose.

                  تعليق


                  • #11
                    4. التصوير على مستوى العين

                    سيؤدي التصوير على مستوى العين أو بالقرب منه إلى تحسين معظم اللقطات بترتيب من حيث الحجم. يؤدي هذا إلى شيئين: يعطي منظورًا أفضل بكثير للحيوان، ويمنحك خلفية أكثر بعدًا (وبالتالي مزيدًا من عزلة الموضوع).

                    نيكون D500 + 500PF عند 500 مم، ISO 280، 1/1000، f/5.6

                    بالنسبة للأهداف القريبة من الأرض، فهذا يعني عادةً الاقتراب من الأرض بنفسك. أنا أجلس وأركع باستمرار للحصول على لقطات على مستوى العين. تتمتع الكاميرات ذات الشاشة القابلة للإمالة الخلفية بميزة كبيرة هنا، حيث يمكنك وضع الكاميرا في مكان منخفض - على حامل ثلاثي القوائم قصير مثلاً - وما عليك سوى إمالة الشاشة للخارج لتكوين الصورة.

                    تعليق


                    • #12

                      5. Watch Your Shutter Speed


                      Light is so precious in wildlife photography, and usually there’s not enough of it! That’s why it’s crucial to use as long of a shutter speed as possible, while still avoiding motion blur and camera shake. The longer your shutter speed, the more light you’ll get on your sensor, and the result is better image quality.

                      Although you would certainly avoid blur on a perched bird at, say, 1/1000 of a second, you simply don’t need such a fast shutter speed. Birds also frequently pause to observe their surroundings, and in those moments, you can use longer shutter speeds without issue. By “longer,” I mean in the range of 1/400 second, 1/200 second, or sometimes more – even with long focal lengths like 500mm.
                      Nikon Z6 + 500PF @ 500mm, ISO 1100, 1/125 second, f/5.6
                      Furthermore, if your subject is standing around like this, it’s fine if you miss a shot or two. The ones that are sharp will have enough image quality to make up for it easily. Above, I easily could have ended up shooting at ISO 4000-5000 if I had followed the usual reciprocal rule of “1/focal length.”

                      On the other hand, don’t use too long a shutter speed for moving animals. For action like flying birds, I prefer to stick to 1/2000 of a second or faster – although for slowly soaring birds like raptors, longer shutter speeds can work. There is much more to say about this topic, and I highly recommend Libor’s excellent guide on birds in flight for more.
                      5. راقب سرعة الغالق لديك

                      يعد الضوء ثمينًا جدًا في تصوير الحياة البرية، وعادةً لا يكون هناك ما يكفي منه! ولهذا السبب من المهم استخدام أكبر سرعة ممكنة للغالق، مع تجنب ضبابية الحركة واهتزاز الكاميرا. كلما زادت سرعة الغالق، زاد الضوء الذي تحصل عليه على المستشعر الخاص بك، والنتيجة هي جودة صورة أفضل.

                      على الرغم من أنك ستتجنب بالتأكيد الضبابية على طائر جاثم عند 1/1000 من الثانية، على سبيل المثال، إلا أنك ببساطة لا تحتاج إلى مثل هذه سرعة الغالق السريعة. تتوقف الطيور أيضًا في كثير من الأحيان لمراقبة المناطق المحيطة بها، وفي تلك اللحظات، يمكنك استخدام سرعات غالق أطول دون مشكلة. عندما أقول "أطول"، أعني في نطاق 1/400 ثانية، أو 1/200 ثانية، أو في بعض الأحيان أكثر - حتى مع الأطوال البؤرية الطويلة مثل 500 مم.

                      نيكون Z6 + 500PF عند 500 مم، ISO 1100، 1/125 ثانية، f/5.6

                      علاوة على ذلك، إذا كان هدفك واقفًا بهذا الشكل، فلا بأس إذا فاتتك لقطة أو اثنتين. ستتمتع العناصر الحادة بجودة صورة كافية للتعويض عنها بسهولة. أعلاه، كان من الممكن أن ينتهي بي الأمر بالتصوير بمعدل ISO 4000-5000 إذا كنت قد اتبعت القاعدة المتبادلة المعتادة وهي "1/الطول البؤري".

                      ومن ناحية أخرى، لا تستخدم سرعة غالق طويلة جدًا لتحريك الحيوانات. بالنسبة لحركة مثل الطيور الطائرة، أفضل الالتزام بمعدل 1/2000 من الثانية أو أسرع - على الرغم من أنه بالنسبة للطيور التي تحلق ببطء مثل الطيور الجارحة، يمكن أن تعمل سرعات الغالق الأطول. هناك الكثير مما يمكن قوله حول هذا الموضوع، وأنا أوصي بشدة بدليل Libor الممتاز عن الطيور أثناء الطيران لمزيد من المعلومات.

                      تعليق


                      • #13

                        6. Constantly Evaluate Your Background Possibilities


                        When I get to a location, I know there are various places where a bird could land. Therefore, I check the likely branches with my eye and through the lens to see where the best spots are. By knowing this information before any bird lands anywhere, I can just ignore the areas that will produce problems.

                        If you practice this, it will become automatic. In your head, you should be saying “Yeah, this spot on the right is great. But, if a bird landed on the left, forget it.” Of course, if it’s a rare species or one you don’t have, you can take a picture anyway, but you’ll also know to pay extra careful attention to the most photogenic spots.

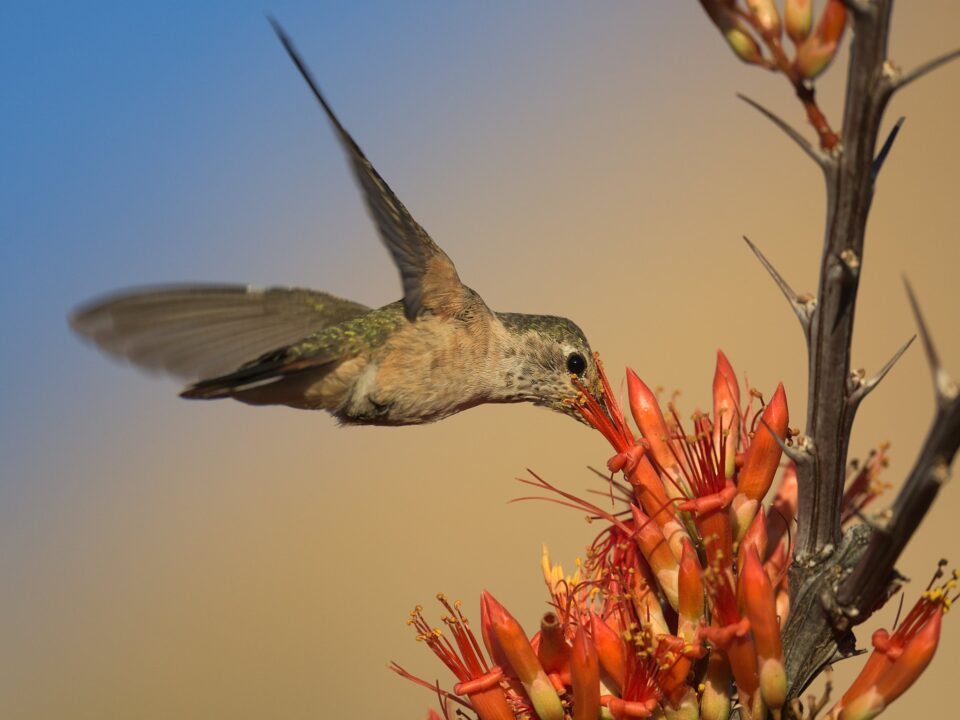
                        Sometimes I also like to include a bit of variation and texture in my background, like the Chiricahua Mountains that are behind this hummingbird:
                        Nikon D500 + 500PF @ 500mm, ISO 320, 1/2000, f/5.6

                        تعليق


                        • #14
                          6. قم بتقييم إمكانيات الخلفية الخاصة بك باستمرار

                          عندما أصل إلى موقع ما، أعلم أن هناك أماكن مختلفة يمكن أن يهبط فيها الطائر. لذلك، أتحقق من الفروع المحتملة بعيني ومن خلال العدسة لمعرفة أفضل المواقع. ومن خلال معرفة هذه المعلومات قبل أن يهبط أي طائر في أي مكان، يمكنني فقط تجاهل المناطق التي قد تسبب مشاكل.

                          إذا مارست هذا، فسوف يصبح تلقائياً. يجب أن تقول في رأسك "نعم، هذا المكان الموجود على اليمين رائع. ولكن إذا هبط طائر على اليسار، فانساه." بالطبع، إذا كان هذا النوع نادرًا أو ليس لديك، فيمكنك التقاط صورة على أي حال، ولكنك ستعرف أيضًا أن تولي اهتمامًا إضافيًا للمواقع الأكثر جاذبية.

                          أحيانًا أرغب أيضًا في تضمين القليل من التنوع والملمس في خلفيتي، مثل جبال تشيريكاهوا التي تقع خلف هذا الطائر الطنان:

                          نيكون D500 + 500PF عند 500 مم، ISO 320، 1/2000، f/5.6

                          تعليق


                          • #15
                            7. Try Different Focal Lengths


                            Long focal lengths like 500mm, 600mm, or even 800mm dominate wildlife photography because the most popular wildlife subject is birds. However, shorter focal lengths can also be used for wildlife.

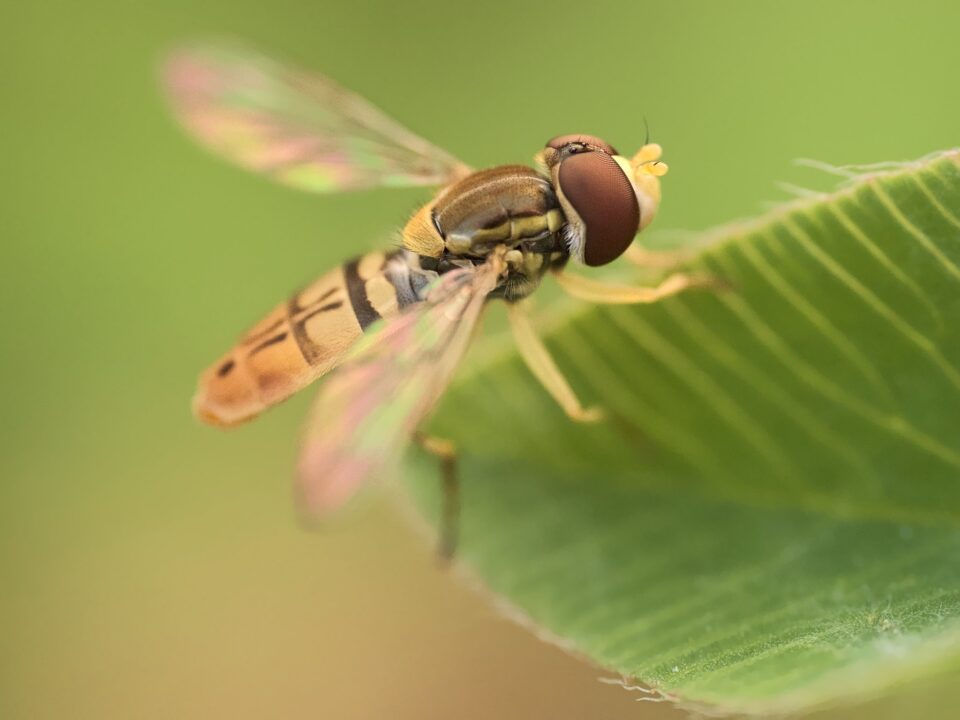
                            A popular example is the macro lens, which typically ranges between 60mm and 150mm, although there are some specialty macro focal lengths outside this range. Regardless, a macro lens opens up possibilities to photograph much smaller wildlife.
                            Panasonic G9 + Laowa 2X Macro @ 50mm, ISO 640, 1/200, f/3.5
                            There is also an entire world of possibilities using wide-angle or normal lenses to photograph wildlife. These focal lengths can show more of an animal’s environment in context and make for unusual shots. Sometimes, you may need to use creative techniques like a remote camera if you need to get this close to your subject without scaring it away.

                            Besides offering new ways of looking at the world, different focal lengths can also give you a mental break from your usual style of photography, giving you a new spark of creativity.

                            تعليق

                            يعمل...
                            X