A Simple Way to Improve Your Black and White Prints on Any Printer
The secret to a good black-and-white print is controlling the dynamic range. The dynamic range is the range of tones, from the blackest black to the whitest white in an image. In a black and white photograph, you want to make full use of the entire dynamic range. The problem is that, when printing, the printer usually hits the limitations of its dynamic range long before our eye (and camera, and monitor) stops differentiating detail. As the printer lays down ink to create your black tones, there will be a point at which you can no longer differentiate the detail in those blacks anymore. The same is true with white – every printer has a point where white simply becomes “paper white” and you can no longer see any ink at all. And if that’s not bad enough, this “black point” and “white point” will be different for every printer/paper combination!
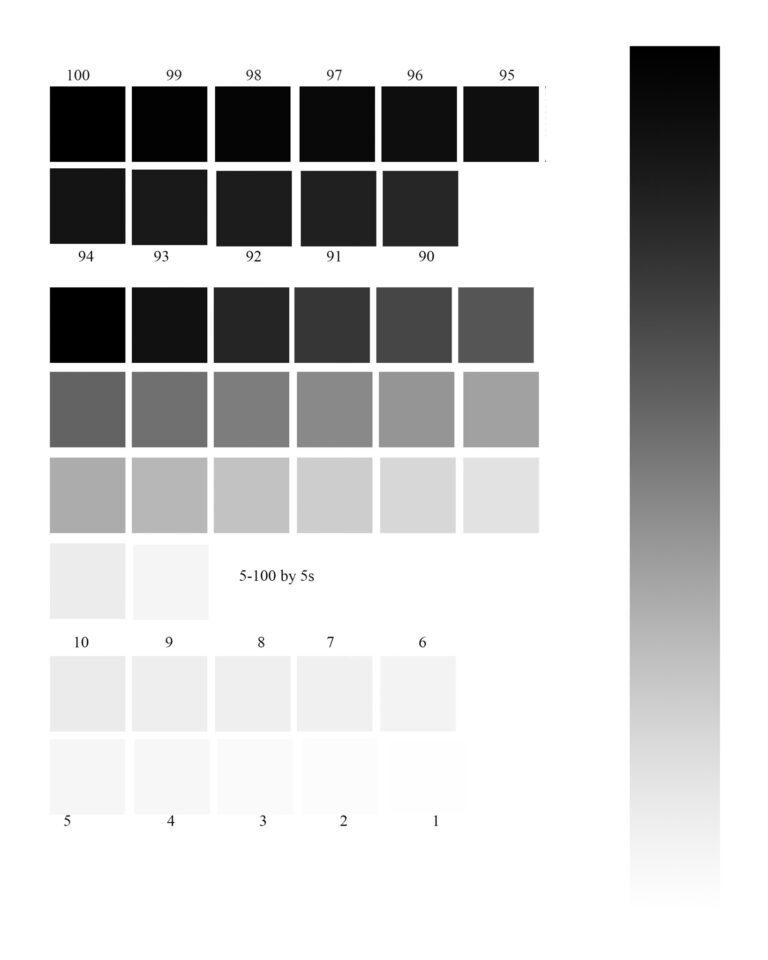
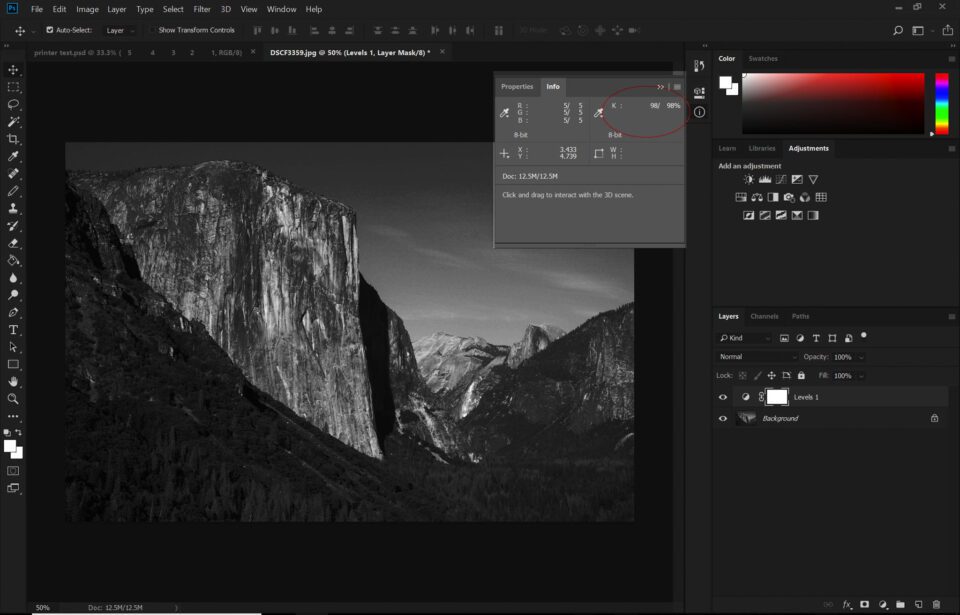
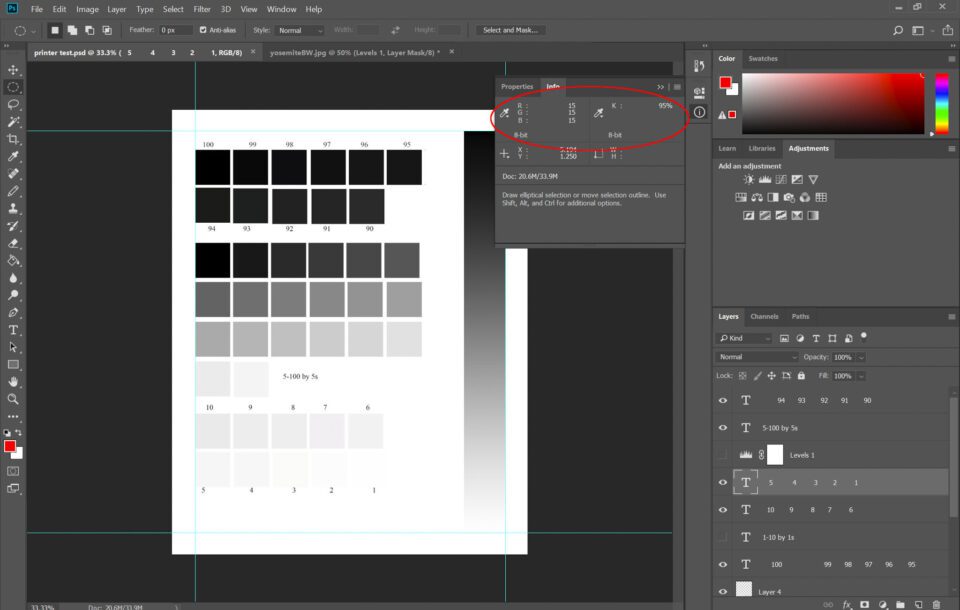
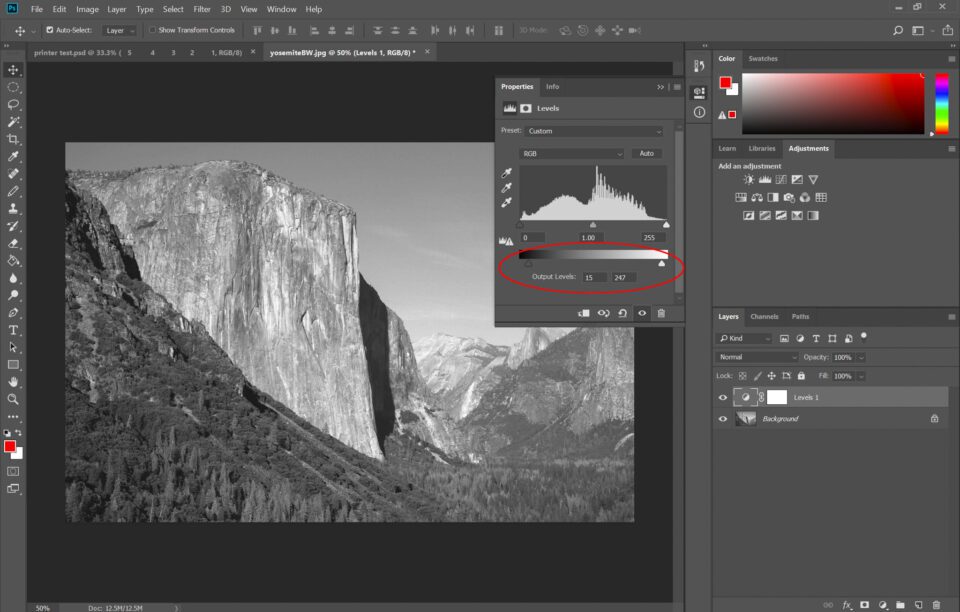
Fortunately, there is a simple solution to this problem. By using a simple black and white test chart, you can see how your particular printer and paper handle the white and black areas of your pint and you can edit your picture to maximize the available dynamic range of your printer:
طريقة بسيطة لتحسين مطبوعاتك بالأبيض والأسود على أي طابعة
يكمن سر الطباعة الجيدة بالأبيض والأسود في التحكم في النطاق الديناميكي. النطاق الديناميكي هو نطاق درجات الألوان، من اللون الأسود الأكثر سوادًا إلى اللون الأبيض الأكثر بياضًا في الصورة. في الصورة بالأبيض والأسود، تريد الاستفادة الكاملة من النطاق الديناميكي بأكمله. المشكلة هي أنه عند الطباعة، عادةً ما تصل الطابعة إلى حدود نطاقها الديناميكي قبل وقت طويل من توقف أعيننا (والكاميرا والشاشة) عن التمييز بين التفاصيل. عندما تضع الطابعة الحبر لإنشاء درجات اللون الأسود، ستكون هناك نقطة لن تتمكن عندها من التمييز بين التفاصيل في تلك الألوان السوداء بعد الآن. وينطبق الشيء نفسه على اللون الأبيض - كل طابعة لديها نقطة يصبح فيها اللون الأبيض ببساطة "ورقة بيضاء" ولا يمكنك رؤية أي حبر على الإطلاق. وإذا لم يكن هذا سيئًا بما فيه الكفاية، فإن هذه "النقطة السوداء" و"النقطة البيضاء" ستكون مختلفة لكل مجموعة طابعة/ورق!
ولحسن الحظ، هناك حل بسيط لهذه المشكلة. باستخدام مخطط اختبار بسيط بالأبيض والأسود، يمكنك معرفة كيفية تعامل الطابعة والورق الخاصين بك مع المناطق البيضاء والسوداء في نصف لتر الخاص بك ويمكنك تحرير صورتك لزيادة النطاق الديناميكي المتاح لطابعتك إلى الحد الأقصى:
The secret to a good black-and-white print is controlling the dynamic range. The dynamic range is the range of tones, from the blackest black to the whitest white in an image. In a black and white photograph, you want to make full use of the entire dynamic range. The problem is that, when printing, the printer usually hits the limitations of its dynamic range long before our eye (and camera, and monitor) stops differentiating detail. As the printer lays down ink to create your black tones, there will be a point at which you can no longer differentiate the detail in those blacks anymore. The same is true with white – every printer has a point where white simply becomes “paper white” and you can no longer see any ink at all. And if that’s not bad enough, this “black point” and “white point” will be different for every printer/paper combination!
Fortunately, there is a simple solution to this problem. By using a simple black and white test chart, you can see how your particular printer and paper handle the white and black areas of your pint and you can edit your picture to maximize the available dynamic range of your printer:

طريقة بسيطة لتحسين مطبوعاتك بالأبيض والأسود على أي طابعة
يكمن سر الطباعة الجيدة بالأبيض والأسود في التحكم في النطاق الديناميكي. النطاق الديناميكي هو نطاق درجات الألوان، من اللون الأسود الأكثر سوادًا إلى اللون الأبيض الأكثر بياضًا في الصورة. في الصورة بالأبيض والأسود، تريد الاستفادة الكاملة من النطاق الديناميكي بأكمله. المشكلة هي أنه عند الطباعة، عادةً ما تصل الطابعة إلى حدود نطاقها الديناميكي قبل وقت طويل من توقف أعيننا (والكاميرا والشاشة) عن التمييز بين التفاصيل. عندما تضع الطابعة الحبر لإنشاء درجات اللون الأسود، ستكون هناك نقطة لن تتمكن عندها من التمييز بين التفاصيل في تلك الألوان السوداء بعد الآن. وينطبق الشيء نفسه على اللون الأبيض - كل طابعة لديها نقطة يصبح فيها اللون الأبيض ببساطة "ورقة بيضاء" ولا يمكنك رؤية أي حبر على الإطلاق. وإذا لم يكن هذا سيئًا بما فيه الكفاية، فإن هذه "النقطة السوداء" و"النقطة البيضاء" ستكون مختلفة لكل مجموعة طابعة/ورق!
ولحسن الحظ، هناك حل بسيط لهذه المشكلة. باستخدام مخطط اختبار بسيط بالأبيض والأسود، يمكنك معرفة كيفية تعامل الطابعة والورق الخاصين بك مع المناطق البيضاء والسوداء في نصف لتر الخاص بك ويمكنك تحرير صورتك لزيادة النطاق الديناميكي المتاح لطابعتك إلى الحد الأقصى:




تعليق