كيفية الحصول على صورة واضحة How to Get Sharp Photos

تقليص
X
 
  • تصفية - فلترة
  • الوقت
  • عرض
إلغاء تحديد الكل
مشاركات جديدة

  • كيفية الحصول على صورة واضحة How to Get Sharp Photos

    How to Get Sharp Photos

    Every photographer wants to take sharper pictures. Here's how to capture insane detail in every shot, start to finish.

    اضغط على الصورة لعرض أكبر.   الإسم:	1697737336082.jpg  مشاهدات:	0  الحجم:	37.9 كيلوبايت  الهوية:	171995

    One of the things that makes photography frustrating is softness and blur in pictures. Sharp photos are much more appealing than soft images. It is very disappointing when you take a picture of a special moment and images come out soft/blurry or out of focus. So, in this article, I will go through the techniques I use to make sure that my images always come out tack sharp.

    Let’s start with the reasons why an image might come out blurry:
    1. A long shutter speed can capture camera shake, which would produce a blurry image
    2. Your subject could be moving and causing motion blur, made worse by a long shutter speed
    3. Poor focus acquisition would result in a soft image
    4. You might have a bad lens or a lens that is not capable of producing sharp photos
    5. Your ISO could be set to a very high number, resulting in lots of noise and loss of detail

    In order to resolve these issues, you need to address them all at the same time, which will help achieve optimal sharpness. There are a few other causes of blurry photos, too, which I will cover below.
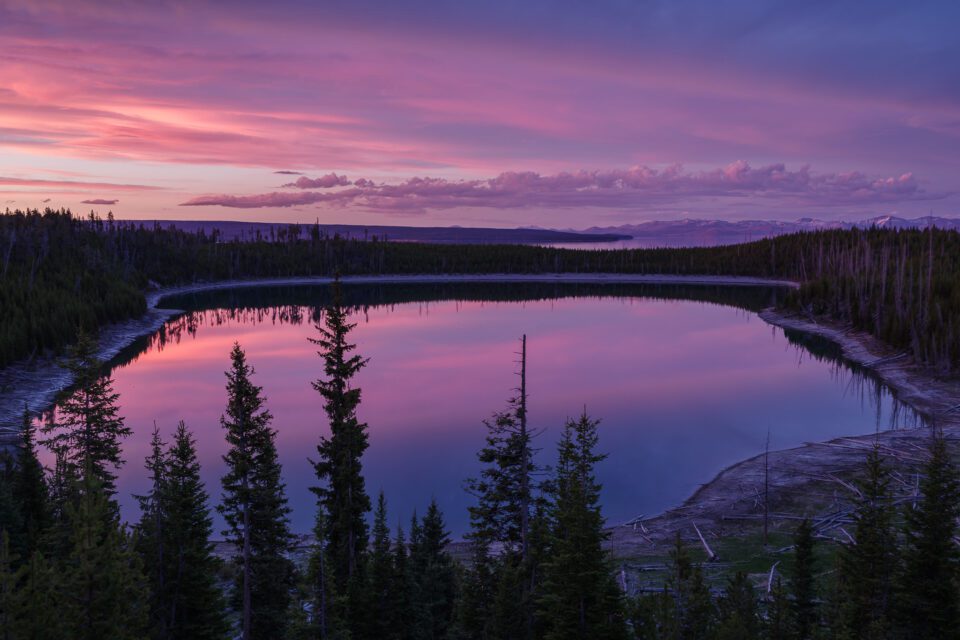
    Sunset at a Lake in Yellowstone
    التعديل الأخير تم بواسطة غدير معروف; الساعة 10-19-2023, 08:50 PM.

  • #2
    كيفية الحصول على صور واضحة

    يريد كل مصور التقاط صور أكثر وضوحًا. وإليك كيفية التقاط التفاصيل المجنونة في كل لقطة، من البداية إلى النهاية.

    اضغط على الصورة لعرض أكبر. 

الإسم:	1697737336082.jpg 
مشاهدات:	30 
الحجم:	37.9 كيلوبايت 
الهوية:	171997

    من الأشياء التي تجعل التصوير الفوتوغرافي محبطًا هو النعومة والضبابية في الصور. الصور الحادة أكثر جاذبية من الصور الناعمة. إنه أمر مخيب للآمال للغاية عندما تلتقط صورة للحظة خاصة وتظهر الصور ناعمة/ضبابية أو خارج نطاق التركيز. لذا، في هذه المقالة، سأستعرض التقنيات التي أستخدمها للتأكد من أن صوري تظهر دائمًا بشكل واضح.

    لنبدأ بالأسباب التي قد تجعل الصورة تبدو ضبابية: يمكن أن تؤدي سرعة الغالق الطويلة إلى التقاط اهتزاز الكاميرا، مما قد ينتج عنه صورة ضبابية. قد يكون هدفك متحركًا ويسبب ضبابية الحركة، ويزداد الأمر سوءًا بسبب سرعة الغالق الطويلة، وقد يؤدي ضعف الحصول على التركيز البؤري إلى تشويش الصورة. صورة ناعمة قد تكون لديك عدسة سيئة أو عدسة غير قادرة على إنتاج صور واضحة، وقد يتم ضبط iso الخاص بك على رقم مرتفع جدًا، مما يؤدي إلى الكثير من التشويش وفقدان التفاصيل
    من أجل حل هذه المشكلات، تحتاج إلى معالجتها جميعًا في نفس الوقت، مما سيساعد في تحقيق الوضوح الأمثل. هناك بعض الأسباب الأخرى للصور الباهتة أيضًا، والتي سأغطيها أدناه.
    اضغط على الصورة لعرض أكبر. 

الإسم:	1697737385614.jpg 
مشاهدات:	30 
الحجم:	129.5 كيلوبايت 
الهوية:	171998
    ​غروب الشمس في بحيرة في يلوستون

    تعليق


    • #4
      جدول المحتويات

      اضبط حساسية iso الصحيحة، استخدم قاعدة الإمساك باليد،
      اختر وضع الكاميرا الخاص بك بحكمة، اختر سرعة غالق سريعة بما فيه الكفاية، استخدم حساسية iso عالية في البيئات المظلمة،
      قم بتمكين حساسية iso التلقائية، أمسك الكاميرا،
      ركز التركيز بحذر على هدفك،
      قلل من ضبابية الحركة في هدفك،
      قم بتشغيل تقليل الاهتزاز،
      استخدم سرعة أكبر العدسات: استخدم عمق المجال بشكل استراتيجي،
      اختر فتحة حادة لتنظيف عدساتك! استخدم حاملًا ثلاثي القوائم في الإضاءة المنخفضة وقم بالتقاط مجموعة من الصور

      تعليق


      • #5

        1. Set the Right ISO


        Start with setting your camera to the lowest ISO “base” value (in my Nikon camera it is ISO 200). Remember that the camera base ISO will produce the highest quality images with maximum sharpness. The higher the ISO (sensor sensitivity), the more noise you will see in the image. I suggest reading my article on understanding ISO.

        تعليق


        • #6
          1. قم بتعيين ISO الصحيح

          ابدأ بضبط الكاميرا على أدنى قيمة "أساسية" لـ ISO (في كاميرا Nikon الخاصة بي هي ISO 200). تذكر أن قاعدة الكاميرا ISO ستنتج صورًا بأعلى جودة وبأقصى قدر من الوضوح. كلما زادت حساسية ISO (حساسية المستشعر)، زادت الضوضاء التي ستشاهدها في الصورة. أقترح قراءة مقالتي حول فهم ISO.

          تعليق


          • #7
            2. Use the Hand-Holding Rule


            If you have a zoom lens that goes beyond 100mm, I would recommend applying the general hand-holding “rule”, which states that the shutter speed should be equivalent to the focal length set on the lens, or faster. For example, if you have your lens zoomed at 125mm, your shutter speed should be at least 1/125 of a second.

            Keep in mind that this rule applied to 35mm film and digital cameras, so if you own an entry-level DSLR or mirrorless camera with a crop factor (not full frame), you need to do the math accordingly. For Nikon cameras with a 1.5x crop factor, just multiply the result by 1.5, whereas for Canon cameras, multiply by 1.6. If you have a zoom lens such as the 18-135mm (for Nikon DX sensors), set the “Minimum Shutter Speed” to the longest focal range of the lens (135mm), which is 1/200 of a second. Here are some examples:
            • 50mm on Nikon DX (D3500/D5600/D7500): 1/75 (50mm x 1.5)
            • 100mm on Nikon DX (D3500/D5600/D7500): 1/150 (100mm x 1.5)
            • 150mm on Nikon DX (D3500/D5600/D7500): 1/225 (150mm x 1.5)
            • 200mm on Nikon DX (D3500/D5600/D7500): 1/300 (200mm x 1.5)
            • 300mm on Nikon DX (D3500/D5600/D7500): 1/450 (300mm x 1.5)

            Remember that this only affects blur from camera shake. If you are taking pictures of a fast moving subject, you very well may need a quicker shutter speed than this in order to get a sharp picture.
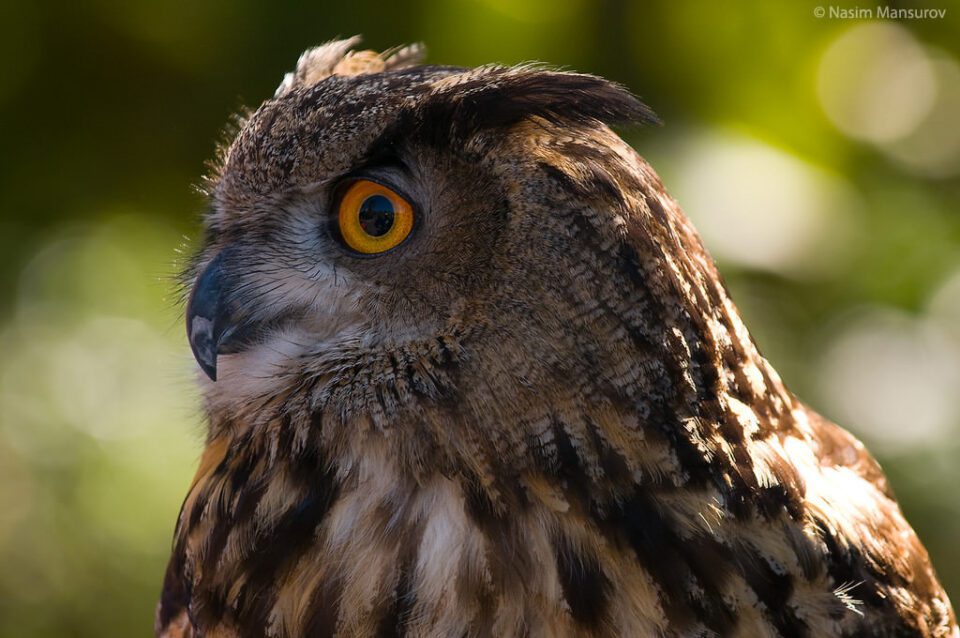
            NIKON D300 @ 280mm, ISO 200, 1/1600, f/4.0
            تعليق


            • #8
              2. استخدم قاعدة إمساك اليد

              إذا كان لديك عدسة تكبير تتجاوز 100 مم، فإنني أوصي بتطبيق "قاعدة" الإمساك باليد العامة، والتي تنص على أن سرعة الغالق يجب أن تكون معادلة للبعد البؤري المحدد على العدسة، أو أسرع. على سبيل المثال، إذا قمت بتكبير العدسة بمقدار 125 ملم، فيجب أن تكون سرعة الغالق 1/125 من الثانية على الأقل.

              ضع في اعتبارك أن هذه القاعدة تنطبق على الكاميرات الرقمية والأفلام مقاس 35 مم، لذلك إذا كنت تمتلك كاميرا DSLR للمبتدئين أو كاميرا بدون مرآة مع عامل الاقتصاص (وليس الإطار الكامل)، فستحتاج إلى إجراء الحسابات وفقًا لذلك. بالنسبة لكاميرات Nikon ذات عامل الاقتصاص 1.5x، ما عليك سوى ضرب النتيجة في 1.5، بينما بالنسبة لكاميرات Canon، اضرب النتيجة في 1.6. إذا كان لديك عدسة تكبير مثل 18-135 مم (لمستشعرات Nikon DX)، فاضبط "الحد الأدنى لسرعة الغالق" على أطول نطاق بؤري للعدسة (135 مم)، وهو 1/200 من الثانية. وهنا بعض الأمثلة:

              50 ملم على نيكون DX (D3500/D5600/D7500): 1/75 (50 ملم × 1.5) 100 ملم على نيكون DX (D3500/D5600/D7500): 1/150 (100 ملم × 1.5) 150 ملم على نيكون DX (D3500/D5600/D7500) ): 1/225 (150 مم × 1.5) 200 مم على نيكون DX (D3500/D5600/D7500): 1/300 (200 مم × 1.5)300 مم على نيكون DX (D3500/D5600/D7500): 1/450 (300 مم × 1.5)

              تذكر أن هذا يؤثر فقط على التعتيم الناتج عن اهتزاز الكاميرا. إذا كنت تلتقط صورًا لهدف يتحرك بسرعة، فقد تحتاج إلى سرعة غالق أسرع من هذه للحصول على صورة واضحة.

              اضغط على الصورة لعرض أكبر. 

الإسم:	1697739272836.jpg 
مشاهدات:	14 
الحجم:	50.9 كيلوبايت 
الهوية:	172005

              كاميرا نيكون D300 عند 280 مم، ISO 200، 1/1600، f/4.0

              تعليق


              • #9

                4. Pick a Fast Enough Shutter Speed


                After you set your camera to aperture priority and pick the right metering mode, point it at the subject that you want to photograph and half-press the shutter. Doing so should show you the shutter speed on the bottom of the viewfinder.
                • If the shutter speed is showing 1/100 or faster, you should be good to go, unless anything in your photo is moving quickly (or if you’re using a long telephoto lens; remember the hand-holding rule). Snap an image or two and see if you are getting any blur in your image. I typically review my images on the back of the camera at 100% and make sure that nothing is blurry. If anything in your photo is blurry – the entire image, or just one fast-moving subject – use a quicker shutter speed like 1/200 or 1/500 second.
                • On the other hand, if the shutter speed is below 1/100, it might mean you simply do not have enough light. If you are indoors, opening up windows to let some light in or turning the lights on will help to increase your shutter speed. It is still possible to capture sharp photos faster than 1/100 second handheld, but it becomes increasingly more difficult the longer your shutter speed is

                تعليق


                • #10
                  4. اختر سرعة غالق سريعة بما فيه الكفاية

                  بعد ضبط الكاميرا على أولوية فتحة العدسة واختيار وضع القياس الصحيح، قم بتوجيهها نحو الهدف الذي تريد تصويره ثم اضغط نصف ضغطة على الغالق. من المفترض أن يُظهر لك القيام بذلك سرعة الغالق في الجزء السفلي من عدسة الكاميرا.

                  إذا كانت سرعة الغالق تظهر 1/100 أو أسرع، فيجب أن تكون جاهزًا للمضي قدمًا، إلا إذا كان أي شيء في صورتك يتحرك بسرعة (أو إذا كنت تستخدم عدسة مقربة طويلة، فتذكر قاعدة الإمساك باليد). التقط صورة أو اثنتين ولاحظ ما إذا كان هناك أي ضبابية في صورتك. عادةً ما أقوم بمراجعة الصور الموجودة على الجزء الخلفي من الكاميرا بنسبة 100% وأتأكد من عدم وجود أي شيء ضبابي. إذا كان أي شيء في صورتك ضبابيًا - الصورة بأكملها، أو مجرد هدف واحد سريع الحركة - فاستخدم سرعة غالق أسرع مثل 1/200 أو 1/500 ثانية. ومن ناحية أخرى، إذا كانت سرعة الغالق أقل من 1/100، قد يعني ذلك أنك ببساطة لا تملك ما يكفي من الضوء. إذا كنت في الداخل، فإن فتح النوافذ للسماح بدخول بعض الضوء أو تشغيل الأضواء سيساعد على زيادة سرعة الغالق. لا يزال من الممكن التقاط صور واضحة بشكل أسرع من 1/100 ثانية، لكن الأمر يصبح أكثر صعوبة كلما زادت سرعة الغالق لديك.

                  تعليق


                  • #11
                    5. Use High ISO in Dark Environments


                    If you are still getting blurry images, try to hold the camera steady without shaking it too much and take another picture. If that doesn’t help, set a fast enough shutter speed to capture sharp photos, and raise your ISO instead. You can do this via Auto ISO (described in the next section) or manually increasing ISO. In dark environments, it is not unusual to use quite a high ISO in order to get a fast enough shutter speed. Although this adds more noise/grain to a photo, that is usually better than capturing a blurry image.
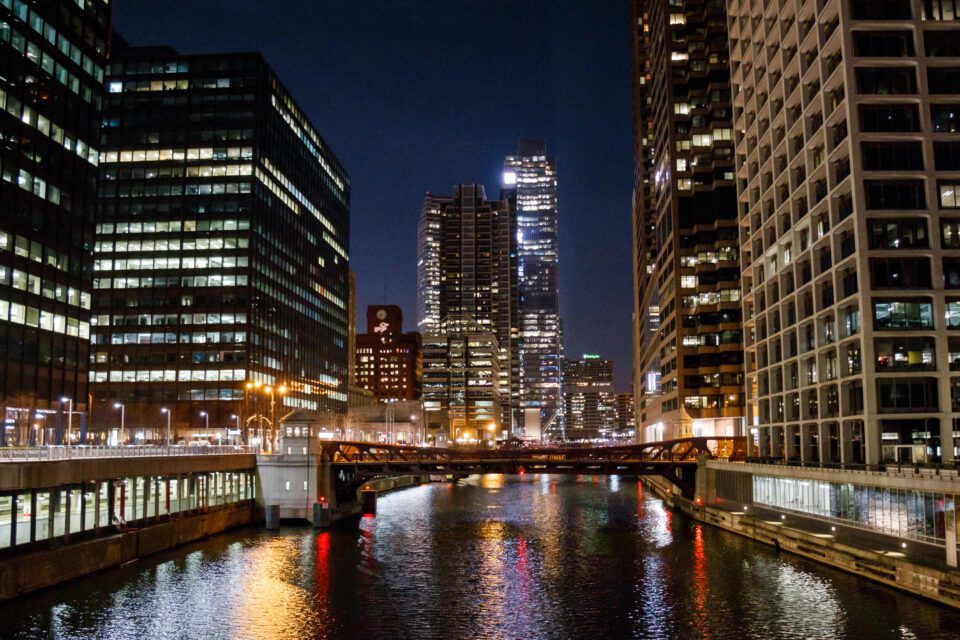
                    Canon EOS Rebel T7i + EF-S18-55mm f/4-5.6 IS STM @ 18mm, ISO 1600, 1/10, f/4.0

                    تعليق


                    • #12
                      5. استخدم ISO عاليًا في البيئات المظلمة

                      إذا كنت لا تزال تحصل على صور ضبابية، فحاول تثبيت الكاميرا دون اهتزازها كثيرًا والتقط صورة أخرى. إذا لم يساعد ذلك، فاضبط سرعة غالق سريعة بما يكفي لالتقاط صور واضحة، وارفع ISO بدلاً من ذلك. يمكنك القيام بذلك عبر Auto ISO (الموصوف في القسم التالي) أو زيادة ISO يدويًا. في البيئات المظلمة، ليس من غير المعتاد استخدام ISO عالي جدًا للحصول على سرعة غالق سريعة بما فيه الكفاية. على الرغم من أن هذا يضيف مزيدًا من الضوضاء/التحبب إلى الصورة، إلا أن ذلك عادة ما يكون أفضل من التقاط صورة ضبابية.

                      اضغط على الصورة لعرض أكبر. 

الإسم:	1697742488095.jpg 
مشاهدات:	14 
الحجم:	225.3 كيلوبايت 
الهوية:	172018
                      كاميرا Canon EOS Rebel T7i + EF-S18-55mm f/4-5.6 IS STM @ 18 مم، ISO 1600، 1/10، f/4.0

                      تعليق


                      • #13

                        6. Enable Auto ISO


                        Many cameras today have an “Auto ISO” feature that is very useful for capturing sharp pictures. So, set it to “On.” Set your Maximum Sensitivity to ISO 1600.

                        If you have the option to select a minimum shutter speed, set it to “Auto” as well, which automatically applies the hand-holding rule! If you don’t have this option, set “Minimum shutter speed” to 1/100 second.

                        This is a useful feature because, if the amount of light entering the lens decreases and the shutter speed goes below 1/100 of a second, the camera automatically increases ISO to keep the shutter speed above 1/100 of a second, or above the hand-holding rule.

                        If you have shaky hands, I would recommend bumping up the “Minimum shutter speed” to something like 1/200-1/250. Or if you have the “Auto” minimum shutter speed option, prioritize it toward “faster” just to be on the safe side. Also see our separate article on how to hand-hold a camera as stable as possible.

                        Some cameras don’t have an Auto ISO feature. In that case, you will have to adjust ISO manually to do the same thing. Just raise your ISO in darker environments to keep your shutter speed at a reasonable level. I don’t recommend raising the ISO above ISO 1600 or perhaps ISO 3200. Why not? Quite simply, anything higher than that in an entry-level DSLRs produces too much noise, which has a negative impact on overall image quality. On older-generation DSLRs such as Nikon D90/D200/D3000/D5000, you might want to keep the maximum ISO to 800

                        تعليق


                        • #14
                          6. تمكين ISO التلقائي

                          تتمتع العديد من الكاميرات اليوم بميزة "Auto ISO" المفيدة جدًا لالتقاط صور واضحة. لذلك، اضبطه على "تشغيل". اضبط الحد الأقصى للحساسية على ISO 1600.

                          إذا كان لديك خيار تحديد الحد الأدنى لسرعة الغالق، فاضبطه على "تلقائي" أيضًا، والذي يطبق تلقائيًا قاعدة إمساك اليد! إذا لم يكن لديك هذا الخيار، فاضبط "الحد الأدنى لسرعة الغالق" على 1/100 ثانية.

                          تعد هذه ميزة مفيدة لأنه إذا انخفضت كمية الضوء الداخل إلى العدسة وانخفضت سرعة الغالق إلى أقل من 1/100 من الثانية، تقوم الكاميرا تلقائيًا بزيادة حساسية ISO للحفاظ على سرعة الغالق أعلى من 1/100 من الثانية، أو أعلى من سرعة الغالق. قاعدة إمساك اليد.

                          إذا كانت يداك مرتعشتين، فإنني أنصحك بزيادة "الحد الأدنى لسرعة الغالق" إلى ما يشبه 1/200-1/250. أو إذا كان لديك خيار الحد الأدنى لسرعة الغالق "تلقائي"، فامنحه الأولوية نحو "أسرع" فقط لتكون في الجانب الآمن. راجع أيضًا مقالتنا المنفصلة حول كيفية حمل الكاميرا بثبات قدر الإمكان.

                          لا تحتوي بعض الكاميرات على ميزة Auto ISO. في هذه الحالة، سيتعين عليك ضبط ISO يدويًا للقيام بنفس الشيء. ما عليك سوى رفع مستوى ISO الخاص بك في البيئات المظلمة للحفاظ على سرعة الغالق عند مستوى معقول. لا أنصح برفع ISO فوق ISO 1600 أو ربما ISO 3200. لماذا لا؟ بكل بساطة، أي شيء أعلى من ذلك في كاميرات DSLR للمبتدئين ينتج عنه الكثير من الضوضاء، مما له تأثير سلبي على جودة الصورة الإجمالية. في كاميرات DSLR من الجيل الأقدم مثل Nikon D90/D200/D3000/D5000، قد ترغب في الحفاظ على الحد الأقصى لحساسية ISO عند 800

                          تعليق


                          • #15

                            7. Hold Your Camera Steady


                            While hand-holding your camera, there is a direct correlation between the camera shutter speed and blurry images. The longer the shutter speed (especially below 1/100 of a second), the higher the chance for blurrier images. Why? Because while hand-holding a camera, factors such as your stance, breathing, camera hand-holding technique all play a huge role in stabilizing the camera and producing shake-free images.

                            Think of it as holding a rifle on your hand. You wouldn’t want to move around while trying to shoot – you need to stand as steady and stable as possible, pull the stock tightly into the shoulder, exhale, and then shoot. The same technique works great for your photography, especially when you have to deal with slow shutter speeds.

                            I recommend holding the camera just like you would hold a rifle (except your right hand goes on the shutter instead of the trigger), with one of your legs on the front and your body balance spread across both legs. I personally exhale when I shoot long shutter speeds handheld, like 1/10 second, and it does help me to get sharper images. Try it and see how it works for you. The difference between shooting a camera versus a rifle, is that you can at least adjust the shutter speed to a higher number and avoid camera shake, whereas you cannot do the same on a gun.
                            NIKON D300 @ 200mm, ISO 200, 1/250, f/5.0

                            تعليق

                            يعمل...
                            X