التصوير الفوتوغرافي عن قربClose-up Photography

تقليص
X
 
  • تصفية - فلترة
  • الوقت
  • عرض
إلغاء تحديد الكل
مشاركات جديدة

  • التصوير الفوتوغرافي عن قربClose-up Photography

    Close-up Photography with the Nikon Z MC 105mm f/2.8 VR S

    التصوير الفوتوغرافي عن قرب باستخدام كاميرا Nikon Z MC مقاس 105 مم f/2.8 VR S


    في هذه المقالة، سأشارك تجربتي في استخدام عدسة Nikon Z MC مقاس 105 مم f/2.8 VR S في الميدان. لقد حاولت التصوير الفوتوغرافي عن قرب عدة مرات، لكنني وجدت دائمًا تعقيد هذا النوع الفني أمرًا هائلاً. ومع ذلك، مع ظهور التكنولوجيا غير المرآة وهذه العدسة المذهلة، كان حظي أفضل في العام الماضي أو نحو ذلك. تركز مقالة اليوم على هذه العدسة، عدسة نيكون عديمة المرآة بشكل عام، وعملية التقاط صور قريبة حادة بسهولة أكبر.


    In this article, I will share my experience using the Nikon Z MC 105mm f/2.8 VR S lens in the field. I have attempted close-up photography multiple times, but I always found the complexity of this technical genre overwhelming. However, with the emergence of mirrorless technology and this amazing lens, I have had better luck in the last year or so. Today’s article focuses on this lens, Nikon mirrorless in general, and my process to capture sharp close-up photos more easily.
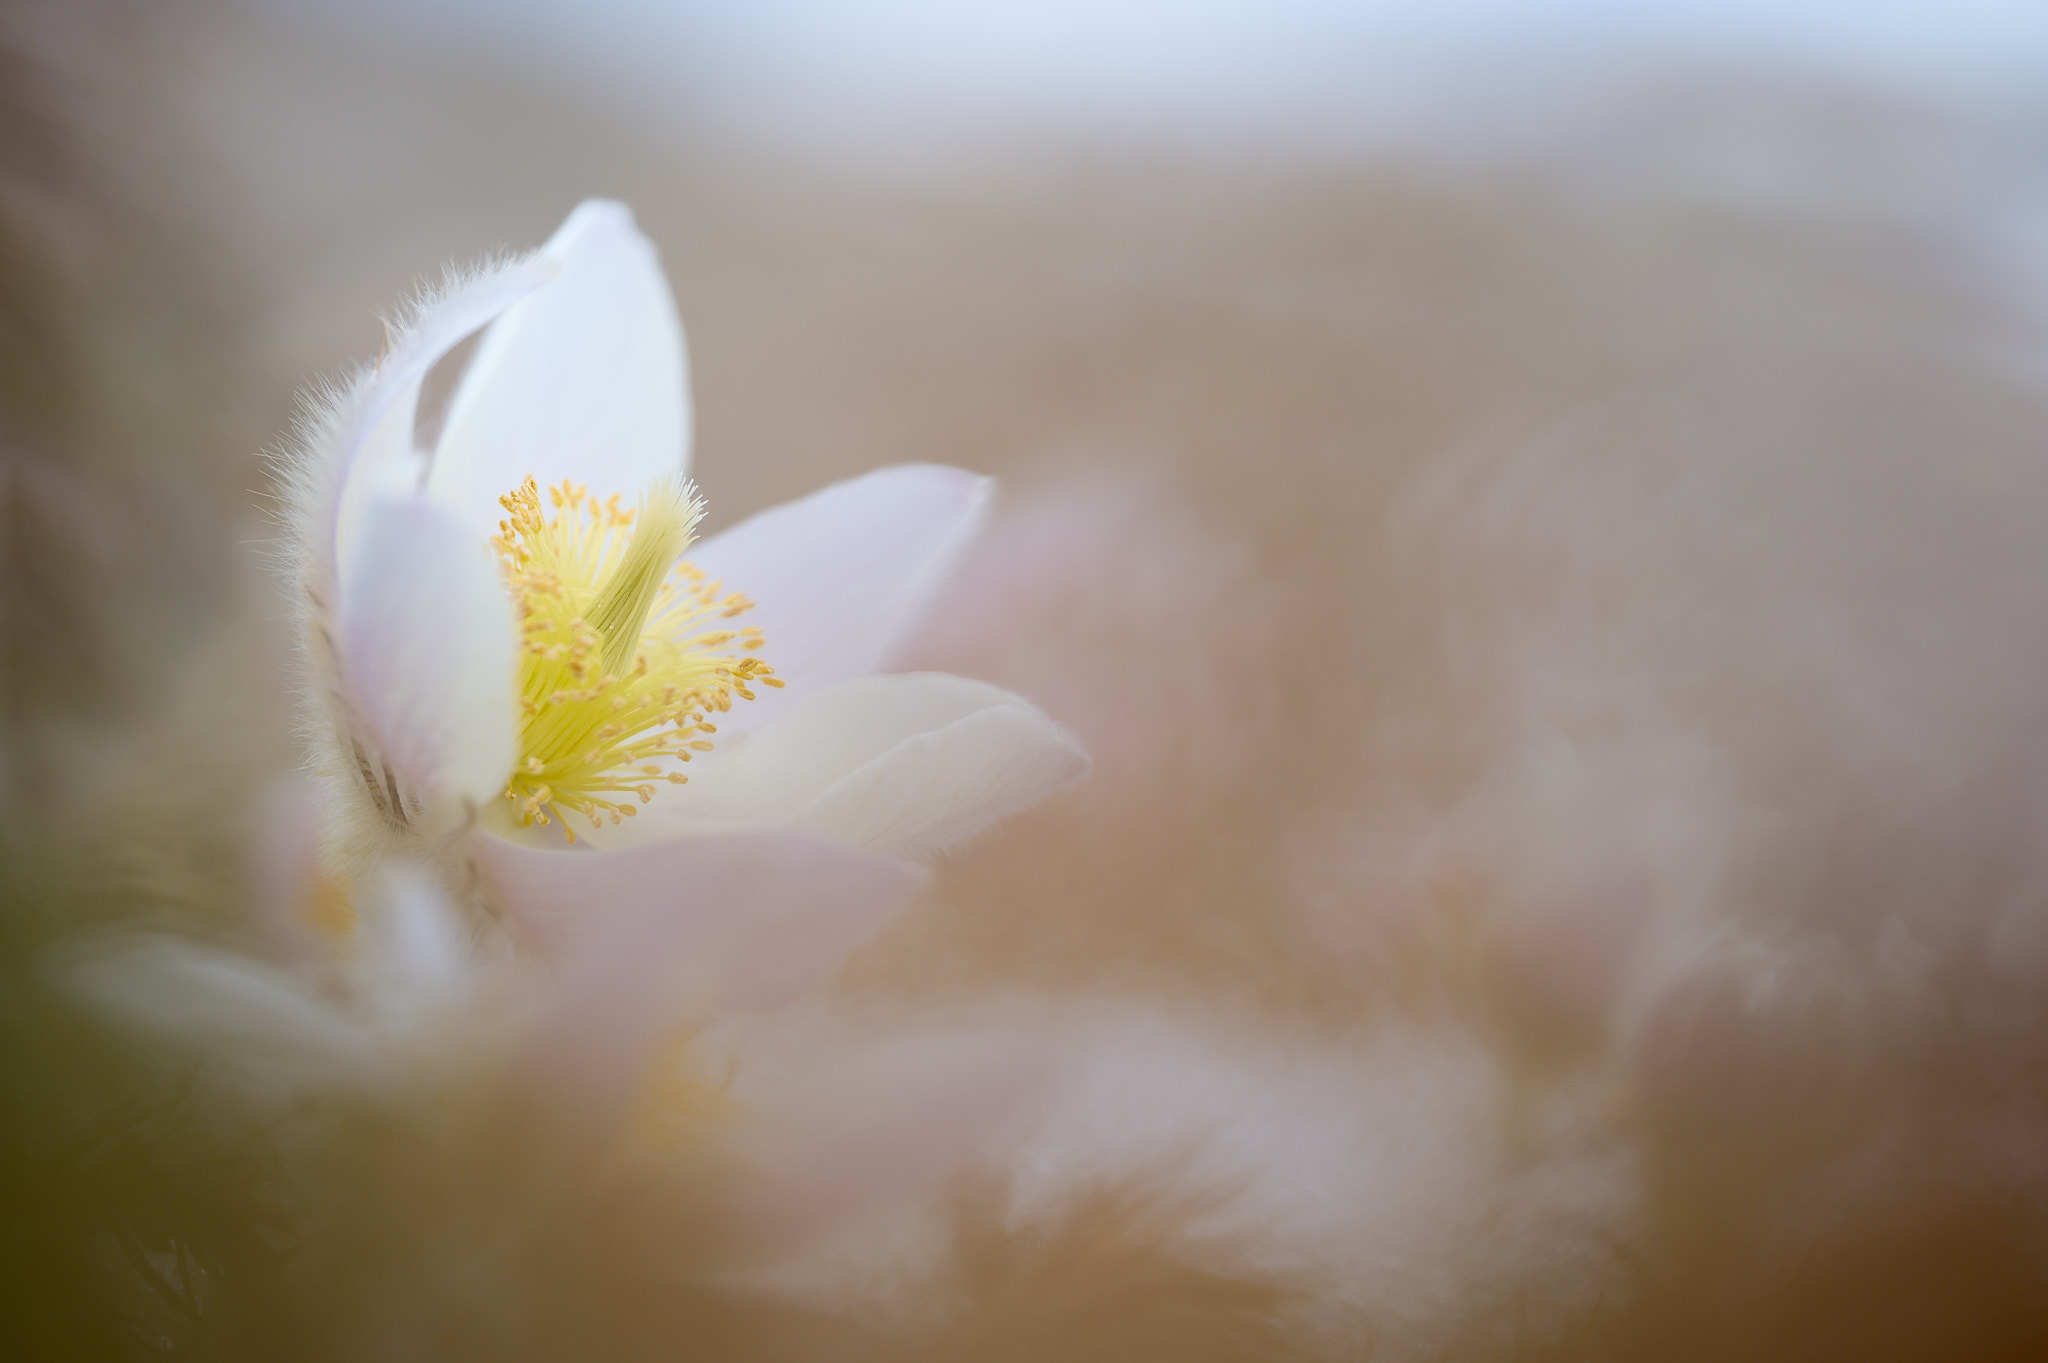
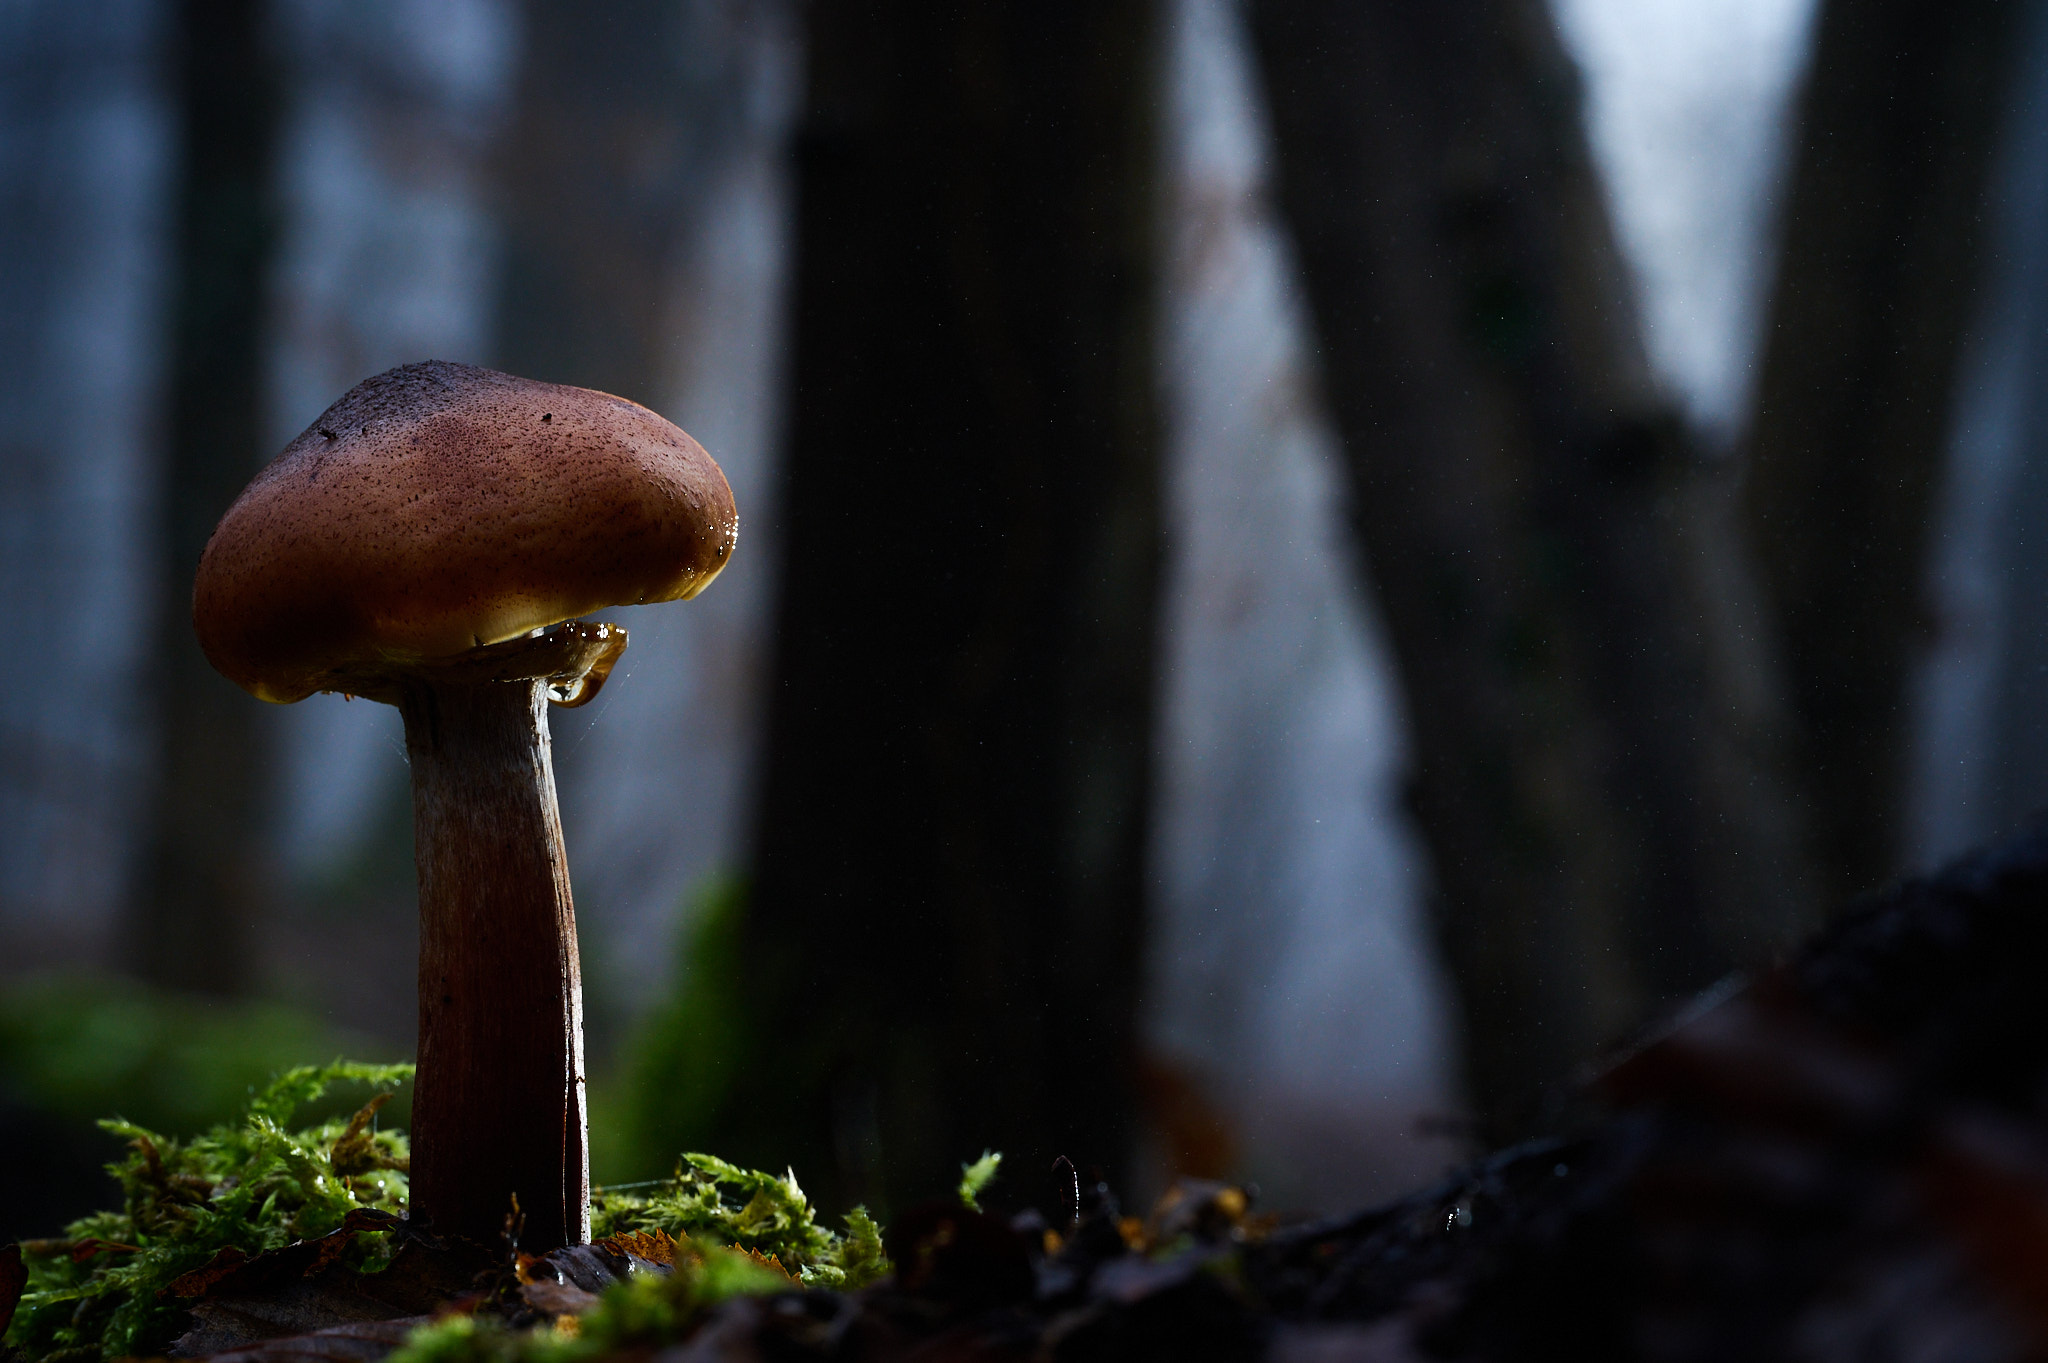
    NIKON Z 6_2 + NIKKOR Z MC 105mm f/2.8 VR S @ 105mm, ISO 100, 1/13, f/16.0


    تعد عدسة Nikon Z MC 105mm f/2.8 VR S عدسة مثيرة للإعجاب من الناحية الفنية والميكانيكية. في مراجعة Photography Life، منحناها أعلى الدرجات في كل فئة. لقد كنت أستخدم جهازي على مدار العامين الماضيين والتقطت آلاف الصور دون أي مشاكل، وغالبًا ما كنت أعمل في أماكن حارة ورطبة. على الرغم من كونها خفيفة الوزن، إلا أنها تشعر بالمتانة. و هو.

    الشيء الوحيد الذي أبهرني هو نظام تقليل الاهتزاز، والذي يظل فعالاً حتى على المسافات القريبة. كما أن تأثير البوكيه ووضوح العدسة ممتازان أيضًا. شعرت أن عدسة F-mount Nikon السابقة مقاس 105 مم وبفتحة f/2.8 كانت أيضًا قوية جدًا، ولكنها تميل إلى الحصول على هامش لوني في المناطق خارج نطاق التركيز (الانحراف اللوني الطولي). النسخة بدون مرآة لا تحتوي على هذه المشكلة.


    The Nikon Z MC 105mm f/2.8 VR S is a technically and mechanically impressive lens. In Photography Life’s review, we gave it top marks in every category. I have been using mine for the last two years and have taken thousands of photos without any issues, often working in hot and humid locations. Despite being lightweight, it feels sturdy. And it is.

    One thing that has impressed me is the vibration reduction system, which continues to be effective even at close distances. The bokeh and sharpness of the lens are also excellent. I felt that the previous F-mount Nikon 105mm f/2.8 macro lens was also very strong, but it tended to get color fringes in out-of-focus regions (longitudinal chromatic aberration). The mirrorless version doesn’t have that issue.
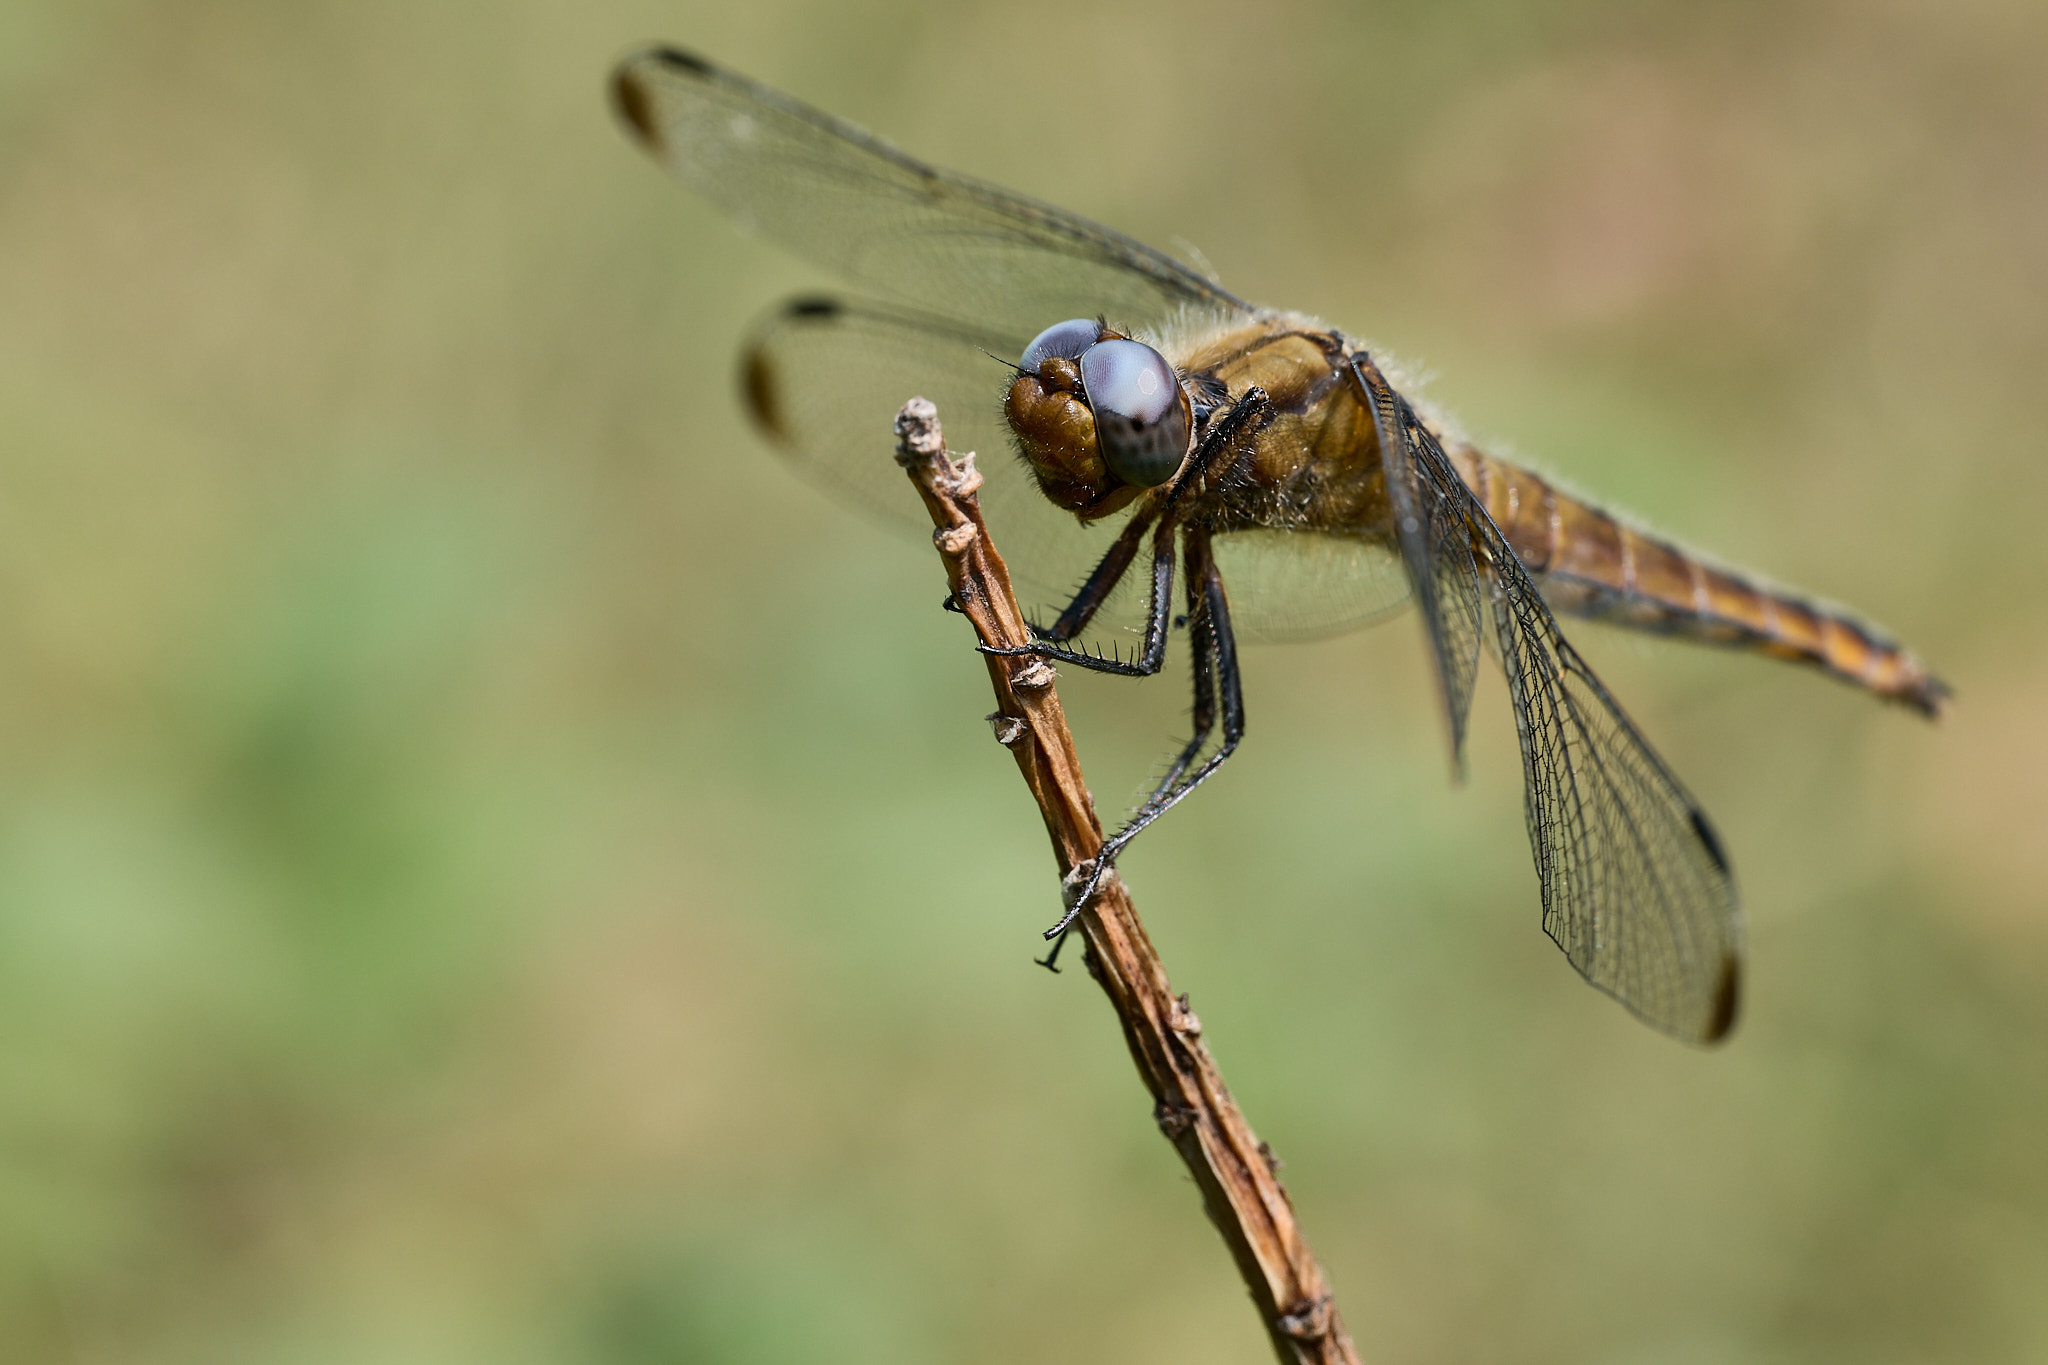
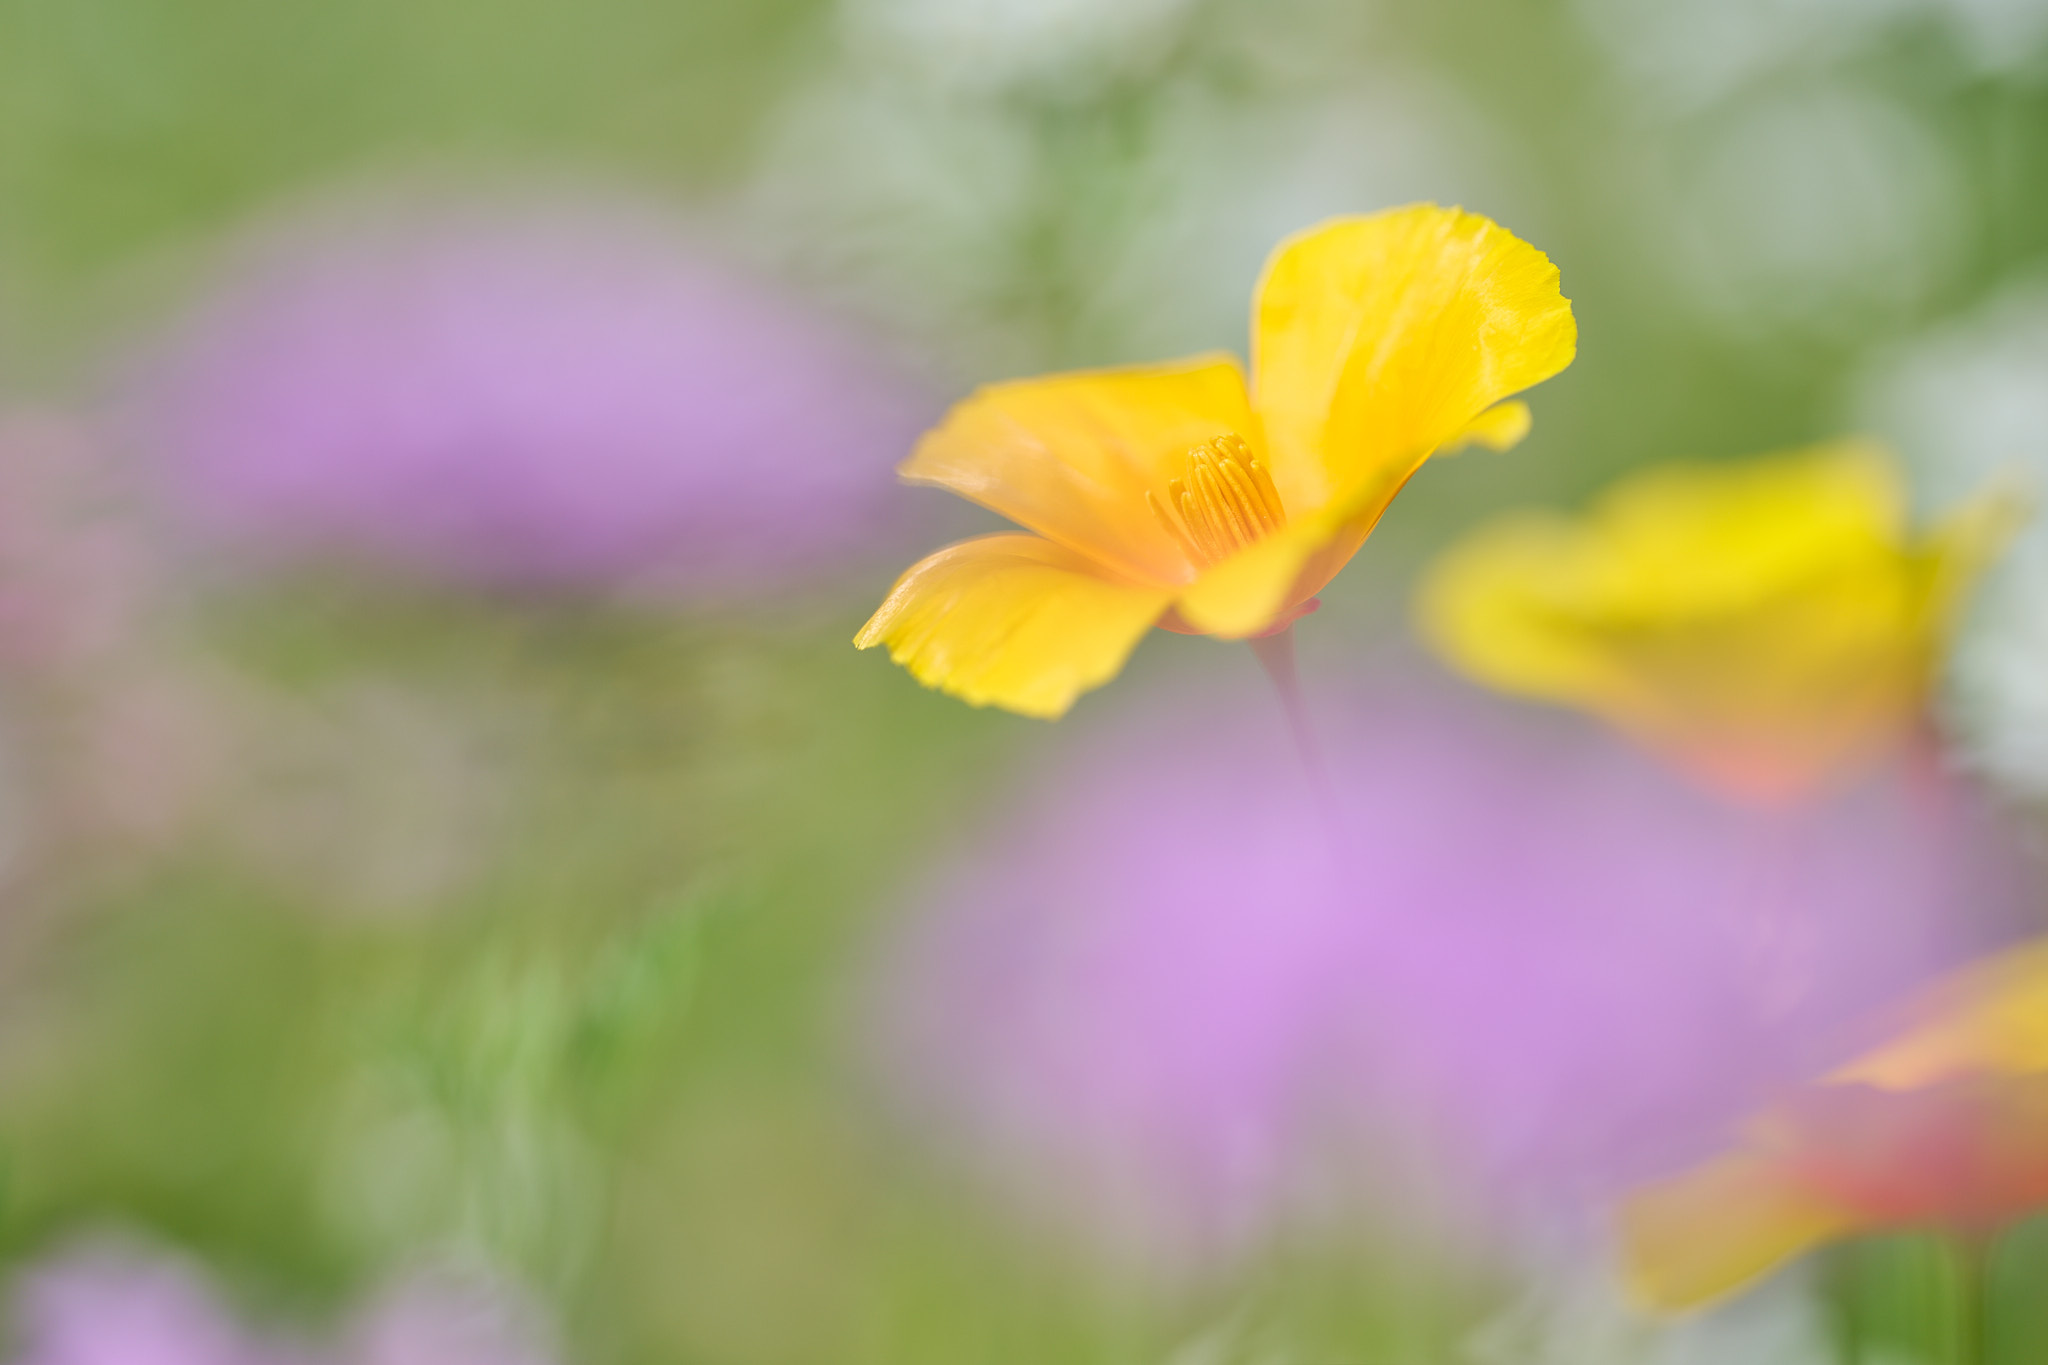
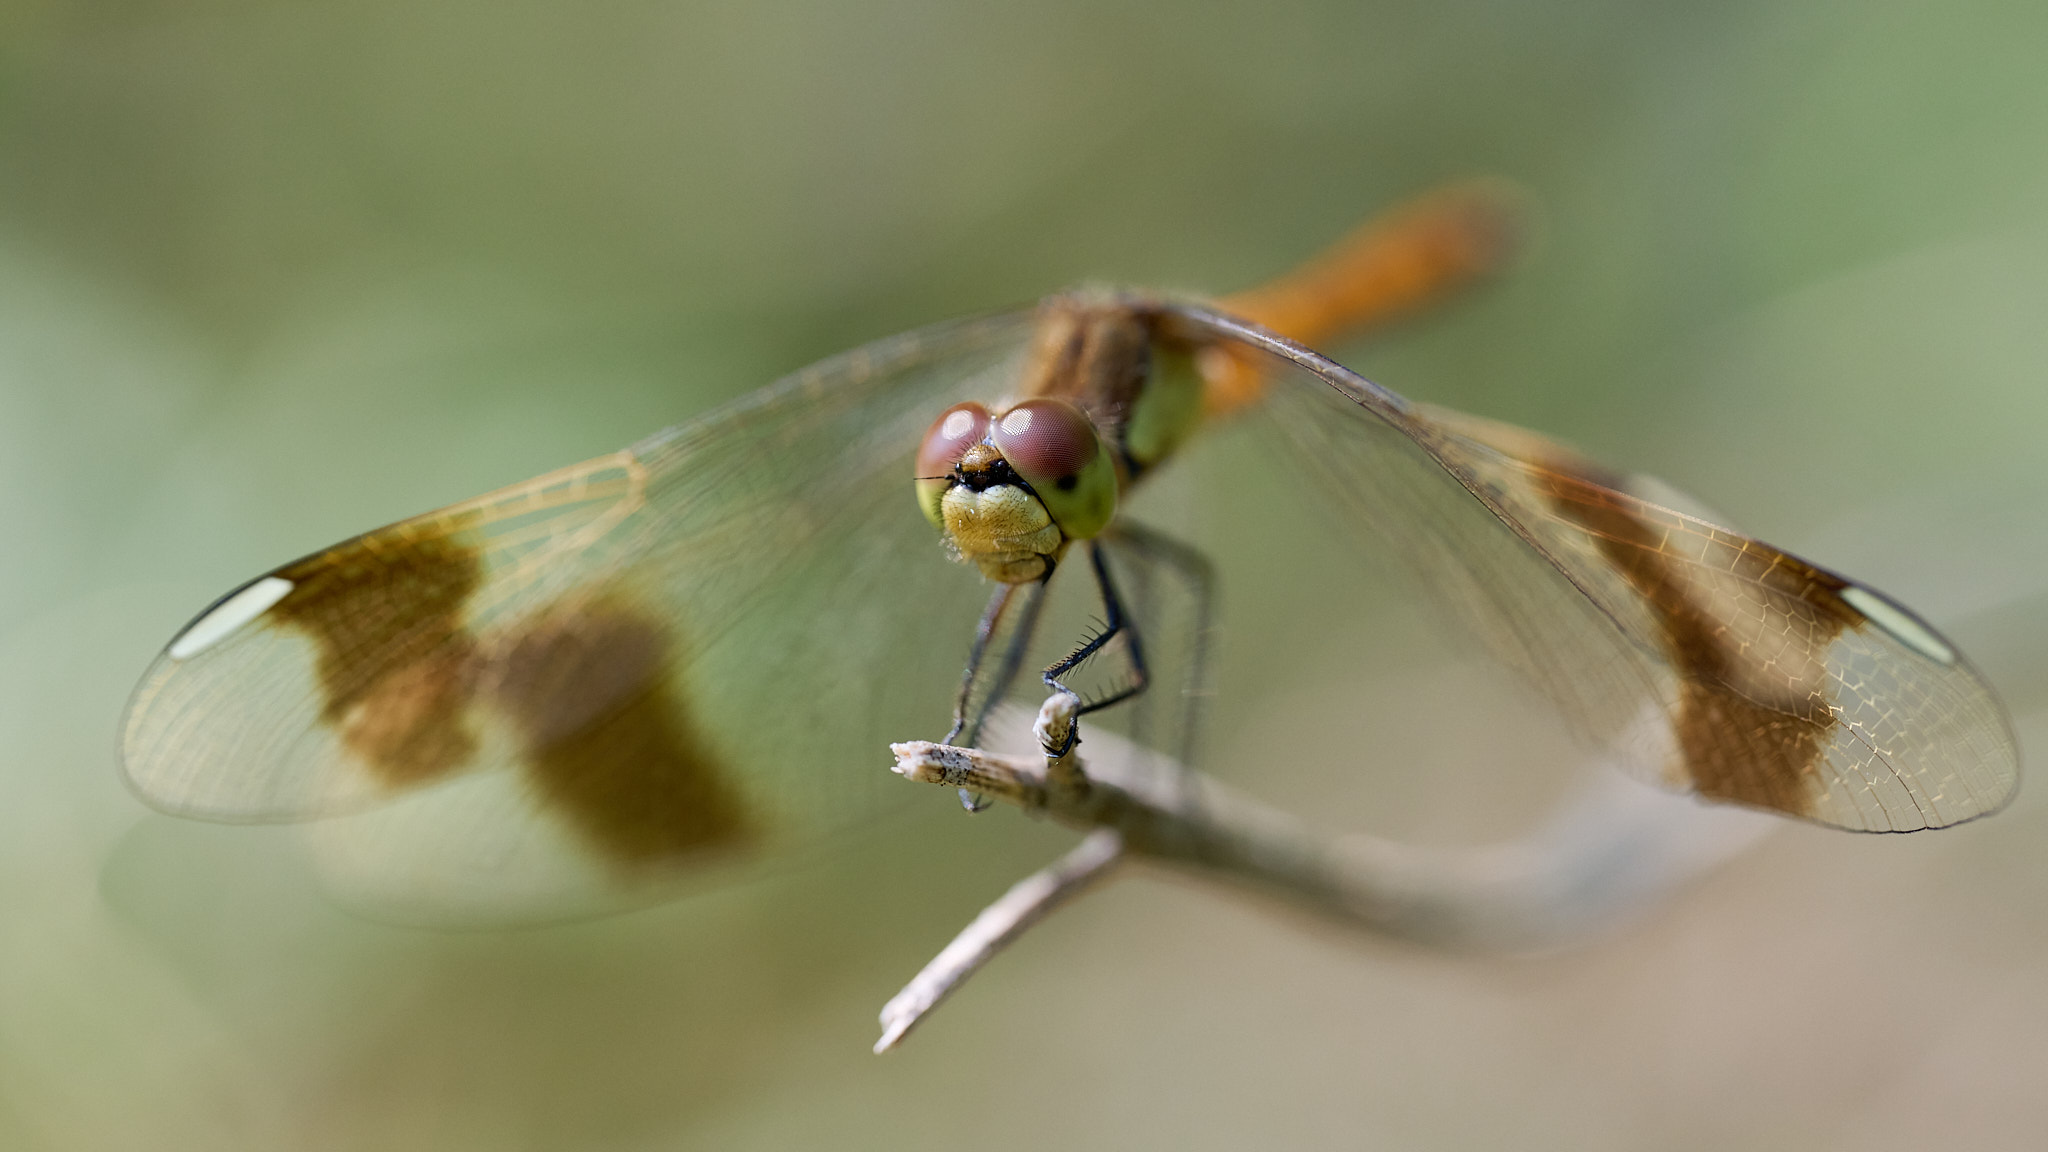
    NIKON Z 6_2 + NIKKOR Z MC 105mm f/2.8 VR S @ 105mm, ISO 100, 1/1250, f/3.5
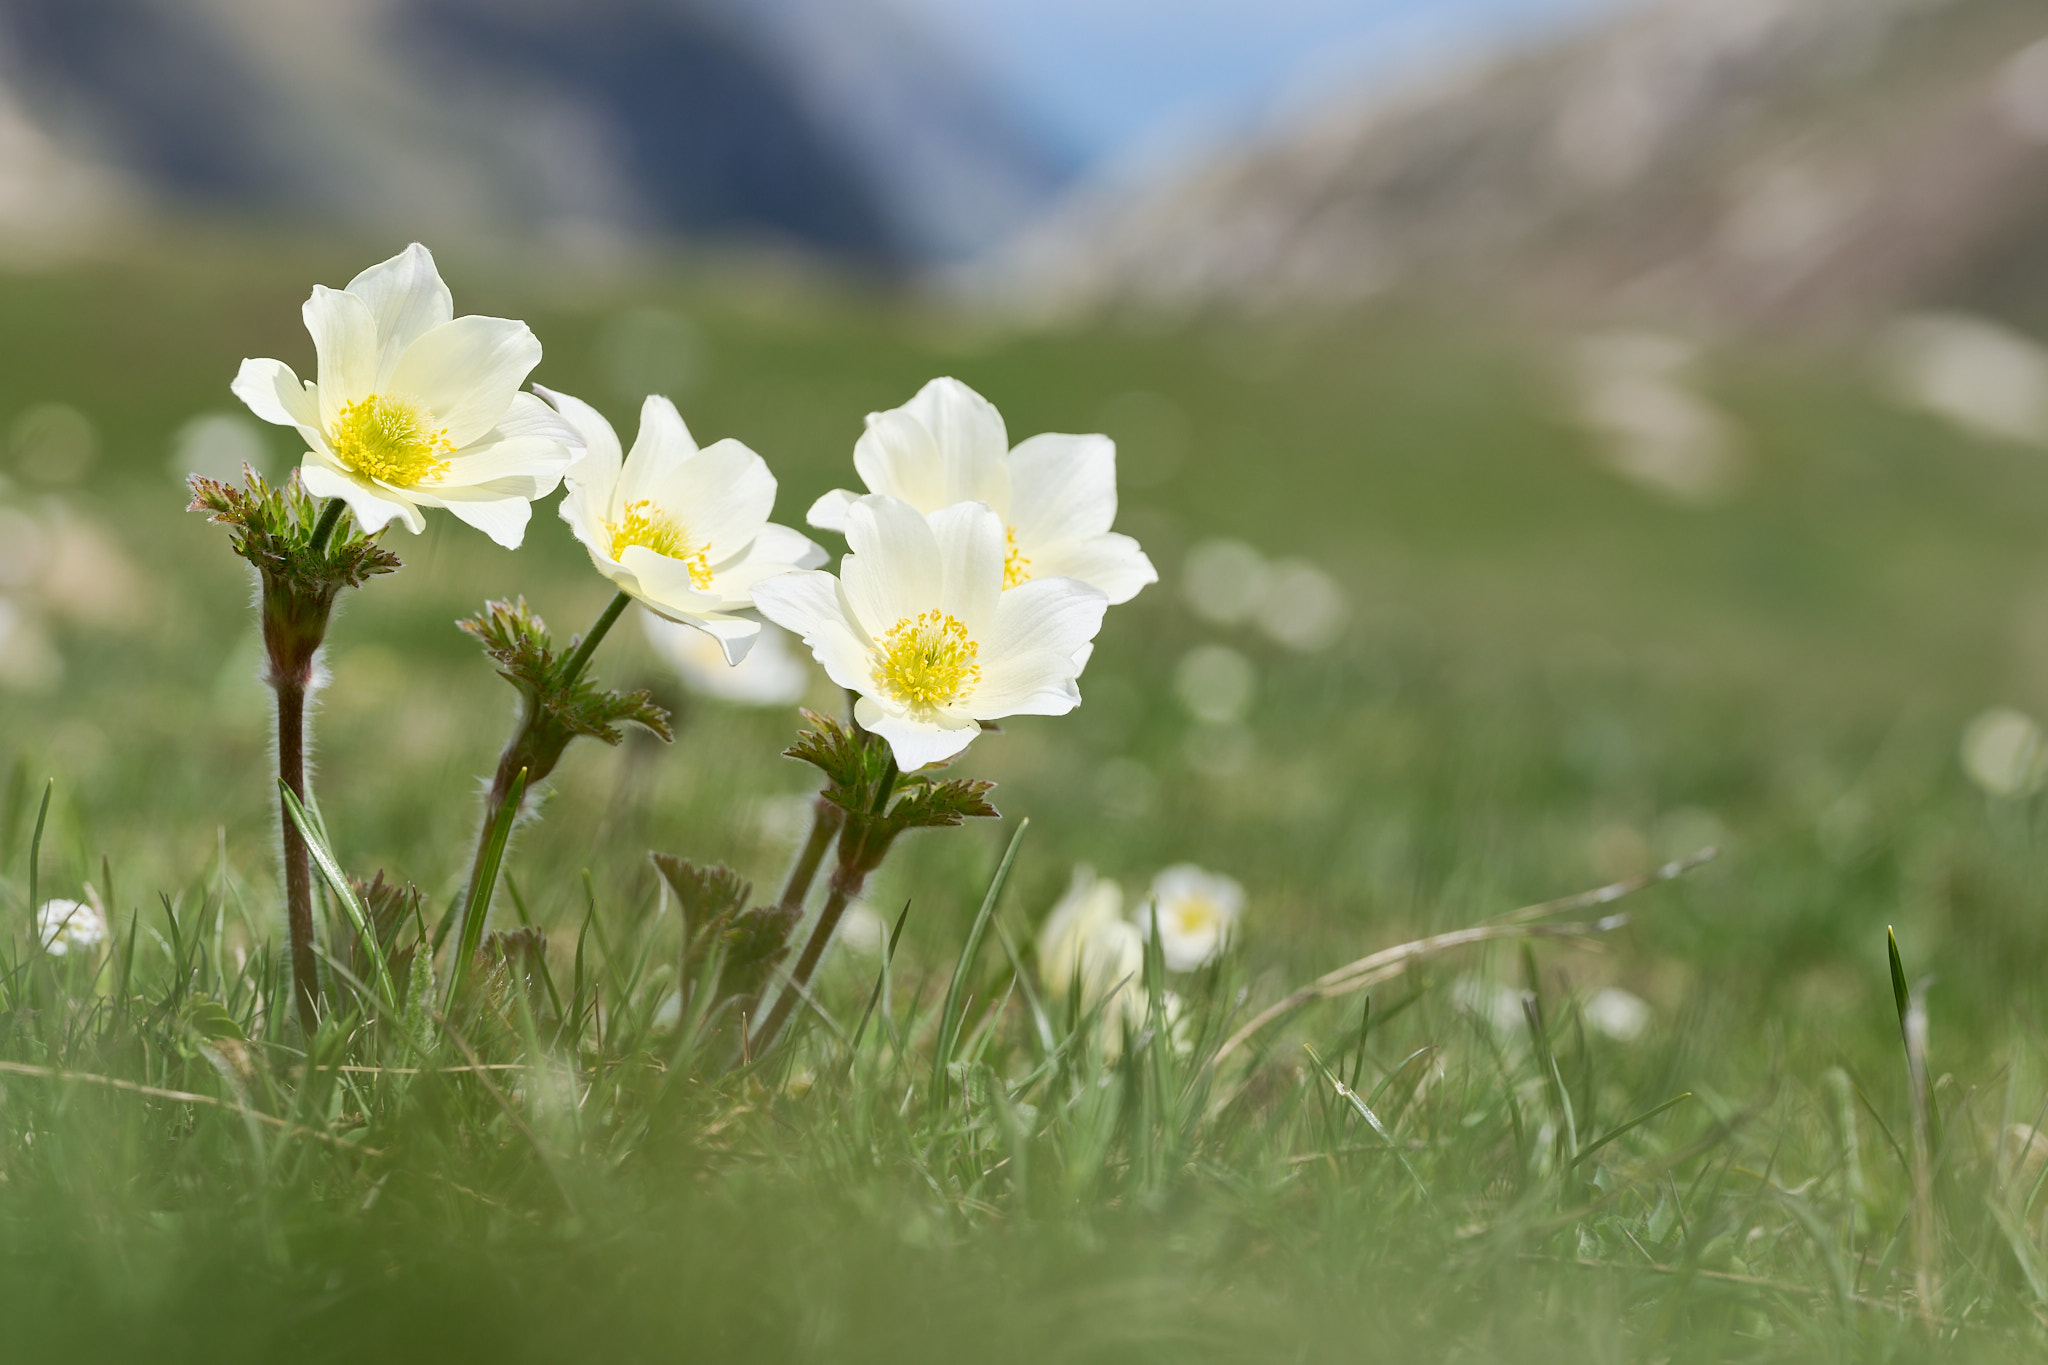
  • #2
    عند التركيز عن كثب، يكون عمق المجال الضحل أمرًا لا مفر منه. ويعتبر هذا النوع من الصور شائعًا وجذابًا عند التقاطه بشكل صحيح. كلما كانت العدسة أطول، أصبح الضبابية خارج التركيز في الخلفية أكبر.

    أعتقد أن العدسة مقاس 105 مم تحقق توازنًا جيدًا بين الهدف وبيئته. يبدو مقاس 50 مم أو 60 مم قليلاً على الجانب القصير، خاصة عند تصوير الحيوانات الصغيرة أو الحشرات. وفي الوقت نفسه، تميل العدسات الأطول إلى جعل الخلفية بأكملها تتحول إلى جدار موحد من الألوان. لا أتردد في استخدام هذا التأثير في بعض الأحيان، ولكن في هذه الأيام، أشعر أنه الفرق بين طبق من البازلاء المدهونة وطبق من اللازانيا. غالبًا ما يكون هناك اهتمام أكبر عندما تتمكن من رؤية بعض الخلفية.

    NIKON Z 9 + NIKKOR Z MC مقاس 105 مم f/2.8 VR S @ 105 مم، ISO 100، 1/500، f/8.0


    When focusing closely, shallow depth of field is inevitable. And this type of photo is both popular and visually appealing when done right. The longer the lens, the bigger the out-of-focus blur in the background becomes.

    I believe that a 105mm lens strikes a good balance between the subject and its environment. 50mm or 60mm feels a bit on the short side, especially when photographing small animals or insects. At the same time, longer lenses tend to make the entire background turn into a uniform wall of colors. I don’t hesitate to use this effect sometimes, but these days, I feel like it’s the difference between a plate of creamed peas and a plate of lasagna. There’s often more interest when you can see some of the background.
    NIKON Z 9 + NIKKOR Z MC 105mm f/2.8 VR S @ 105mm, ISO 100, 1/500, f/8.0

    تعليق


    • #3
      ومع ذلك، لا أريد أن أكون حازمًا جدًا بشأن هذا الأمر. في نهاية اليوم، سيكون لكل مصور ماكرو تفضيلاته الخاصة، تمامًا كما يوجد دائمًا نقاش بين 300 مم، 400 مم، 500 مم، 600 مم، و800 مم في تصوير الحياة البرية. ولا تتنافس بالضرورة مع بعضها البعض، لأنها تخدم أغراضًا مختلفة.

      ونعم، كلما كانت العدسة أطول، كان من الأسهل تصوير هدف خجول دون إخافته. يمكن أيضًا الترحيب بالخلفيات الأكثر ضبابية إذا كانت صورتك ذات نمط "عمودي" أكثر. ولكن يصبح من الصعب إدراج البيئة، التي يمكن أن تساعد في سرد ​​القصة. بالطبع، لم تصنع شركة Nikon عدسة ماكرو مقاس 200 مم حتى الآن، لذلك قد يبدو كل هذا أكاديميًا بعض الشيء. ولكن هناك خيارات مثل تعديل العدسات أو استخدام عدسة Nikon 100-400mm للتصوير الفوتوغرافي عن قرب إذا كنت بحاجة إلى شيء أطول.

      NIKON Z 9 + NIKKOR Z MC مقاس 105 مم f/2.8 VR S @ 105 مم، ISO 200، 1/125، f/16.0 NIKON Z 9 + NIKKOR Z MC 105 مم f/2.8 VR S @ 105 مم، ISO 720، 1/1000 ، f/8.0


      However, I don’t want to be too
      assertive about it. At the end of the day, every macro photographer will have their own preferences, just as there is always a debate between 300mm, 400mm, 500mm, 600mm, and 800mm in wildlife photography. They don’t necessarily compete with each other, as they serve different purposes.

      And yes, the longer the lens, the easier to photograph a shy subject without scaring it away. The blurrier backgrounds can also be welcome if your photo is more of a “portrait” style. But it becomes more difficult to include the environment, which can help to tell the story. Of course, Nikon doesn’t make a 200mm macro yet, so all of this could sound a bit academic. But there are options like adapting lenses or using the Nikon 100-400mm for close-up photography if you need something longer.
      NIKON Z 9 + NIKKOR Z MC 105mm f/2.8 VR S @ 105mm, ISO 200, 1/125, f/16.0NIKON Z 9 + NIKKOR Z MC 105mm f/2.8 VR S @ 105mm, ISO 720, 1/1000, f/8.0

      تعليق


      • #4
        إن الحصول على عدسة ماكرو مخصصة ليس هو الطريقة الوحيدة لالتقاط صور قريبة، وقد قمت بتجربة بعض الخيارات الأخرى من قبل. تعد أنابيب التمديد والمرشحات القريبة من الخيارات الرئيسية. وقد تشعر أنه إذا كان بإمكانك التقاط صور ماكرو باستخدام هذه الملحقات، فلماذا تهتم بعدسة ماكرو مخصصة؟

        ومع ذلك، في تجربتي، شعرت بالإحباط باستخدام هذه الأدوات. كان الحصول على مسافة عمل كافية أمرًا صعبًا باستخدام أنابيب التمديد، كما تم اختراق الحدة باستخدام مرشحات التقريب. وبالمقارنة، تم تحسين عدسات الماكرو لتحقيق أقصى قدر من الأداء على مسافات قريبة. إنها فاخرة بعض الشيء، لكنها تعمل بشكل أفضل من أي بديل، خاصة عند التصوير بفتحة واسعة.

        NIKON Z 9 + NIKKOR Z MC مقاس 105 مم f/2.8 VR S @ 105 مم، ISO 64، 1/1000، f/4.0 NIKON Z 9 + NIKKOR Z MC مقاس 105 مم f/2.8 VR S @ 105 مم، ISO 160، 1/500 ، f/4.0


        Getting a dedicated macro lens is not the only way to take close-up photos, and I have experimented with some of the other options before. Extension tubes and close-up filters are two of the main choices. And you may feel that, if you can achieve macro photos with those accessories, why bother with a dedicated macro lens?

        However, in my experience, I became frustrated using these tools. Getting sufficient working distance was difficult with extension tubes, and sharpness was compromised with close-up filters. By comparison, macro lenses are optimized for maximum performance at close distances. They are a bit of a luxury, but they work better than any alternative, especially when shooting at a wide aperture.
        NIKON Z 9 + NIKKOR Z MC 105mm f/2.8 VR S @ 105mm, ISO 64, 1/1000, f/4.0NIKON Z 9 + NIKKOR Z MC 105mm f/2.8 VR S @ 105mm, ISO 160, 1/500, f/4.0

        تعليق


        • #5
          لقد وجدت أن الكاميرات الحديثة تضمنت الكثير من التحسينات في التصوير الفوتوغرافي الماكرو. أصبح التثبيت أفضل من أي وقت مضى، ربما بسبب الجمع بين تثبيت الصورة داخل الجسم وتقنية الواقع الافتراضي المستندة إلى العدسة. وهو يعمل بفعالية حتى في التصوير الفوتوغرافي الماكرو، وهو ما لم يكن الحال دائمًا في الماضي.

          يمكنك أيضًا أن تعتبرني من محبي شاشات LCD المفصلية. أفضّل التقاط صور قريبة بدون حامل ثلاثي الأرجل، لأنه يسمح لي بالتحرك بسهولة والاقتراب كثيرًا من الأرض. في الواقع، غالبًا ما أضع الكاميرا على الأرض وأحيانًا أستخدم كاميرا Z9 مقلوبة للوصول إلى أدنى مستوى ممكن. لن يكون من الممكن تأطير هذه الصور بدون شاشة مرنة، والقدرة على التركيز التلقائي في أي مكان في الإطار. هذه ليست مجرد ميزة للكاميرات غير المزودة بمرآة ولكنها تنطبق أيضًا على العديد من كاميرات DSLR الأحدث.

          NIKON Z 9 + NIKKOR Z MC مقاس 105 مم f/2.8 VR S @ 105 مم، ISO 500، 1/800، f/5.6


          I have found that recent cameras have included a lot of improvements for macro photography. Stabilization is better than ever, maybe because of the combination of in-body image stabilization and lens-based VR. It works effectively even in macro photography, which was not always the case in the past.

          You can also count me a fan of articulating LCD screens. I prefer to take close-up photos without a tripod, as it allows me move easily and to get very close to the ground. In fact, I often place the camera on the ground and sometimes even use my Z9 upside-down to get as low as possible. It wouldn’t be possible to frame these images without a flexible screen, and the ability to autofocus anywhere in the frame. This isn’t just a feature of mirrorless cameras but also true of many of the later DSLRs.
          NIKON Z 9 + NIKKOR Z MC 105mm f/2.8 VR S @ 105mm, ISO 500, 1/800, f/5.6

          تعليق


          • #6
            يسمح لي التصوير باليد بالتحرك والعثور على الزاوية والخلفية والتكوين المطلوب دون إخافة الأهداف. ما زلت بحاجة إلى التحرك ببطء والانتباه إلى اتجاه الضوء لتجنب إلقاء الظلال على الأشخاص، مما قد يخيفهم. لكن الأمر يختلف ليلًا ونهارًا مقارنة بمحاولة القيام بنفس الشيء في إدارة حامل ثلاثي الأرجل ورأس ثابتين.

            وهنا نصيحتان:

            قم بإزالة غطاء العدسة عند عدم الحاجة إليه، وبالتالي زيادة مسافة العمل من الهدف. عند الاقتراب من هدف قريب عصبي، حاول تحريك ذراعيك للأمام مع إبقاء رأسك وجسمك إلى الخلف. سيؤدي ذلك إلى إخافة الهدف بشكل أقل وتقليل احتمالية هروبه.NIKON Z 9 + NIKKOR Z MC مقاس 105 مم f/2.8 VR S @ 105 مم، ISO 80، 1/500، f/5.6


            Shooting handheld allows me to move and find the desired angle, background, and composition without scaring off the subjects. I still need to move slowly and pay attention to the direction of the light to avoid casting shadows on the subjects, which would scare them. But it is night and day compared with trying to do the same thing managing a stable tripod and head.

            Here are two tips:
            1. Remove the lens hood when not needed, thereby increasing the working distance from the subject
            2. When approaching a nervous macro subject, try to move your arms forward while keeping your head and body further back. This will scare the subject less and reduce the likelihood of it running away.
            NIKON Z 9 + NIKKOR Z MC 105mm f/2.8 VR S @ 105mm, ISO 80, 1/500, f/5.6

            تعليق


            • #7
              على الرغم من أنني أقدر استخدام شاشات LCD، إلا أنني لا أزال أفضل التصوير عبر عدسة الكاميرا كلما أمكن ذلك. في هذا الصدد، أعتقد أن الكاميرات ذات العدسة الأحادية العاكسة (DSLR) والكاميرات غير المزودة بمرآة لها مزاياها الخاصة. لكنني كبرت لأحب عدسة الكاميرا الإلكترونية. إنه يساعد على مراجعة الصور دون الحاجة إلى التحرك (وبالتالي تخويف موضوعي بعيدًا). من الجيد أيضًا رؤية دليل واضح على مناطق التركيز البؤري قبل اللقطة، خاصة عندما أريد التأكد من أنني موازٍ تمامًا لموضوعي.

              عادةً ما أعمل في التركيز التلقائي المستمر (AF-C). ومع ذلك، من خلال تدوير حلقة التركيز قليلاً واستخدام التركيز اليدوي بدلاً من ذلك، تُظهر الكاميرا مناطق التركيز البؤري مما يسمح لي بالتحقق مما إذا كنت موازيًا للموضوع. ثم سأعود إلى التركيز التلقائي بسرعة. يمنحني هذا معاينة للمناطق التي يتم التركيز عليها حتى مع التركيز البؤري التلقائي، وهذه هي الطريقة التي تمكنت بها من التركيز على فرس النبي بشكل مثالي أثناء الإمساك بيدي على بعد بضع بوصات من الأرض.

              إذا جاز لي، لدي طلب لنيكون. سيكون من المفيد رؤية بيانات ذروة التركيز حتى أثناء استخدام التركيز التلقائي. ستساعد هذه الميزة أي شخص يقوم بالتقاط صور ماكرو وهو محمول باليد، خاصة إذا كان من الممكن ربطها بزر وظيفة لتمكينها بسرعة.

              NIKON Z 6_2 + NIKKOR Z MC مقاس 105 مم f/2.8 VR S @ 105 مم، ISO 800، 1/30، f/22.0


              Although I appreciate articulating LCD monitors, I still prefer to shoot via the viewfinder whenever possible. In this regard, I think DSLRs and mirrorless cameras have their own advantages. But I’ve grown to love the electronic viewfinder. It helps to review the photos without having to move (thereby scaring my subject away). It’s also nice to see clear evidence of the in-focus areas before the shot, especially when I want to ensure that I’m completely parallel to my subject.

              I typically work in continuous autofocus (AF-C). However, by rotating the focus ring slightly and employing manual focus instead, the camera shows the in-focus areas letting me check if I am parallel to the subject. Then I will jump back to autofocus quickly. This gives me a preview of the in-focus areas even with autofocus, and that’s how I managed to have the Praying Mantis perfectly in focus while handholding at a few inches from the ground.

              If I may, I have a request for Nikon. It would be useful to see focus peaking data even while using autofocus. This feature would help anyone who shoots macro photos handheld, especially if it could be coupled to a function button to quickly enable.
              NIKON Z 6_2 + NIKKOR Z MC 105mm f/2.8 VR S @ 105mm, ISO 800, 1/30, f/22.0

              تعليق


              • #8


                في الختام، تتضمن وصفتي للتصوير الفوتوغرافي المقرب في المقام الأول العمل يدويًا مع تشغيل تقليل الاهتزاز، واستخدام AF-C، والتقاط دفعات من 4-5 صور فوتوغرافية لضمان الحصول على صور واضحة. لا أستخدم الفلاش في معظم الأوقات لهذه الصور، على الرغم من أن التصوير الفوتوغرافي الماكرو بتكبير 1 إلى 1 يتطلب ذلك أحيانًا. أخيرًا، أحب تفعيل ذروة التركيز البؤري (عن طريق تدوير حلقة التركيز قليلاً) للتأكيد على أنني أقوم بمحاذاة موضوعي قدر الإمكان مع عمق المجال الخاص بي.

                تعد عدسة نيكون مقاس 105 مم f/2.8 MC جيدة بشكل لا يصدق وقد جعلت بعض هذه المهام أسهل. لقد استمتعت أيضًا بالمناظر الطبيعية والصور الشخصية. قد يكون التكبير/التصغير أكثر مرونة، لكن لا تقلل من شأن قدرة عدسات الماكرو. ولتوثيق ذلك، أضفت بضع إطارات فقط التقطتها في ظروف مختلفة تمامًا.

                NIKON Z 9 + NIKKOR Z MC مقاس 105 مم f/2.8 VR S @ 105 مم، ISO 64، 1/1250، f/2.8NIKON Z 6_2 + NIKKOR Z MC مقاس 105 مم f/2.8 VR S @ 105 مم، ISO 100، 1/200 ، f/8.0


                Wrapping up, my recipe for easy close-up photography primarily involves working freehand with Vibration Reduction engaged, using AF-C, and taking bursts of 4-5 photographs to ensure sharp photos. I do not use a flash most of the time for these photos, although extreme 1-to-1 magnification macro photography sometimes requires it. Finally, I like to engage focus peaking (by rotating the focus ring a little bit) to confirm that I’m aligning my subject as well as possible with my depth of field.

                Nikon’s 105mm f/2.8 MC lens is incredibly good and has made some of these tasks easier. I’ve also enjoyed it for landscapes and portrait photos. A zoom may be more flexible, but don’t underestimate the capability of macro lenses. To document it, I added just a couple of frames I shot in totally different conditions.
                NIKON Z 9 + NIKKOR Z MC 105mm f/2.8 VR S @ 105mm, ISO 64, 1/1250, f/2.8NIKON Z 6_2 + NIKKOR Z MC 105mm f/2.8 VR S @ 105mm, ISO 100, 1/200, f/8.0

                تعليق


                • #9
                  نصيحتي لمحبي العدسات الأولية هي إقران عدسة Z MC 105mm f/2.8 مع عدد قليل من العدسات الأولية الأخرى، مثل 50 مم للصور الشخصية و24 مم للمناظر الطبيعية. ويمكن أيضًا إقرانها مع Nikon Z 180-600mm f/5.6-6.3 إذا كنت بحاجة إلى شيء أطول، حيث لا أعتقد أن الفجوة بين 105 مم و180 مم تمثل مشكلة في معظم الأوقات.

                  أتمنى أن تستمتع بهذا المقال الذي يتناول تجربتي في استخدام عدسة Nikon Z MC مقاس 105 مم f/2.8 VR S في الميدان، بالإضافة إلى بعض النصائح لتسهيل تصوير اللقطات القريبة.


                  My advice to prime lens lovers
                  is to pair the Z MC 105mm f/2.8 with a few other primes, such as a 50mm for portraits and a 24mm for landscapes. It could also pair with the Nikon Z 180-600mm f/5.6-6.3 if you need something longer, as I don’t think the gap between 105mm and 180mm is a problem most of the time.

                  I hope you enjoyed this article on my experience using the Nikon Z MC 105mm f/2.8 VR S lens in the field, along with a few tips to make close-up photographer easier.

                  تعليق

                  يعمل...
                  X