حقيبة الكاميرا الخاصة بي (الجزء الرابع) What’s In My Camera Bag? Alex Coleman

تقليص
X
 
  • تصفية - فلترة
  • الوقت
  • عرض
إلغاء تحديد الكل
مشاركات جديدة

  • حقيبة الكاميرا الخاصة بي (الجزء الرابع) What’s In My Camera Bag? Alex Coleman

    ماذا يوجد في حقيبة الكاميرا الخاصة بي؟ اليكس كولمان

    What’s In My Camera Bag? Alex Coleman


    على الرغم من أنني لا أملك إعدادًا محددًا لحقيبة الكاميرا، إلا أنني أملك عددًا من الأشياء التي يجب أن أملكها، بالإضافة إلى بعض الإعدادات النموذجية، اعتمادًا على ما أقوم بتصويره في ذلك اليوم. هل تريد رؤية بعض معداتي المفضلة لتصوير المناظر الطبيعية والتصوير التجاري؟ ها هو!

    عدة تصوير المناظر الطبيعية

    من المؤكد أن معدات المناظر الطبيعية الخاصة بي هي المجموعة الأكثر تنوعًا. إن ما أحمله معي في نزهة قصيرة عبر الغابة سيكون مختلفًا تمامًا عن جلسة التصوير الفلكي في الريف. ومع ذلك، فإن توحيد جميع المعدات هو جهاز Nikon Z7. على الرغم من أنني قمت بالتصوير سابقًا باستخدام كاميرا Nikon D800 وD810 - التي أعجبتني بسبب الدقة الكبيرة التي توفرها - فقد وصل الأمر إلى النقطة التي قدمت فيها الكاميرا غير المزودة بمرآة الكثير من الفوائد.

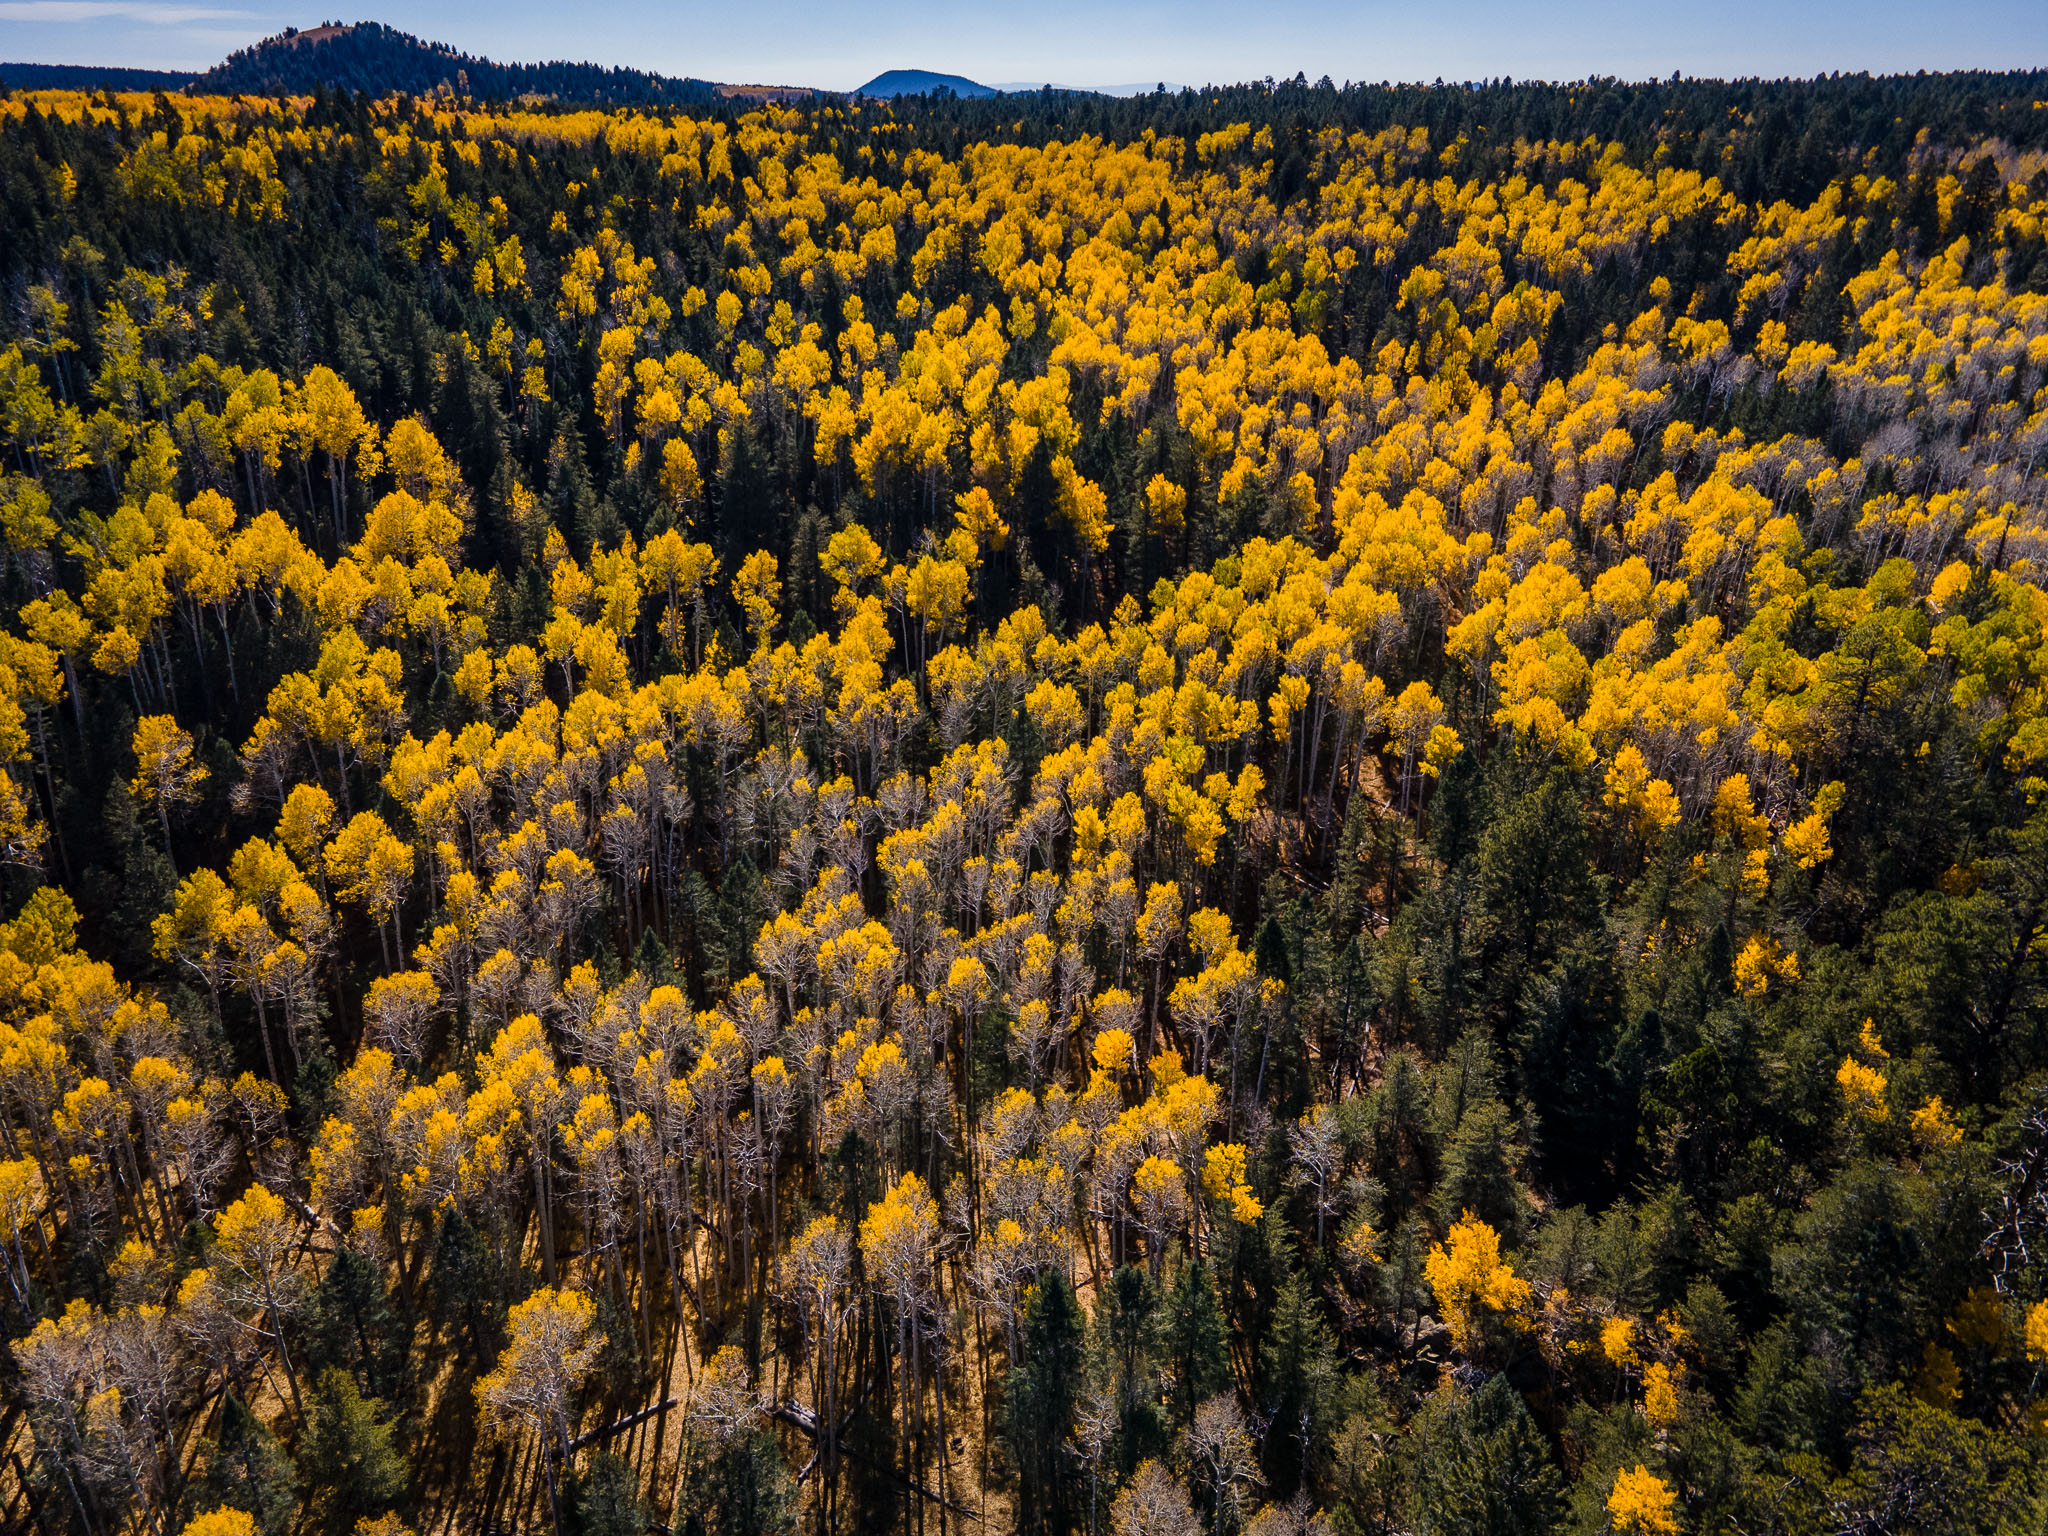
    NIKON D810 + 24-70 مم f/2.8 @ 38 مم، ISO 640، 30/1، f/2.8


    While I don’t have a definitive camera bag setup, I’ve got a number of must-haves, as well as a few typical setups, depending on what I’m shooting that day. Want to see some of my favorite gear for landscape and commercial photography? Here it is!
    Landscape Photography Kit


    My landscape gear is definitely the most variable set of kit. What I bring for a short walk through the woods is going to be very different from an astrophotography shoot in the backcountry. Unifying all of the gear, however, is my Nikon Z7. While I previously shot with the Nikon D800 and D810 – which I loved for the significant resolution they offered – it got to the point where mirrorless just offered too many benefits.
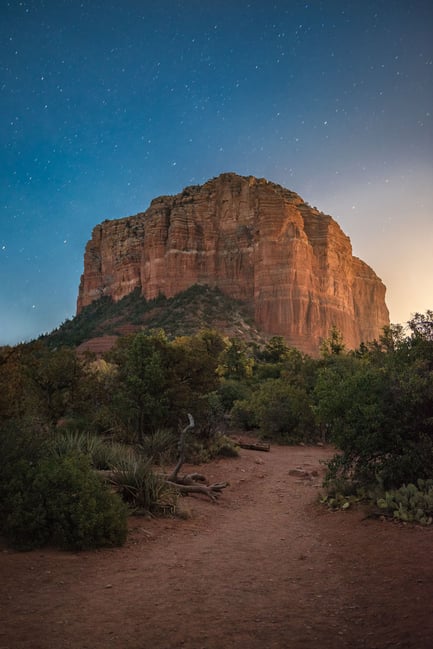
    NIKON D810 + 24-70mm f/2.8 @ 38mm, ISO 640, 30/1, f/2.8

  • #2
    تعتمد جميع إعداداتي على كاميرا Nikon Z7، التي تحتوي على دعامة L صغيرة الحجم متصلة بشكل دائم تقريبًا. تعجبني المقبض الإضافي الذي يضيفه L-Bracket، إلى جانب حقيقة أنه متوافق مع جميع حوامل ثلاثية القوائم وحلول التثبيت الأخرى.

    بالنسبة لبطاقات الذاكرة، وصلت إلى النقطة التي أترك فيها بطاقة واحدة كبيرة في الكاميرا، مثل بطاقة Delkin's CFExpress بسعة 256 جيجابايت. على الرغم من أنني سأحضر بعض البطاقات الاحتياطية في الرحلات الطويلة، إلا أنني أجد أنني لا أملأ بطاقة واحدة إلا إذا كنت في رحلة طويلة بشكل خاص - وحتى ذلك الحين، فإن إعادة البطاقة إلى الفندق أمر جيد تمامًا بالنسبة لي. على الرغم من أن هذا الأسلوب أكثر عرضة لفشل البطاقة مقارنةً بعمليات إعداد البطاقات المتعددة، إلا أنه يقلل من خطر فقدان البطاقة، فضلاً عن تبسيط إدارة الملفات.

    تظهر هنا إحدى المزايا الأخرى للعدسة بدون مرآة: عدسات Nikon Z. في حين أن العديد من عدسات تركيب F من نيكون كانت ذات كفاءة عالية، فإن جميع عدسات Z-mount تقريبًا تمثل تحسينات واضحة على نظيراتها من عدسات F.

    بالنسبة لتصوير المناظر الطبيعية والسفر بشكل خاص، فإن العدسة الأكثر استخدامًا هي Z مقاس 24-70 مم وبفتحة f/4. حادة بما يكفي لجسم بدقة 45 ميجابكسل، ولكنها مضغوطة بشكل لا يصدق، وهذه العدسة موجودة دائمًا في حقيبتي تقريبًا. أقوم باستبداله فقط بإصدار f/2.8 للمناسبات وحفلات الزفاف.

    NIKON Z 7 + NIKKOR Z مقاس 24-70 مم f/4 S @ 24 مم، ISO 64، 1/160، f/6.3


    All of my setups are based around the Nikon Z7, which has a Smallrig L-Bracket almost permanently attached. I like the extra bit of grip the L-Bracket adds, along with the fact that it’s compatible with all my tripods and other mounting solutions.

    For memory cards, I’ve gotten to the point where I just leave a single large card in the camera, like Delkin’s CFExpress 256GB card. While I’ll bring some spare cards on longer trips, I find that I don’t fill a single card unless I’m on an especially long trip – and even then, transferring the card back at the hotel is perfectly fine to me. This approach, while slightly more vulnerable to card failure compared to multi-card setups, reduces the risk of losing a card, as well as simplifying file management.

    One of the other benefits of mirrorless comes into play here: Nikon’s Z lenses. While many of Nikon’s F mount lenses were very capable, almost all of the Z-mount lenses are clear improvements over their F mount counterparts.

    Particularly for landscape and travel photography, my most commonly used lens is the Z 24-70mm f/4. Sharp enough for a 45MP body, yet incredibly compact, this lens is almost always in my bag. I only swap it for the f/2.8 version for events and weddings.
    NIKON Z 7 + NIKKOR Z 24-70mm f/4 S @ 24mm, ISO 64, 1/160, f/6.3

    تعليق


    • #3
      إلى جانب 24-70 f/4، سأضيف 14-30m f/4 في معظم الأوقات. إنها تشترك في التصميم الخفيف مقاس 24-70 مم f/4، والوضوح الجيد، ومستويات منخفضة من الانحرافات البصرية. وهذا يجعله خيارًا سهلاً لمعظم سيناريوهات الزاوية الواسعة. على الرغم من أنني أرغب في الترقية إلى 14-24 f/2.8، فإن السعر يمثل قفزة كبيرة بالنسبة للفوائد التي لا تهمني خارج التصوير الفلكي.

      بصرف النظر عن استخدام f/4 للتصوير الفلكي، فإن مشكلتي الأكبر مع عدسة 14-30 مم هي التغيير الجذري في مركز الجاذبية عند تكبير العدسة، لأن هذا يجعل موازنة الإعداد على محور الفيديو أمرًا مزعجًا بعض الشيء. وبسبب هذين العاملين، فإنني أتطلع إلى إضافة عدسة أولية سريعة، مثل عدسة Venus Optic مقاس 15 مم f/2، إلى مجموعتي.

      NIKON Z 7 + NIKKOR Z مقاس 14-30 مم f/4 S @ 14 مم، ISO 64، 1/80، f/4.5


      Alongside the 24-70 f/4, I’ll add the 14-30m f/4 much of the time. It shares the 24-70mm f/4’s lightweight design, good sharpness, and low levels of optical aberrations. This makes it an easy choice for most wide angle scenarios. While I’d like to upgrade to the 14-24 f/2.8, the price is a steep jump for benefits that don’t matter to me outside of astrophotography.

      Aside from using f/4 for astrophotography, my biggest quibble with the 14-30mm is the drastic change in the center of gravity when zooming the lens, as this makes balancing the setup on a video gimbal a bit annoying. Because of those two factors, I’m looking at adding a fast prime, like Venus Optic’s 15mm f/2, to my kit.
      NIKON Z 7 + NIKKOR Z 14-30mm f/4 S @ 14mm, ISO 64, 1/80, f/4.5

      تعليق


      • #4
        تشكل هاتان العدستان مجموعة أدوات المناظر الطبيعية الأساسية الخاصة بي. وأي شيء آخر، أضيفه حسب الحاجة. بالنسبة لمواقف التقريب، كنت سأحب عدسة تقريب Z خفيفة الوزن، مثل Z مقاس 70-200 مم f/4 أو 70-300 مم f/5.6. ولكن بدلاً من إطلاق واحدة، أعطت نيكون الأولوية لخمسة أعداد أولية في نطاق 40-60 ملم. لذا، فقد تمسكت بـ 70-300 AF-P، الأمر الذي يتطلب إضافة محول FTZ أيضًا. ربما سأحصل على Tamron 70-300mm الجديد في وقت ما كبديل.

        بالنسبة لمواقف الماكرو، أضفت عدسة Z MC 105mm f/2.8، والتي يمكن أن تكون أيضًا بمثابة تليفون قصير في المواقف التي لم أحضر فيها عدسة AF-P مقاس 70-300 مم. نظرًا لأنني عادةً ما أصور الماكرو كهدف جانبي لتصويري الرئيسي، فأنا لا أحمل الكثير من معدات دعم الماكرو.

        أخيرًا، بالنسبة للتصوير الفوتوغرافي الفلكي المخصص، أود أن أحضر عدسة Nikon F-Mount مقاس 24 مم وبفتحة f/1.8. تمثل هذه العدسة مجالًا آخر أرغب في التبديل إليه إلى عدسة Z مقاس 20 مم f/1.8 أو 24 مم f/1.8، لكن تكلفة العدسة الجديدة لا تستحق العناء مقابل قفزة صغيرة في الأداء على موضوع أقوم بتصويره بشكل أقل مرارًا.

        لحزم كل شيء، أحب استخدام Backlight 18L، الذي يوفر توازنًا جيدًا بين الحجم والتخزين، خاصة بالنسبة للخيارات بدون مرآة. ومن المثير للاهتمام، أنه على الرغم من المواصفات المذكورة، فإنه يمكن أن يستوعب جهاز MacBook Pro مقاس 14 بوصة، على الرغم من أنه ضغط محكم. يمكن أن يبدو هذا الإعداد واضحًا بعض الشيء في البيئات الحضرية، لذلك أستخدم أيضًا حقيبة الظهر ThinkTank التي تم إيقاف إنتاجها الآن. ويبدو أن أقرب حقيبة لهذه الحقيبة هي حقيبة Airport Essentials، التي توفر تصميمًا هادئًا للغاية باللون الأسود بالكامل.

        NIKON D810 + 24-70 مم f/2.8 @ 38 مم، ISO 160، 25/1، f/5.6


        Those two lenses constitute my most basic landscape kit. Anything else, I add as needed. For telephoto situations, I would have loved a lightweight Z telephoto, like a Z 70-200mm f/4 or 70-300mm f/5.6. But instead of releasing one, Nikon prioritized five primes in the 40-60mm range. So, I’ve stuck with my 70-300 AF-P, which requires adding the FTZ adapter too. Maybe I’ll get the new Tamron 70-300mm at some point as a replacement.

        For macro situations, I’ve added the Z MC 105mm f/2.8, which can also serve as a short tele in situations where I didn’t bring my 70-300mm AF-P. Because I typically shoot macro as a side goal to my main shoot, I don’t bring much macro supporting equipment.

        Lastly, for dedicated astrophotography shoots, I like to bring the Nikon F-Mount 24mm f/1.8. This lens represents another area where I’d love to switch to the Z 20mm f/1.8 or 24mm f/1.8, but the cost of a new lens just isn’t worth it for a small jump in performance on a subject I shoot less frequently.

        To pack everything up, I like to use the Backlight 18L, which offers a good balance of size and storage, particularly for mirrorless options. Interestingly, despite the listed specs, it can accommodate a 14″ MacBook Pro, although it’s a tight squeeze. This setup can look a bit conspicuous in urban environments, however, so I also make use of a now-discontinued ThinkTank backpack. The closest relative to that bag looks to be the Airport Essentials bag, which offers a very quiet, all-black design.
        NIKON D810 + 24-70mm f/2.8 @ 38mm, ISO 160, 25/1, f/5.6

        تعليق


        • #5
          معدات تجارية

          في لقطاتي التجارية، يحدد الموضوع الإعداد. الكثير من المعدات هي نفس مجموعة أدوات المناظر الطبيعية، لكنني غالبًا ما سأحضر المزيد من الإضاءة والفيديو ومعدات الطائرات بدون طيار.

          بالنسبة للإضاءة، لدي إعداد محمول مبني على أضواء Godox والمشغلات اللاسلكية. أنا من أشد المعجبين بالتوافق بين النظام، فضلاً عن نسبة السعر إلى الأداء القوية حقًا. مصابيحي النموذجية هي مصابيح AD200، والتي يمكنها إضاءة غرفة لالتقاط لقطات عقارية "ملتهبة" (فلاش/محيط)، ولكن يمكن استخدامها أيضًا عن قرب من خلال أداة تعديل لصور المنتج. الحجم الصغير لـ AD200 يعني أيضًا أنه يمكنني الاستفادة من حوامل الإضاءة المدمجة، مما يجعل المجموعة الشاملة قابلة للحمل.

          عندما يحين وقت تصوير الفيديو، غالبًا ما أستخدم كاميرا Nikon Z7 فقط. لتحقيق الاستقرار أثناء مقاطع الفيديو الإرشادية، كنت أستخدم سابقًا نظام Ronin SC gimbal، على الرغم من أنني بدأت مؤخرًا في استخدام Zhiyun Weebill 3. بالنسبة لأي من هذين المحورين، أحب أنهما قادران على دعم إعداد Z7 الخاص بي، دون أن يكونا ضخمين حقًا ومرهقة. بالنسبة لمقاطع الفيديو التي أنتجها للعملاء، غالبًا ما لا يكون الصوت أولوية، لذا سأتجنب إضافة ميكروفون إلى إعداد المحور الثنائي الخاص بي. ومع ذلك، في مقاطع الفيديو الخاصة بي على YouTube، حصلت على نتائج رائعة من كل من Rode VideoMic Go وSennheiser MKE 600، اللذين يوفران جودة أكبر من Go، ولكن بحجم أكبر.

          وأخيرًا، مجموعة أدوات الطائرة بدون طيار عبارة عن حقيبة قائمة بذاتها تحتوي على جهاز Mavic 3 ووحدة تحكم وبطاريات احتياطية وبعض المرشحات وضوء للتصوير الليلي. من خلال الحفاظ على كل شيء معًا، من السهل إحضار طائرتي بدون طيار إلى جلسة التصوير، أو مجرد الإمساك بها للخروج والطيران لمشاريع شخصية.

          مافيك 3 + 24 مم f/2.8 @ 4.5 مم، ISO 100، 1/640، f/2.8


          Commercial Gear


          On my commercial shoots, the subject dictates the setup. A lot of the gear is the same as the landscape kit, but I’ll often bring more lighting, video, and drone gear.

          For lighting, I’ve got a portable setup built around Godox’s lights and wireless triggers. I’m a big fan of the inter-compatibility of the system, as well as the really strong price-to-performance ratio. My typical lights are the AD200 strobes, which can light a room for “flambient” (flash/ambient) real estate shots, but also be used up close through a modifier for product photos. The small size of the AD200 also means I can get away with compact light stands, keeping the overall kit portable.

          When it’s time to shoot video, I’m often still just using my Nikon Z7. For stabilization during walkthrough videos, I’ve previously been using a Ronin SC gimbal, although I recently started using a Zhiyun Weebill 3. For either of these gimbals, I like that they’re able to support my Z7 setup, without being really bulky and cumbersome. For the videos that I produce for clients, audio is often not a priority, so I’ll avoid adding a mic to my gimbal setup. On my videos for YouTube, however, I’ve gotten great results from both the Rode VideoMic Go and the Sennheiser MKE 600, which offers even more quality than the Go, but at a bigger size.

          Lastly, my drone kit is a self-contained bag with a Mavic 3, controller, spare batteries, a few filters, and a light for night photography. By keeping everything together, it’s easy to bring my drone on a shoot, or just grab it to go out and fly for personal projects.
          Mavic 3 + 24mm f/2.8 @ 4.5mm, ISO 100, 1/640, f/2.8

          تعليق


          • #6
            الصعاب والنهايات

            على مر السنين، قمت بالتقاط عدد من الأشياء في حقيبتي والتي ليست مجرد معدات للكاميرا، ولكنها يمكن أن تكون مفيدة حقًا. ومن بين هذه الأدوات بعض الأدوات، مثل أداة Leatherman المتعددة (مع ذلك، تأكد من عدم تجربة استخدام هذه الأداة) وأداة مخصصة متعددة الصور، والتي توفر مجموعة من الأجزاء المخصصة لمعدات الكاميرا مثل الحوامل ثلاثية القوائم ومسامير التثبيت. لقد استخدمت Leatherman الخاص بي في كل شيء بدءًا من سحب الصبار من يدي إلى تشديد البراغي السائبة وقطع الخيوط الخاطئة على حزام الكاميرا.

            كما أنني حرصت دائمًا على حمل بعض بطاقات العمل للتواصل المرتجل. يمكن أيضًا استخدام منشفة من الألياف الدقيقة لتجفيف المعدات بعد المطر فقط للالتفاف حول المعدات التي تحتاج إلى بعض التوسيد الإضافي. وأخيرًا، يمكن أن يؤدي وضع بطارية احتياطية وبطاقة ذاكرة في الحقيبة، حتى لو كانت ذات سعة أكبر أو أصغر، إلى حفظ عملية التصوير إذا نسيت أخذ البطارية أو البطاقة الجيدة معك.

            بشكل عام، لقد كنت سعيدًا جدًا بإعداداتي. لقد رأيت مصورين فوتوغرافيين أكثر دقة في تعبئة الأشياء، لكنهم يفضلون أن يكونوا مرنين. ما أقوم بتصويره يمكن أن يتغير بشكل جذري من يوم لآخر، وأحب أن يعكس إعداد معداتي ذلك. إنني أقدر حقًا أن أتمكن من تقليص مجموعتي عندما يكون ذلك ممكنًا، لذا فإن بعض إعداداتي الأساسية هي مجرد جسم وعدسة أو اثنتين.


            Odds and Ends


            Over the years, I have picked up a number of things in my bag that aren’t strictly camera gear, but can really come in handy. Among these are some tools, like a Leatherman multi-tool (make sure not to try and fly with this, however) and a dedicated photo multi-tool, which offers a range of dedicated bits for camera gear like tripods and mounting screws. I’ve used my Leatherman for everything from pulling cactus out of my hand to tightening loose screws and cutting errant threads on a camera strap.

            Also, I’ve always made sure to carry some business cards for impromptu networking. A microfiber towel for drying off gear after rain can also be used just to wrap around gear that needs some extra cushioning. Lastly, throwing a spare battery and a memory card into the bag, even if these are older or smaller capacity, can save a shoot if you forget to take your good battery or card with you.

            Overall, I’ve been pretty happy with my setup. I’ve seen photographers who are more meticulous with packing things away, but prefer to be flexible. What I photograph can change drastically from day to day, and I like my gear setup to reflect that. I really prize being able to slim my kit down when possible, so some of my most basic setups are just a body and a lens or two.

            تعليق

            يعمل...
            X