إعدادات نيكون D7100 الموصى بها Recommended Nikon D7100 Settings

تقليص
X
 
  • تصفية - فلترة
  • الوقت
  • عرض
إلغاء تحديد الكل
مشاركات جديدة

  • إعدادات نيكون D7100 الموصى بها Recommended Nikon D7100 Settings

    إعدادات نيكون D7100 الموصى بها
    Recommended Nikon D7100
    Settings


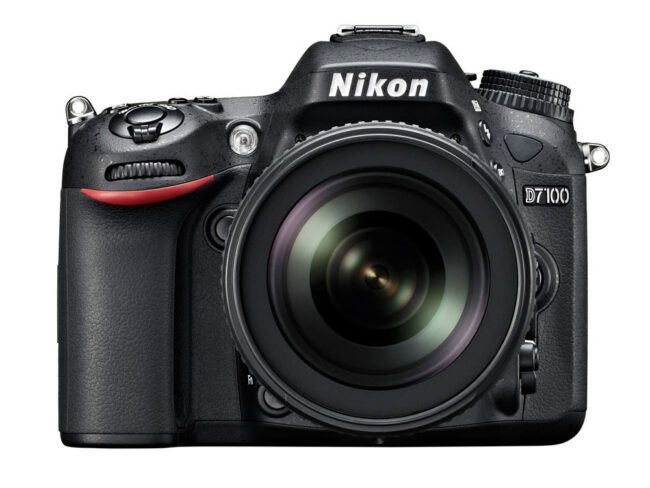
    أثناء مراجعة كاميرا Canon 7D Mark II، اضطررت إلى استعارة كاميرا Nikon D7100 لمقارنة جودة الصورة وميزات الكاميرا الأخرى. لذا، اعتقدت أن كتابة مقال حول الإعدادات الموصى بها لكاميرا D7100 سيكون مفيدًا لقرائنا. على الرغم من أن كاميرا Nikon D7100 ليست منافسًا مباشرًا لكاميرا 7D Mark II (وهذا هو دور كاميرا Nikon D500)، إلا أنها لا تزال كاميرا قوية يستخدمها العديد من المصورين لتلبية مجموعة متنوعة من الاحتياجات المختلفة. وعلى الرغم من ضعف سعة المخزن المؤقت، تُستخدم كاميرا D7100 غالبًا لتلبية احتياجات التصوير الفوتوغرافي للحياة البرية والرياضة.

    نظرًا لأن الكاميرا متطورة إلى حد ما من حيث إمكانياتها وميزاتها، مع العديد من القوائم والإعدادات المختلفة، فقد تبدو ساحقة إلى حد ما بالنسبة للمبتدئين. في هذه المقالة، أريد تقديم بعض المعلومات حول ما أستخدمه شخصيًا وأشرح باختصار ما تفعله بعض الإعدادات المهمة.

    من فضلك ضع في اعتبارك أنه على الرغم من أن إعدادات الكاميرا هذه تناسبني، إلا أن هذا لا يعني أنه يجب على الجميع التصوير بنفس الإعدادات تمامًا. يتم توفير المعلومات الواردة أدناه كدليل لأولئك الذين يريدون فقط البدء بالفهم الأساسي للكاميرا وميزاتها العديدة.


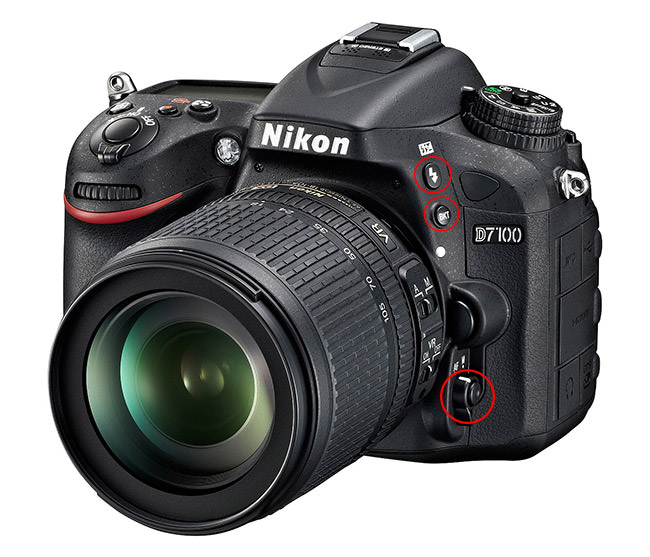
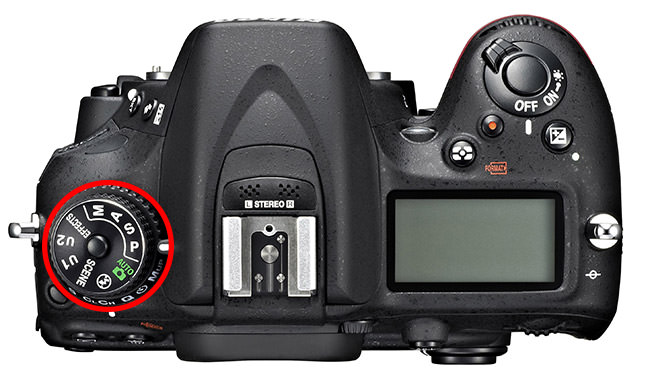
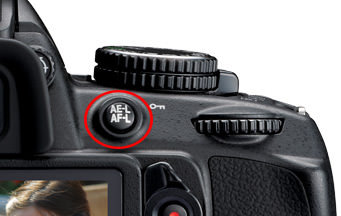
    قبل الدخول إلى قائمة الكاميرا، فلنبدأ أولاً في عناصر التحكم الخارجية. تحتوي كاميرا Nikon D7100 على الكثير من خيارات القائمة، ولكن هناك بعض الأشياء التي لا يمكنك التحكم فيها إلا باستخدام عناصر التحكم الخارجية.


    While reviewing the Canon 7D Mark II, I had to borrow the Nikon D7100 to compare image quality and other camera features. So, I thought doing an article on the recommended settings for the D7100 would be useful to our readers. Although the Nikon D7100 is not a direct competitor to the 7D Mark II (that’s more of the Nikon D500’s role), it is still a solid camera that is used for a variety of different needs by many photographers. And despite its crippled buffer capacity, the D7100 is often used for both wildlife and sports photography needs.

    Since the camera is rather sophisticated in terms of its capabilities and features, with many different menu and settings, it can look rather overwhelming for a beginner. In this article, I want to provide some information on what I personally use and shortly explain what some of the important settings do.

    Please do keep in mind that while these camera settings work for me, it does not mean that everyone else should be shooting with exactly the same settings. The below information is provided as a guide for those who just want to get started with a basic understanding of the camera and its many features.


    Before going into the camera menu, let’s first get started on the exterior controls. The Nikon D7100 has a lot of menu options, but there are some things that you can only control with external controls.
    التعديل الأخير تم بواسطة غدير معروف; الساعة 01-16-2024, 03:39 PM.

  • #2
    أوضاع التركيز التلقائي، والتصحيح، والفلاش

    في الجزء الأمامي الأيسر من الكاميرا، ستجد رافعة تنتقل من AF إلى M، مع وجود زر في المنتصف (دائرة حمراء كبيرة في الصورة أدناه). تأكد من إبقاء هذا الرافعة على وضع "AF"، وإلا فلن تقوم العدسة بالتركيز التلقائي. إذا توقفت عدستك عن التركيز لسبب ما، فهذا هو ما يجب عليك التحقق منه أولاً. يتيح لك الضغط على الزر الموجود في منتصف الذراع الاختيار بين أوضاع التركيز المختلفة.


    لتنشيط هذا التغيير، تحتاج إلى الضغط مع الاستمرار على الزر، ثم تدوير القرص الخلفي بإبهامك. أثناء قيامك بذلك، انظر إلى شاشة LCD العلوية وستقوم الكاميرا بالتبديل بين AF-A وAF-S وAF-C. لن أخوض في الكثير من التفاصيل حول كل وضع من أوضاع التركيز، حيث تم شرح كل ذلك بالتفصيل في هذه المقالة التي كتبتها منذ فترة. هنا خلاصة سريعة:

    AF-S - يُسمى هذا الوضع "Single-servo AF" ويستخدم فقط للأهداف الثابتة التي لا تتحرك. عندما تضغط نصف زر على زر الغالق، يتم قفل التركيز البؤري التلقائي على الهدف وإذا تحرك الهدف، فلن يتغير التركيز، مما يؤدي إلى صورة ضبابية. استخدم هذا الوضع فقط لتصوير الأهداف الثابتة (المناظر الطبيعية، والهندسة المعمارية، وما إلى ذلك). AF-C - المعروف باسم "التركيز البؤري التلقائي المستمر" في لغة نيكون، يُستخدم هذا الإعداد لتصوير الأهداف المتحركة. عندما تضغط نصف زر على زر الغالق ويتحرك هدفك، ستعيد الكاميرا التركيز. أحتفظ عادةً بالكاميرا في وضع التركيز البؤري التلقائي AF-C عند تصوير الأشخاص، وخاصة أطفالي وهم يركضون. AF-A - هذا الوضع موجود فقط في الكاميرات المنخفضة الجودة لتسهيل الأمر على المبتدئين. في الأساس، إنه مزيج من الوضعين المذكورين أعلاه في إعداد واحد. تقوم الكاميرا بتقييم الموضوع/المشهد والتبديل تلقائيًا بين الوضعين المذكورين أعلاه اعتمادًا على ما تقوم بتصويره.

    إذا كنت لا تعرف من أين تبدأ، فاحتفظ بالإعداد على AF-A، مما سيتيح للكاميرا أن تقرر كيفية التركيز في المواقف المختلفة.


    Autofocus Modes, Bracketing and Flash


    On the front left of the camera, you will find a lever that goes from AF to M, with a button in the middle (big red circle in the image below). Make sure to keep that lever on “AF”, or your lens will not autofocus. If for some reason your lens stops focusing, this is what need to check first. Pressing the button in the middle of the lever allows to choose between different focus modes.


    To activate this change, you need to press and hold the button, then rotate the rear dial with your thumb. As you do this, look at the top LCD and the camera will switch between AF-A, AF-S and AF-C. I won’t go into too much detail about each focus mode, since it is all explained in detail in this article that I wrote a while ago. Here is a quick recap:
    1. AF-S – this mode is called “Single-servo AF” and it is used only for stationary subjects that do not move. When you half-press the shutter button, autofocus lock on the subject and if the subject moves, the focus will not change, resulting in a blurry picture. Only use this mode for photographing stationary subjects (landscapes, architecture, etc).
    2. AF-C – known as “Continuous-servo AF” in Nikon’s lingo, this setting is used for photographing moving subjects. When you half-press the shutter button and your subject moves, the camera will re-acquire focus. I usually keep my camera in AF-C autofocus mode when photographing people, especially my kids running around.
    3. AF-A – this mode is only present on lower-end cameras to make it easier for beginners. Basically, it is a combination of the above two modes in one setting. The camera evaluates the subject/scene and automatically switches between the above two modes depending on what you are photographing.

    If you don’t know where to start, keep the setting on AF-A, which will let the camera decide on how to focus in different situations.

    تعليق


    • #3

      الآن إذا قمت بتدوير القرص الأمامي بإصبع السبابة أثناء الضغط على نفس الزر، فستحصل على العديد من الخيارات المختلفة مثل "S" و"D 9" و"D 21" و"D 51" و"3D" و"Auto" . توجد هذه الإعدادات للتحكم في نقاط التركيز التي تراها داخل عدسة الكاميرا. مرة أخرى، تم بالفعل شرح معظم هذه الأمور بالتفصيل في المقالة الموضحة لأوضاع التركيز التلقائي، لذلك لن أخوض في الكثير من التفاصيل هنا. إذا كنت لا تعرف من أين تبدأ، فاحتفظ به على "S" (مفرد)، والذي يتيح لك اختيار نقطة تركيز واحدة ستستخدمها الكاميرا للتركيز. دعنا ننتقل إلى الضوابط الخارجية الأخرى.

      ستجد أعلى ذراع التركيز البؤري التلقائي / M زرين إضافيين: زر الفلاش، الذي يسمح لك بضبط تعويض الفلاش بدقة وتعيين معلمات الفلاش الأخرى مثل مزامنة الفلاش الأمامي/الخلفي، وزر BKT (تقوس) للإعداد بين قوسين على الكاميرا. إعدادات الفلاش لا تهم حقًا، ولكن في الوقت الحالي تأكد فقط من إيقاف تشغيل كل شيء وإظهار "0.0" عند الضغط عليه مع الاستمرار. وبالمثل، تأكد من إيقاف تشغيل الأقواس أيضًا بالضغط على الزر والتحقق من شاشة LCD الخلفية. يجب أن يظهر "0F" على الجانب الأيسر، مما يعني أنه تم إيقاف تشغيل التصحيح (يجب أن تختفي أحرف "BKT" أيضًا). سيسمح استخدام القرص الأمامي بتغيير خطوات التصحيح وسيغير القرص الخلفي عدد الإطارات التي تم التقاطها في تسلسل بين قوسين. تسمح كاميرا D7100 بوضع ما يصل إلى 5 إطارات على حدة وما يصل إلى 3 نقاط توقف (EV).


      Now if you rotate the front dial with your index finger while holding the same button, you will get many different options like “S”, “D 9”, “D 21”, “D 51”, “3D” and “Auto”. These settings are there for controlling the focus points that you see inside the viewfinder. Once again, most of these are already explained in detail in my autofocus modes explained article, so I won’t go into too much detail here. If you don’t know where to start, keep it on “S” (Single), which lets you choose one single focus point that the camera will use for focusing. Let’s move on to other external controls.

      Right above the AF / M lever, you will find two additional buttons: the Flash button, which allows you to fine-tune flash compensation and set other flash parameters like front/rear flash sync, and the BKT (Bracketing) button to set up bracketing on the camera. Flash settings don’t really matter, but for now just make sure that everything is turned off and shows “0.0” when you press and hold it. Similarly, make sure that bracketing is also turned off by holding the button and checking the rear LCD. It should show “0F” on the left side, which means that bracketing is turned off (the “BKT” letters should also disappear). Using the front dial will allow changing bracketing steps and the rear dial will change the number of frames shot in a bracketing sequence. The D7100 allows bracketing up to 5 frames and up to 3 stops (EV) apart.

      تعليق


      • #4

        وضع التصوير وأقراص وضع الكاميرا

        ستجد في الجانب العلوي الأيسر من الكاميرا قرصًا مزدوجًا - الجزء العلوي يسمح بالتبديل بين أوضاع الكاميرا المختلفة (يُشار إليه غالبًا باسم قرص "PASM")، بينما يسمح الجزء السفلي بالتبديل بين أوضاع التصوير المختلفة. لقد قمت بضبط القرص العلوي على "A" (وضع أولوية فتحة العدسة) بنسبة 90% من الوقت، لأن الكاميرا تقوم بعمل رائع في إعطائي تعريضات ضوئية جيدة. بمجرد التعرف على الكاميرا بشكل أفضل، أوصي باستكشاف إعدادات "U1" / "U2" (المزيد حول هذا أدناه ضمن قائمة الإعداد)، لأنها يمكن أن توفر لك الوقت عند التبديل بين بيئات التصوير المختلفة (على سبيل المثال، عند التبديل بين بيئات التصوير المختلفة). تصوير المناظر الطبيعية لتشغيل الاطفال).


        يحتوي القرص السفلي على مجموعة من أوضاع التصوير مثل "S" (فردي)، و"Cl, Ch" (منخفض مستمر ومرتفع مستمر)، و"Q" (هادئ)، و"Qc" (هادئ مستمر)، ومؤقت وMup (مرآة). اغلق). عادةً ما يتم ضبط خاصيتي على "S" والذي يطلق طلقة واحدة فقط عندما أضغط على زر تحرير الغالق. إذا أردت أن تقوم الكاميرا بإطلاق عدة لقطات عند تصوير الحركة، فإنني أتحول إلى "Ch". نادرًا ما أستخدم إعدادات أخرى، ولكن يمكن أن تكون مفيدة أيضًا، خاصة ميزة المؤقت التي أستخدمها عند تصوير المناظر الطبيعية لتقليل الاهتزازات (المزيد حول هذا أدناه).

        وبصرف النظر عن ما سبق، لا تقلق بشأن أي أزرار أخرى على الكاميرا. الآن دعنا ننتقل إلى قائمة إعدادات الكاميرا.


        Shooting Mode and Camera Mode Dials


        On the top left side of the camera you will find a double dial – the top portion allows switching between different camera modes (often referred to as the “PASM” dial), while the bottom part allows switching between different shooting modes. I have my top dial set to “A” (Aperture Priority Mode) 90% of the time, because the camera does a great job in giving me good exposures. Once you get to know the camera better, I would recommend to explore the “U1” / “U2” settings (more on this below under Setup Menu), because they could save you time when switching between different shooting environments (say when switching between photographing landscapes to running kids).


        The lower dial has a bunch of shooting modes like “S” (Single), “Cl, Ch” (Continuous low and Continuous High), “Q” (Quiet), “Qc” (Quiet Continuous), Timer and Mup (Mirror lock-up). Mine is usually set to “S” which only fires a single shot when I press the shutter release button. If I want the camera to fire multiple shots when shooting action, I switch to “Ch”. I rarely use other settings, but those can be useful as well, particularly the timer feature that I use when shooting landscapes to reduce vibrations (more on this below).

        Aside from the above, don’t worry about any other buttons on the camera. Now let’s move to the camera settings menu.

        تعليق


        • #5
          قائمة التشغيل

          نادرًا ما ألمس أي شيء في قائمة التشغيل، نظرًا لأن ذلك يُستخدم فقط لعرض الصور على شاشة LCD الخلفية. الإعدادان الوحيدان اللذان أعبث بهما هما "خيارات عرض التشغيل" و"التدوير طويلًا". يمكن أن تكون "خيارات عرض التشغيل" مفيدة عند مراجعة الصور. عندما تضغط على زر التشغيل الموجود في الجزء الخلفي من الكاميرا، يمكنك الضغط على الأزرار لأعلى/لأسفل وستتمكن من رؤية أنواع مختلفة من المعلومات. وللحفاظ على الفوضى، قمت بتشغيل ثلاثة أشياء: "نقطة التركيز"، والتي تسمح لي برؤية المكان الذي ركزت عليه، و"الإبرازات" لإظهار التعريض الزائد في اللقطات (المعروف أيضًا باسم "وميض") و"نظرة عامة"، والتي تمنحني رؤية واضحة. ملخص التعرض الخاص بي (سرعة الغالق، فتحة العدسة، ISO، البعد البؤري، إلخ). أقوم دائمًا بإيقاف تشغيل إعداد "التدوير طويلًا"، لأنني لا أريد أن تقوم الكاميرا بتغيير الصور الرأسية إلى الصور الأفقية عندما أقوم بمراجعتها - فمن الأسهل بكثير تدوير الكاميرا لرؤية صورة رأسية، بدلاً من الاضطرار إلى تكبير كل صورة. مرة واحدة. يوجد الآن إعداد آخر تريد الاحتفاظ به وهو موجود في قائمة الإعداد: يسمى "التدوير التلقائي للصورة". هذه الميزة المحددة هي التي تكتب الاتجاه الصحيح في كل صورة، بحيث عندما تقوم باستيراد الصورة إلى Lightroom أو أي برنامج آخر لمرحلة ما بعد المعالجة، فإنه سيتم تدويرها تلقائيًا. إذا قمت بتعطيل هذه الميزة، فسيتعين عليك تدوير كل صورة يدويًا بعد الاستيراد.

          كل شيء آخر هو الافتراضي في قائمة التشغيل.


          Playback Menu


          I rarely ever touch anything in the Playback menu, since that’s only used for displaying pictures on the rear LCD. The only two settings that I ever mess with are “Playback display options” and “Rotate tall”. The “Playback display options” can be useful when reviewing images. When you press the playback button on the back of the camera, you can press up/down buttons and you will be able to see different types of information. To keep the clutter out, I have three things turned on: “Focus point”, which allows me to see where I focused, “Highlights” to show overexposure in shots (a.k.a. “blinkies”) and “Overview”, which gives me a summary of my exposure (shutter speed, aperture, ISO, focal length, etc). I always turn the “Rotate tall” setting off, because I do not want my camera to change vertical images to horizontal when I review them – it is much easier to rotate the camera to see a vertical image, rather than having to zoom in every single time. Now there is another setting that you do want to keep and it is in the Setup Menu: it is called “Auto image rotation”. That particular feature is what writes the correct orientation into each image, so that when you import the photo into Lightroom or other post-processing software, it will automatically rotate it. If you disable this feature, you will have to rotate each image manually after import.

          Everything else is default in the Playback Menu.

          تعليق


          • #6
            قائمة تصوير الصور

            لننتقل الآن إلى قائمة التقاط الصور، وهو المكان الأول الذي أذهب إليه عادةً عند التحقق من إعداداتي. سأقدم قيمي أولاً، ثم أتحدث عن الإعدادات المهمة:

            إعادة تعيين قائمة تصوير الصور: —مجلد التخزين: افتراضي، لا تغير تسمية الملف: DSC (افتراضي)، لا تغير الدور الذي تلعبه البطاقة في الفتحة 2: الفائض جودة الصورة: NEF (RAW) حجم الصورة: رمادي خارج منطقة الصورة DX (24×16) ): افتراضي، لا تتغير 1.3× (18×12) ضغط JPEG: جودة مثالية تسجيل NEF (RAW): النوع: عمق بت NEF (RAW) مضغوط بدون فقدان: 14 بت توازن اللون الأبيض: تلقائي (AUTO1 عادي) ضبط برنامج التحكم بالصورة Picture Control: SD (قياسي)، القيم الافتراضية إدارة برنامج التحكم بالصورة Picture Control: —مساحة اللون: Adobe RGBActive D-Lighting: OFFHDR (النطاق الديناميكي العالي): إيقاف (رمادي) التحكم التلقائي في التشوه: OFFتعريض طويل NR: OFFHigh ISO NR: إعدادات حساسية OFFISO حساسية ISO: 100Auto ISO التحكم في الحساسية: تشغيل الحد الأقصى للحساسية: 3200 الحد الأدنى لسرعة الغالق: تلقائي -> منتصف المقياس وضع التحكم عن بعد (ML-L3): 2 ثانية التعرض المتعدد: إيقاف التصوير بمؤقت الفاصل الزمني: إيقاف إعدادات الفيلم حجم الإطار/معدل الإطار: 1920×1080؛ 24 بكسل جودة الفيلم: عالي الميكروفون: حساسية يدوية 10 الوجهة: الفتحة 1

            على الرغم من وجود الكثير من الإعدادات المختلفة هنا، فلا تقلق – فلن تقوم بتغيير العديد من الإعدادات كثيرًا. دعنا نستعرض بعض الإعدادات المهمة. الأول هو "الدور الذي تلعبه البطاقة في الفتحة 2"، والذي يسمح لك باختيار ما تريد القيام به باستخدام فتحات البطاقة المزدوجة في الكاميرا. إذا قمت بالتصوير باستخدام بطاقات متعددة، يمكنك ضبط الكاميرا لحفظ الصور بثلاث طرق مختلفة. يمكنك ضبطه على "Overflow"، والذي يقوم بشكل أساسي بحفظ الصور على البطاقة الأولى، ثم عندما تنفد المساحة، تبدأ الكاميرا في الحفظ على البطاقة الثانية. عادةً ما أضبط خياري على Overflow، إلا إذا كنت أعمل على شيء مهم حقًا وأحتاج إلى نسخ الصور احتياطيًا. وبالحديث عن النسخ الاحتياطي/التكرار، فهذا هو ما تستخدم الإعداد الثاني "النسخ الاحتياطي" من أجله. بمجرد تحديده، ستقوم الكاميرا بحفظ الصور على بطاقتي الذاكرة في نفس الوقت. يتيح لك الإعداد الأخير حفظ ملفات RAW على بطاقة واحدة وملفات JPEG على بطاقة أخرى. بالنسبة للتصوير اليومي، ما عليك سوى تركه على "Overflow" وإذا كنت تريد حقًا التأكد من عدم فقدان صورك في حالة فشل إحدى البطاقات، فاختر "Backup".


            Photo Shooting Menu


            Let’s now go through the Photo Shooting Menu, which is the first place that I usually go to when checking my settings. I will first provide my values, then talk about the important settings:
            • Reset photo shooting menu: —
            • Storage folder: default, don’t change
            • File naming: DSC (default), don’t change
            • Role played by card in Slot 2: Overflow
            • Image quality: NEF (RAW)
            • Image size: grayed out
            • Image area
              • DX (24×16): default, don’t change
              • 1.3x (18×12)
            • JPEG compression: Optimal quality
            • NEF (RAW) recording:
              • Type: Lossless compressed
              • NEF (RAW) bit depth: 14-bit
            • White balance: AUTO (AUTO1 Normal)
            • Set Picture Control: SD (Standard), Default values
            • Manage Picture Control: —
            • Color space: Adobe RGB
            • Active D-Lighting: OFF
            • HDR (high dynamic range): OFF (grayed out)
            • Auto distortion control: OFF
            • Long Exposure NR: OFF
            • High ISO NR: OFF
            • ISO sensitivity settings
              • ISO sensitivity: 100
              • Auto ISO sensitivity control: ON
                • Maximum sensitivity: 3200
                • Minimum shutter speed: Auto -> Middle of the scale
            • Remote control mode (ML-L3): 2s
            • Multiple exposure: OFF
            • Interval timer shooting: OFF
            • Movie settings
              • Frame size/frame rate: 1920×1080; 24p
              • Movie quality: HIGH
              • Microphone: Manual sensitivity 10
              • Destination: Slot 1

            While there are a lot of different settings here, do not worry – you won’t be changing many settings very often. Let’s go through some of the important settings. The first one is “Role played by card in Slot 2”, which allows you to choose what you want to do with the dual card slots of your camera. If you shoot with multiple cards, you can set the camera to save images in three different ways. You can set it to “Overflow”, which basically saves images to the first card, then when the space runs out, the camera starts saving to the second card. I usually set mine to Overflow, unless I am working on something really important and need to backup images. And speaking of backup/redundancy, that’s what you use the second setting “Backup” for. Once selected, the camera will save photos to both memory cards at the same time. The last setting allows you to save RAW files to one card and JPEG files to another. For your day to day shooting, just leave it on “Overflow” and if you really need to make sure that your photos are not lost if one of the cards fails, then choose “Backup”.

            تعليق


            • #7
              من الواضح أن جودة الصورة مضبوطة على RAW، لأنني ألتقط صور RAW فقط. يتم دائمًا ضبط "تسجيل NEF (RAW)" على ضغط 14 بت بدون فقدان البيانات. أريد أفضل جودة صورة يمكن أن توفرها الكاميرا. "توازن اللون الأبيض" هو تلقائي ويتم إيقاف تشغيل كافة الإعدادات الأخرى مثل عناصر التحكم بالصورة Picture Control وActive D-Lighting وHDR وما إلى ذلك، حيث لا يؤثر أي منها (باستثناء "Long Exposure NR") على صور RAW. تذكر أن ملفات RAW تحتوي على بيانات لم يتم التلاعب بها وتتطلب معالجة لاحقة، وبالتالي فإن الإعدادات المذكورة أعلاه تؤثر فقط على شيئين: الصور المعروضة على شاشة LCD الخاصة بالكاميرا (يحتوي كل ملف RAW على صورة JPEG بالحجم الكامل، وهو ما يتم استخدامه للعرض الصور) وإذا كنت تستخدم برنامجًا خاصًا بشركة Nikon مثل Capture NX، فيمكن تطبيق هذه الإعدادات على صور RAW تلقائيًا. وبما أنني أستخدم Lightroom لتخزين ومعالجة صوري، فإن الجزء الثاني لا ينطبق علي. كما أنني لا أهتم كثيرًا بكيفية عرض الصور على شاشة LCD الخاصة بالكاميرا، لذا أترك كل شيء مغلقًا.

              على الرغم من أن مساحة اللون لا تهم ملفات RAW، إلا أنني الآن أستخدم AdobeRGB لأنه يوفر رسمًا بيانيًا أكثر دقة قليلاً لتحديد التعريض الضوئي الصحيح (نظرًا لأن الكاميرا تعرض رسمًا بيانيًا استنادًا إلى صورة JPEG التي تعرضها الكاميرا، حتى إذا كنت تقوم بالتصوير بصيغة RAW حصريًا).

              إعداد القائمة الكبيرة الذي أقوم بتغييره بشكل متكرر هو "إعدادات حساسية ISO". في أغلب الأحيان، أستخدم Auto ISO، لأنها ميزة رائعة توفر لي الكثير من الوقت. بدلاً من تحديد ISO لكل لقطة، قمت فقط بضبطها على تلقائي، مع ضبط ISO الأساسي على 100، وتعيين الحساسية القصوى على 3200 (الحد الشخصي لمستويات الضوضاء "المقبولة") وتعيين الحد الأدنى لسرعة الغالق على "تلقائي". والذي يغير تلقائيًا الحد الأدنى لسرعة الغالق ليتناسب مع البعد البؤري الذي أستخدمه. عند استخدام عدسة مثبتة الصورة (VR)، قد أقوم بخفض الحد الأدنى لسرعة الغالق "تلقائي" إلى "أبطأ" وإذا قمت بالتصوير باستخدام عدسة أساسية وأردت الحصول على سرعات غالق أسرع (على سبيل المثال عند تصوير الحياة البرية)، فإنني أقوم بتحريك شريط التمرير نحو "أسرع". عند تصوير المناظر الطبيعية أو الهندسة المعمارية باستخدام الكاميرا المثبتة على حامل ثلاثي الأرجل، أقوم بإيقاف تشغيل ISO التلقائي واستخدم ISO 100 لأعلى نطاق ديناميكي وأقل مستويات الضوضاء. بالمناسبة، يمكنك بسهولة تشغيل وإيقاف ISO التلقائي عن طريق الضغط على زر ISO الموجود في الجزء الخلفي من الكاميرا، ثم تدوير القرص الأمامي.


              Image quality” is obviously set to RAW, since I only shoot RAW. “NEF (RAW) recording” is always set on mine to 14-bit Lossless compressed. I want the best image quality the camera can provide. “White Balance” is Auto and all other settings like Picture Controls, Active D-Lighting, HDR, etc. are turned off, since none of them (with the exception of “Long Exposure NR”) affect RAW images. Remember, RAW files contain non-manipulated data and require post-processing, so the above settings only impact two things: images displayed by your camera’s LCD screen (each RAW file contains a full-size JPEG image, which is what is used to display images) and if you use Nikon’s proprietary software like Capture NX, those settings can be applied to RAW images automatically. Since I use Lightroom to store and process my images, the second part does not apply to me. And I also do not care much about how images are displayed on the camera’s LCD, so I leave everything turned off.

              Although color space does not matter for RAW files, I now use AdobeRGB because it gives a slightly more accurate histogram to determine the correct exposure (since the camera shows histogram based on camera-rendered JPEG image, even if you shoot exclusively in RAW).

              The big menu setting that I frequently change is “ISO sensitivity settings”. Most of the time, I use Auto ISO, because it is a great feature that saves me a lot of time. Instead of specifying ISO for every shot, I just have it set on Auto, with its base ISO set to 100, Maximum sensitivity set to 3200 (my personal limit for “acceptable” noise levels) and Minimum shutter speed set to “Auto”, which automatically changes the minimum shutter speed to match the focal length I am using. When using an image stabilized (VR) lens, I might lower the “Auto” minimum shutter speed to “Slower” and if I shoot with a prime lens and want to have faster shutter speeds (say when photographing wildlife), I move the slider towards “Faster”. When photographing landscapes or architecture with the camera mounted on a tripod, I turn Auto ISO off and use ISO 100 for the highest dynamic range and lowest noise levels. By the way, you can easily turn Auto ISO on and off by holding the ISO button on the back of the camera, then rotating the front dial.

              تعليق


              • #8

                قائمة الإعدادات المخصصة

                هذا هو المكان الذي يضيع فيه الكثير من الأشخاص، نظرًا لوجود العديد من الإعدادات المختلفة. فيما يلي الإعدادات التي أستخدمها شخصيًا:

                تحديد أولوية التركيز البؤري التلقائي AF-C: تحديد أولوية إطلاق AF-S: تتبع التركيز البؤري مع القفل: AF 3 (عادي) إضاءة نقطة التركيز البؤري التلقائي: التفاف نقطة التركيز البؤري التلقائي: إيقاف عدد نقاط التركيز البؤري: AF51 مصباح مساعد التركيز البؤري التلقائي المدمج: ONMetering/exposureISO قيمة خطوة الحساسية: خطوات 1/3EV للتحكم في التعريض الضوئي: 1/3 تعويض التعريض السهل: إيقاف المنطقة المركزية المرجحة: 8 مم ضبط التعريض الضوئي الأمثل: —المؤقتات/قفل AE زر تحرير الغالق AE-L: OFF مؤقت الاستعداد: 6 ثوانٍ مؤقت ذاتي تأخير المؤقت الذاتي : 5 ثواني عدد اللقطات: 1 الفاصل الزمني بين اللقطات: 0.5 ثانية تأخير إيقاف تشغيل الشاشة: 10 ثوانٍ، 1 م، 10 ثوانٍ، 4 ثوانٍ، 10 م مدة تشغيل جهاز التحكم عن بعد (ML-L3): 1 م


                Custom Setting Menu


                This is where a lot of people get lost, since there are so many different settings. Here are the settings that I personally use:
                • Autofocus
                  • AF-C priority selection: Release
                  • AF-S priority selection: Focus
                  • Focus tracking with lock-on: AF 3 (Normal)
                  • AF point illumination: Auto
                  • Focus point wrap-around: OFF
                  • Number of focus points: AF51
                  • Built-in AF-assist illuminator: ON
                • Metering/exposure
                  • ISO sensitivity step value: 1/3
                  • EV steps for exposure cntrl: 1/3
                  • Easy exposure compensation: OFF
                  • Center-weighted area: 8mm
                  • Fine-tune optimal exposure: —
                • Timers/AE lock
                  • Shutter-release button AE-L: OFF
                  • Standby timer: 6s
                  • Self-timer
                    • Self-timer delay: 5s
                    • Number of shots: 1
                    • Interval between shots: 0.5s
                  • Monitor off delay: 10s, 1m, 10s, 4s, 10m
                  • Remote on duration (ML-L3): 1m

                تعليق


                • #9

                  التصوير/العرض حجم الصوت: OFFPitch: عرض شبكة Low Viewfinder: عرض ONISO وتعديله: نصائح OFFScreen: سرعة التصوير في وضع ONCL: 3 إطار في الثانية الحد الأقصى. إطلاق مستمر: 100 تسلسل رقم الملف: ON عرض المعلومات: AUTOLCD الإضاءة: OFF وضع تأخير التعرض: OFF تحذير الفلاش: OFFMB-D15 نوع البطارية: LR6 طلب البطارية: MB-D15 Bracketing/flash سرعة مزامنة الفلاش: 1/320 (Auto FP) سرعة مصراع الفلاش: 1/ 60Flash cntrl للفلاش المدمج: TTLExposure comp. للفلاش: الإطار بأكمله، فلاش النمذجة: ON، مجموعة تصحيح تلقائي: AE وفلاش، ترتيب الأقواس: تحت > MTR > أكثر
                  • Shooting/display
                    • Beep
                      • Volume: OFF
                      • Pitch: Low
                    • Viewfinder grid display: ON
                    • ISO display and adjustment: OFF
                    • Screen tips: ON
                    • CL mode shooting speed: 3 fps
                    • Max. continuous release: 100
                    • File number sequence: ON
                    • Information display: AUTO
                    • LCD illumination: OFF
                    • Exposure delay mode: OFF
                    • Flash warning: OFF
                    • MB-D15 battery type: LR6
                    • Battery order: MB-D15
                  • Bracketing/flash
                    • Flash sync speed: 1/320 (Auto FP)
                    • Flash shutter speed: 1/60
                    • Flash cntrl for built-in flash: TTL
                    • Exposure comp. for flash: Entire frame
                    • Modeling flash: ON
                    • Auto bracketing set: AE & flash
                    • Bracketing order: Under > MTR > over

                  تعليق


                  • #10

                    عناصر التحكم زر موافق وضع التصوير: إعادة تعيين وضع التشغيل: تشغيل/إيقاف التكبير -> تكبير متوسط ​​عرض مباشر: زر RESETAssign Fn: الوصول إلى العنصر العلوي في قائمتي زر معاينة التعيين: PreviewAssign زر AE-L/AF-L: الضغط على زر AE-L / AF-L: قفل AE/AF تخصيص أقراص الأوامر: زر التحرير الافتراضي بالكامل لاستخدام القرص: OFFقفل تحرير الفتحة الفارغة: LOCKالمؤشرات العكسية: – 0 +Assign MB-D15 زر AE-L/AF-L: قفل AE/AFMovieAssign زر Fn: OFFAssign زر المعاينة: OFFAssign زر AE-L/AF-L: قفل AE/AF زر الغالق المخصص: التقاط الصور

                    هذا كثير من الخيارات! مرة أخرى، لن أخوض في تفاصيل حول كل إعداد، لذا اسمحوا لي أن أتطرق إلى أهم الإعدادات التي يجب أن تعرفها. يعد قسم "التركيز التلقائي" مهمًا جدًا، لأنه يتحكم في طريقة تكوين التركيز التلقائي للكاميرا. يوجد أول إعدادين "اختيار أولوية AF-C" و"اختيار أولوية AF-S" للمساعدة في التصوير في الأوضاع الفردية أو المستمرة. يؤدي إعداد "التركيز البؤري" في تحديد "اختيار أولوية AF-S" إلى إجبار الكاميرا على الحصول على التركيز البؤري قبل التقاط اللقطة. على عكس كاميرات Nikon DSLR السابقة، ستظل كاميرا D7100 تسمح لك بالتقاط لقطة إذا قمت "بالتركيز وإعادة التركيب" في وضع AF-S.
                    • Controls
                      • OK button
                        • Shooting mode: RESET
                        • Playback mode: Zoom on/off -> Medium magnification
                        • Live view: RESET
                      • Assign Fn button: Access top item in MY MENU
                      • Assign preview button: Preview
                      • Assign AE-L/AF-L button: AE-L / AF-L button press: AE/AF lock
                      • Customize command dials: All default
                      • Release button to use dial: OFF
                      • Slot empty release lock: LOCK
                      • Reverse indicators: – 0 +
                      • Assign MB-D15 AE-L/AF-L button: AE/AF lock
                    • Movie
                      • Assign Fn button: OFF
                      • Assign preview button: OFF
                      • Assign AE-L/AF-L button: AE/AF lock
                      • Assign shutter button: Take photos

                    That’s a lot of options! Once again, I won’t go into details about each setting, so let me just go over the most important ones that you should know about. The “Autofocus” section is pretty important, because it controls the way your camera autofocus is configured. The first two settings “AF-C priority selection” and “AF-S priority selection” are there to assist in shooting in Single or Continuous modes. The “Focus” setting in the “AF-S priority selection” selection forces the camera to acquire focus before taking the shot. Unlike earlier Nikon DSLRs, the D7100 will still let you take a shot if you “focus and recompose” in AF-S mode.

                    تعليق


                    • #11
                      هذا كثير من الخيارات! مرة أخرى، لن أخوض في تفاصيل حول كل إعداد، لذا اسمحوا لي أن أتطرق إلى أهم الإعدادات التي يجب أن تعرفها. يعد قسم "التركيز التلقائي" مهمًا جدًا، لأنه يتحكم في طريقة تكوين التركيز التلقائي للكاميرا. يوجد أول إعدادين "اختيار أولوية AF-C" و"اختيار أولوية AF-S" للمساعدة في التصوير في الأوضاع الفردية أو المستمرة. يؤدي إعداد "التركيز البؤري" في تحديد "اختيار أولوية AF-S" إلى إجبار الكاميرا على الحصول على التركيز البؤري قبل التقاط اللقطة. على عكس كاميرات Nikon DSLR السابقة، ستظل كاميرا D7100 تسمح لك بالتقاط لقطة إذا قمت "بالتركيز وإعادة التركيب" في وضع AF-S.

                      الإعداد التالي هو "تتبع التركيز البؤري مع القفل"، والذي أحتفظ به عادةً على الإعداد الافتراضي "3". يتحكم هذا الإعداد في مدى سرعة إعادة تشغيل التركيز البؤري التلقائي عندما يكتشف أخطاء التركيز. عند تصوير الطيور أثناء طيرانها، أميل إلى تقليل هذا الإعداد إلى تأخيرات قصيرة، لأنني أريد إعادة تشغيل التركيز البؤري التلقائي حتى مع التغييرات الصغيرة. وفي بقية الوقت، أبقي الأمر طبيعيًا ولا أضطر أبدًا إلى الانتظار لفترة طويلة.


                      That’s a lot of options! Once again, I won’t go into details about each setting, so let me just go over the most important ones that you should know about. The “Autofocus” section is pretty important, because it controls the way your camera autofocus is configured. The first two settings “AF-C priority selection” and “AF-S priority selection” are there to assist in shooting in Single or Continuous modes. The “Focus” setting in the “AF-S priority selection” selection forces the camera to acquire focus before taking the shot. Unlike earlier Nikon DSLRs, the D7100 will still let you take a shot if you “focus and recompose” in AF-S mode.

                      The next setting is “Focus tracking with lock-on”, which I normally keep at the default setting of “3”. This setting controls how quickly your autofocus will re-engage when it detects focus errors. When shooting birds in flight, I tend to reduce that setting to short delays, because I want autofocus to re-engage even with smaller changes. The rest of the time, I keep it in normal and almost never go up to long waits.

                      تعليق


                      • #12
                        "مصباح مساعدة التركيز البؤري التلقائي المدمج" هو المصباح الموجود في مقدمة الكاميرا والذي يتم تشغيله عند التصوير في وضع التركيز البؤري AF-S. إذا كان الهدف مظلمًا، فسيتم تشغيل الضوء الأمامي وإلقاء الضوء على الهدف الذي تقوم بتصويره، مما سيساعد نظام التركيز التلقائي على الحصول على التركيز المناسب. أجد الضوء مفيدًا في حالات الإضاءة المنخفضة، لذا أبقي هذا الإعداد قيد التشغيل.

                        لا أعبث مطلقًا بأي من إعدادات "القياس/التعرض"، لذا أوصي فقط بتركها على القيم الافتراضية. أود أيضًا تخطي القسم الفرعي "Timers/AE lock" بالكامل.

                        ضمن "التصوير/العرض"، أول شيء أفعله دائمًا هو إيقاف تشغيل صوت تأكيد التركيز. غالبًا ما أستعيد التركيز عدة مرات وأكره إزعاج أي شخص بأصوات التنبيه الصادرة من الكاميرا.

                        تعد "شاشة عرض شبكة عدسة الكاميرا" ميزة أنيقة تعمل على إنشاء خطوط رأسية وأفقية داخل عدسة الكاميرا. أستخدم هذه الشبكات طوال الوقت عند إنشاء لقطاتي - فهي أدوات رائعة لمحاذاة الأفق أفقيًا أو رأسيًا وإلقاء نظرة بصرية أفضل على الإطارات/التركيب.


                        The “Built-in AF-assist illuminator” is the lamp on the front of the camera that is engaged when shooting in AF-S focus mode. If the subject is dark, the front light will turn on and illuminate the subject you are photographing, which will help the autofocus system to acquire proper focus. I find the light to be helpful in low-light situations, so I keep that setting turned on.

                        I never mess with any of the “Metering/exposure” settings, so I would just recommend to leave them at default values. I would also skip the whole “Timers/AE lock” sub-section.

                        Under “Shooting/display”, the first thing I always do is turn off the focus confirmation beep. I often re-acquire focus many times and I would hate to annoy anyone with the beeps coming from my camera.

                        The “Viewfinder grid display” is a neat feature that creates vertical and horizontal lines inside the viewfinder. I use those grids all the time when composing my shots – they are great tools for aligning the horizon horizontally or vertically and having a better visual look at my framing / composition.

                        تعليق


                        • #13

                          عند التصوير في أوضاع أخرى غير الوضع اليدوي (على سبيل المثال أولوية فتحة العدسة)، تسمح كاميرا Nikon D7100 بتغيير ISO باستخدام القرص الخلفي أو الأمامي، وهو ما يمكن أن يكون لطيفًا عندما يحتاج المرء إلى ضبط ISO بسرعة بيد واحدة. يمكن تمكين ذلك بالانتقال إلى "عرض وضبط ISO" وضبطه على "إظهار ISO/Easy ISO". ومع ذلك، هناك جانب سلبي لهذه الميزة مزعج إلى حد ما - بمجرد القيام بذلك، لن تظهر لك الكاميرا بعد الآن عدد اللقطات المتبقية في بطاقة الذاكرة الخاصة بك! لهذا السبب، عادةً ما أقوم بتعطيل هذه الميزة واختيار "إظهار عدد الإطارات" بدلاً من ذلك. إذا كنت لا تهتم برؤية عدد اللقطات المتبقية في بطاقتك، فإنني أوصي باستخدام هذه الميزة. لقد عالجت شركة Nikon هذه المقايضة في كاميرا Nikon D750، التي تحتوي الآن على إعداد "Easy ISO" مخصص - ولم يعد تحديد هذا الخيار يؤثر على عرض عدد الصور.

                          الإعداد الكبير الذي أعتمد عليه غالبًا عند تصوير المناظر الطبيعية هو "وضع تأخير التعريض الضوئي". تعد هذه الميزة بمثابة جوهرة في أحدث كاميرات Nikon DSLR، لأنها ترفع أولاً مرآة الكاميرا (التي تولد الكثير من الاهتزازات)، ثم تنتظر فترة زمنية محددة وبعد ذلك فقط تفتح الغالق لالتقاط الصورة. والشيء الجميل هو أنه يمكنك تحديد ما يصل إلى 3 ثوان من التأخير، والتي يمكن أن تقضي تماما على "صفعة المرآة" المخيفة. عندما أقوم بإجراء ورش عمل حول تصوير المناظر الطبيعية، غالبًا ما أتجول حول المشاركين وأتحقق من كيفية تشغيل كاميراتهم. أولئك الذين ليس لديهم أجهزة تحكم عن بعد للكاميرا (إصدار كابل عن بعد) يشعرون في البداية بالإحباط، ولكن بمجرد اكتشافهم لهذه الميزة الرائعة، فإنهم لا يندمون على عدم إحضار مشغلات عن بعد بعد الآن (لاحظ أن المشغلات عن بعد يمكن أن تكون مفيدة جدًا لاستخدامات أخرى رغم ذلك). أفضل جزء في هذه الميزة بالذات هو أنه يمكنك استخدامها فعليًا مع مؤقت الكاميرا! إذا قمت بضبط القرص الثانوي الموجود أعلى الكاميرا على Timer، ثم قمت بتعيين "تأخير المؤقت الذاتي" على ما يقرب من 5 ثوانٍ، فيمكنك التخلص تمامًا من اهتزاز الكاميرا. بشكل أساسي، المؤقت الأولي الذي يبلغ 5 ثوانٍ هو أن تستقر الكاميرا بعد الضغط على زر الغالق. بعد الانتظار لمدة 5 ثوانٍ، يتم تشغيل ميزة "وضع تأخير التعريض الضوئي" ويتم رفع المرآة. تنتظر الكاميرا 3 ثوانٍ إضافية قبل أن يفتح الغالق أخيرًا ويتم التقاط الصورة. هذه ميزة رائعة أوصي بشدة باستخدامها عند تصوير المناظر الطبيعية والهندسة المعمارية في ظروف الإضاءة المنخفضة / سرعات الغالق البطيئة جدًا.


                          When shooting in modes other than Manual (for example Aperture Priority), the Nikon D7100 allows changing ISO with the rear or front dial, which can be nice when one needs to adjust ISO quickly with one hand. This can be enabled by going to “ISO display and adjustment” and setting it to “Show ISO/Easy ISO”. However, there is a downside to this feature that is rather annoying – once you do this, the camera will no longer show you the number of remaining shots left in your memory card! For this reason, I usually disable this feature and pick “Show frame count” instead. If you do not care about seeing how many shots are left in your card, then I would recommend to use this feature. Nikon has addressed this trade-off in the Nikon D750, which now has a dedicated “Easy ISO” setting – picking that option no longer affects the display of the image count.

                          The big setting that I often rely on when photographing landscapes is “Exposure delay mode”. This feature is a gem on the latest Nikon DSLRs, because it first lifts the camera mirror (which generates a lot of vibrations), then waits a specified amount of time and only then opens up the shutter to capture the image. The nice thing is, you can specify up to 3 seconds of delay, which can completely eliminate the dreaded “mirror slap”. When I conduct my landscape photography workshops, I often walk around the participants and check how they trigger their cameras. Those, that do not have camera remotes (remote cable release) initially feel frustrated, but once they discover this neat feature, they don’t regret that they did not bring remote triggers anymore (note that remote triggers can be very useful for other uses though). The best part about this particular feature, is that you can actually use it in conjunction with the camera timer! If you set the secondary dial on the top of the camera to Timer, then set the “Self-timer delay” to something like 5 seconds, you can completely eliminate camera shake. Basically, the initial 5-second timer is for the camera to settle after you press the shutter release. After it waits for 5 seconds, the “Exposure delay mode” feature kicks in and the mirror is raised. The camera waits 3 more seconds before the shutter finally opens up and the image is captured. This is a great feature that I highly recommend to use when photographing landscapes and architecture in low light conditions / very slow shutter speeds.

                          تعليق


                          • #14

                            إذا كنت لا تحب ظهور رمز الفلاش البرتقالي باستمرار في عدسة الكاميرا (أجده مزعجًا)، فهناك مكان لإيقاف تشغيله - ما عليك سوى ضبط "تحذير الفلاش" على إيقاف ولن ترى رمز تحذير الفلاش مرة أخرى.

                            لن أخوض في أقسام التصحيح/الفلاش، لأن هذا موضوع كبير بحد ذاته. الشيء الوحيد الذي أقوم بتغييره عادةً هنا هو ترتيب الأقواس - أحب أن تكون إطاراتي منخفضة التعريض، ثم عادية، ثم تعريض زائد، لذلك قمت بتعيين "ترتيب الأقواس" على "تحت > MTR > أكثر".

                            قسم "عناصر التحكم" هو شيء أقوم بتغييره دائمًا، نظرًا لوجود بعض الميزات لتوفير الوقت هناك. لنبدأ أولاً بالميزة المفضلة لدي في كاميرات Nikon المتقدمة والتي تسمح بتكبير الصورة على الفور من خلال الضغط على الزر "موافق" في قرص الاختيار المتعدد. كان يُطلق على عنصر القائمة هذا اسم "زر مركز التحديد المتعدد"، لكن شركة Nikon أعادت تسميته الآن إلى "زر موافق" فقط. إنه يوفر وقتًا كبيرًا وهو شيء أتمنى حقًا أن تمتلكه جميع كاميرات Nikon DSLR. بشكل أساسي، يمكنك إعداد زر موافق المركزي على زر الاختيار المتعدد للتكبير والتصغير إلى مستوى تكبير محدد عند مراجعة الصور بضغطة واحدة على الزر! إذا وجدت نفسك محبطًا بسبب الضغط المستمر على زر التكبير حتى تصل إلى مستوى التكبير الصحيح، فسوف تحب هذه الميزة تمامًا. هناك ثلاثة مستويات تكبير للاختيار من بينها: "التكبير المنخفض"، و"التكبير المتوسط"، و"التكبير العالي". أفضل إعداد يمكن استخدامه هو التكبير المتوسط، لأنه يتيح لك عرض الصور على مستوى 100% / بكسل. أنه يوفر 8 ضغطات زر التكبير!


                            If you dislike the orange flash icon constantly popping up in your viewfinder (I find it annoying), there is a place to turn it off – just set “Flash warning” to Off and you won’t see that flash warning icon again.

                            I won’t go into Bracketing/flash sections, because that’s a big topic on its own. The only thing that I usually change here is Bracketing order – I like to have my frames underexposed, normal, then overexposed, so I set “Bracketing order” to “Under > MTR > over”.

                            The “Controls” section is something I always change, because there are some time-saving features there. Let’s first start with my favorite feature on Nikon advanced cameras that allows to zoom in to an image instantly with a press of the OK button in the multi-selector dial. This menu item used to be called “Multi selector center button”, but Nikon has now renamed it to just “OK button”. It is a huge time saver and something I really wish all Nikon DSLR cameras had. Basically, you can set up the center OK button on the multi-selector to zoom in and out to a set magnification level when reviewing images with a single press of the button! If you find yourself frustrated by constantly pressing the zoom in button until you get to the right magnification level, then you will absolutely love this feature. There are three magnification levels to choose from: “Low magnification”, “Medium magnification” and “High magnification”. The best setting to use is Medium magnification, because it allows you to view images at 100% / pixel level. It saves 8 zoom in button presses!

                            تعليق


                            • #15
                              يتيح خيار القائمة المهم التالي "زر Assign Fn" برمجة زر "Fn" (الوظيفة) الموجود في مقدمة الكاميرا. نظرًا لأنني أقوم بالتصوير في بيئات مختلفة كثيرًا، فأنا أحب أن أكون قادرًا على تغيير إعدادات ISO التلقائي الخاصة بي بسرعة (ليس فقط تمكين أو تعطيل Auto ISO، ولكن في الواقع الوصول إلى إعدادات مثل "الحساسية القصوى" و"الحد الأدنى لسرعة الغالق"). لسوء الحظ، فإن Auto ISO مخفي في "قائمة التصوير" ويستغرق وقتًا طويلاً للوصول إليه. أحب أن أكون قادرًا على الوصول إلى Auto ISO بمجرد الضغط على زر Fn وهذا شيء يمكنك إعداده بسهولة شديدة. أولاً، انتقل إلى قسم "قائمتي" في القائمة. ثم انتقل إلى "إضافة عناصر" -> "قائمة التصوير". ابحث عن "إعدادات حساسية ISO" وبدلاً من الدخول إلى هذه القائمة، ما عليك سوى الضغط على الزر "موافق". يجب أن تقول الشاشة التالية "اختر الموضع" وسترى "إعدادات حساسية ISO" هناك. فقط اضغط على "موافق" مرة أخرى وسترى ذلك أعلى نافذة "قائمتي". إذا كان لديك بالفعل بعض المفضلة المحفوظة، فتأكد من نقل هذا إلى الأعلى. بمجرد القيام بذلك، انتقل إلى "قائمة الإعدادات المخصصة" مرة أخرى وانتقل إلى "عناصر التحكم" -> "زر تعيين Fn". من هناك، اختر "الوصول إلى العنصر العلوي في قائمتي" ثم اضغط على "موافق". اختبرها الآن - أغلق القائمة، ثم اضغط على الزر "Fn" الموجود في مقدمة الكاميرا. إذا فعلت كل شيء بشكل صحيح، فمن المفترض أن تنقلك شاشة LCD الخلفية إلى إعدادات حساسية ISO! أنيق جدًا ويوفر الكثير من الوقت عندما تحتاج إلى تعديل ميزة Auto ISO!

                              إذا كنت لا تهتم بشكل خاص بزر "المعاينة" لعمق المجال، فيمكنك برمجة كاميرا D7100 الخاصة بك للقيام بنفس الشيء من هذا الزر بدلاً من ذلك.

                              الآن دعونا نتحدث عن إعداد آخر مهم في القائمة، وهو "تعيين زر AE-L/AF-L". إذا لم تكن قد قرأت مقالتي عن تقنية التركيز وإعادة التركيب، فهذا هو الوقت المناسب للقيام بذلك، لأنه يشرح هذه الميزة بالتفصيل. بشكل أساسي، يمكنك تبديل وظيفة التركيز التلقائي من تحرير الغالق (نصف ضغطة) إلى الزر AE-L / AF-L الموجود في الجزء الخلفي من الكاميرا، كما هو موضح أدناه:


                              بمجرد القيام بذلك، لن تقوم الكاميرا بالتركيز التلقائي بعد ذلك عن طريق الضغط على مصراع الكاميرا نصف ضغطة وسوف تستجيب فقط للضغط على زر AE-L / AF-L الخلفي. إنها ميزة رائعة أستخدمها دائمًا بشكل افتراضي في جميع الكاميرات الخاصة بي (تحتوي كاميرات DSLR المتطورة على زر AF-ON مخصص)، لذا أوصي باستكشاف هذه الميزة على كاميرا D7100 الخاصة بك أيضًا.

                              وبصرف النظر عن هذه، أود أن أترك بقية الإعدادات وحدها.


                              The next important menu option “Assign Fn button” allows programming the “Fn” (Function) button on the front of the camera. Since I shoot in different environments a lot, I like to be able to change my Auto ISO settings quickly (not just enabling or disabling Auto ISO, but actually accessing settings like “Maximum sensitivity” and “Minimum shutter speed”). Unfortunately, Auto ISO is buried in the “Shooting Menu” and takes too long to get to. I love being able to access Auto ISO with just pressing the Fn button and that’s something you can set up very easily. First, go to “My Menu” section of the menu. Then go to “Add items” -> “Shooting menu”. Find “ISO sensitivity settings” and instead of getting into this menu, simply press the “OK” button. The next screen should say “Choose position” and you will see “ISO sensitivity settings” there. Just press “OK” one more time and you will see this on the top of the “My Menu” window. If you already have some favorites saved, make sure to move this one to the very top. Once you do this, go to the “Custom Setting Menu” again and navigate to “Controls” -> “Assign Fn button”. From there, pick “Access top item in MY MENU” and press OK. Now test it out – close the menu, then press the “Fn” button on the front of the camera. If you did everything right, the back LCD should get you right into ISO sensitivity settings! Pretty neat and saves a lot of time when you need to tweak the Auto ISO feature!

                              If you don’t particularly care for the depth of field “Preview” button, you can program your D7100 to do the same thing from that button instead.

                              Now let’s talk about another important menu setting, which is “Assign AE-L/AF-L button”. If you have not read my article on the Focus and Recompose technique, now is a good time to do it, because it explains this feature in detail. Basically, you switch the autofocus function from your shutter release (half-press) to the AE-L / AF-L button on the back of the camera, as shown below:


                              Once you do this, your camera will no longer autofocus by half-pressing the shutter and will only respond to you depressing the rear AE-L / AF-L button. It is a neat feature that I always use by default on all of my cameras (higher-end DSLRs have a dedicated AF-ON button), so I would recommend to explore this feature on your D7100 as well.

                              Aside from these, I would leave the rest of the settings alone.

                              تعليق

                              يعمل...
                              X