إعدادات كاميرا نيكون D5600 الموصى بها Recommended Nikon D5600 Settings

تقليص
X
 
  • تصفية - فلترة
  • الوقت
  • عرض
إلغاء تحديد الكل
مشاركات جديدة

  • إعدادات كاميرا نيكون D5600 الموصى بها Recommended Nikon D5600 Settings

    إعدادات كاميرا نيكون D5600 الموصى بها
    Recommended Nikon D5600 Settings

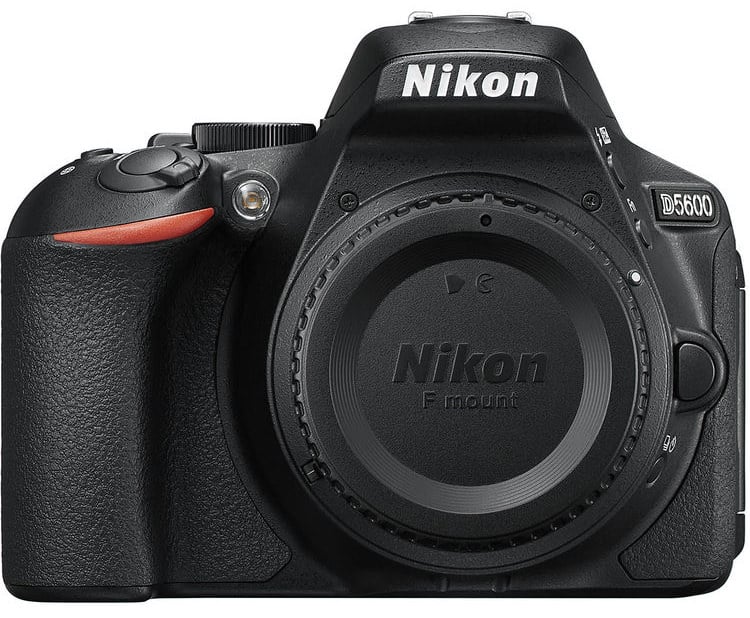
    على الرغم من أن كاميرا Nikon D5600 تحتوي على قائمة أكثر انسيابية من بعض الكاميرات الأخرى في مجموعة Nikon، إلا أنه لا يزال هناك عدد كبير من إعدادات الكاميرا وخياراتها التي تحتاج إلى معرفتها. في هذه المقالة، سأغطي كل ما تحتاج لمعرفته حول إعدادات القائمة لكاميرا Nikon D5600، بما في ذلك توصية محددة لكل إعداد مهم. من المفترض أن يساعدك هذا على تحقيق أقصى استفادة من الكاميرا الجديدة واستخدام كاميرا D5600 بكامل إمكاناتها.


    Although the Nikon D5600 has a more streamlined menu than some other cameras in Nikon’s lineup, there are still a huge number of camera settings and options that you need to know about. In this article, I will cover everything you need to know about menu settings for the Nikon D5600, including a specific recommendation for every important setting. This should help you make the most of your new camera and use the D5600 to its full potential.


  • #2
    قائمة التشغيل

    معظم هذه الإعدادات هي تفضيلات شخصية، ويمكنك ترك معظمها على إعداداتها الافتراضية. ومع ذلك، هناك بعض إعدادات التشغيل التي يمكن أن تُحدث فرقًا كبيرًا، لذا سأغطيها هنا:

    خيارات عرض التشغيل لا شيء (الصورة فقط): الإبرازات المحددة: محددة (تتيح القدرة على وميض المناطق المعرضة للضوء بشكل مفرط في الصورة بالأبيض والأسود) الرسم البياني RGB: محدد (راجع مقالتنا حول الرسوم البيانية) بيانات التصوير: غير محددة نظرة عامة: مراجعة الصورة المحددة: تشغيل (هذا يحدد ما إذا كانت صورتك ستظهر فورًا بعد التقاطها أم لا) بعد الحذف: إظهار التدوير التلقائي للصورة التالية: تشغيل (إشارات لتدوير الصور الرأسية عند فتحها على جهاز كمبيوتر) التدوير طويلًا: إيقاف (وإلا، سيتم تشغيل الصور الرأسية ضيقة جدًا على الكاميرا، وسيتعين عليك إدارة رأسك لمراجعة الصور الرأسية عند استخدام حامل ثلاثي الأرجل)

    إعدادات التشغيل التي تخطيتها هي أشياء يتم استخدامها لمرة واحدة ولا تهم عند إعداد كاميرا Nikon D5600، مثل إنشاء عرض شرائح.


    Playback Menu


    Most of these settings are personal preferences, and you can leave the bulk of them at their defaults. However, there are a few playback settings that can make a big difference, so I will cover those here:
    • Playback display options
      • None (image only): Checked
      • Highlights: Checked (enables the ability to have overexposed regions of a photo blink black and white)
      • RGB histogram: Checked (see our article on histograms)
      • Shooting data: Not checked
      • Overview: Checked
    • Image review: ON (this determines whether or not your photo pops up immediately after you take it)
    • After delete: Show next
    • Auto image rotation: ON (signals to rotate vertical photos when you’ve opened them on a computer)
    • Rotate tall: OFF (otherwise, vertical photos will be too narrow on your camera, and you’ll have to turn your head to review vertical photos when you’re using a tripod)

    The playback settings I skipped are one-time things that don’t matter for setting up the Nikon D5600, such as creating a slideshow.

    تعليق


    • #3
      قائمة تصوير الصور

      التالي هو قائمة التقاط الصور، والتي تحتوي على العديد من الخيارات. سأضيف ملاحظة عندما يكون هناك شيء يتعلق بالتوصية يستحق التوضيح:

      إعادة تعيين قائمة تصوير الصور: —مجلد التخزين: افتراضي، لا حاجة للتغيير تسمية الملف: DSC (افتراضي)، لا حاجة للتغيير، إلا إذا كنت تستخدم عدة كاميرات وتريد أن تبدأ أسماء الملفات من كل منها بطريقة فريدة (مثل NIK_1234 بدلاً من ذلك) بدلاً من DSC_1234 الافتراضي) جودة الصورة: NEF (RAW) - ولكن راجع مقالتنا حول RAW مقابل JPEG إذا لم تكن متأكدًا، نظرًا لأن عددًا من مستخدمي كاميرا D5600 قد يفضلون ملفات JPEG. حجم الصورة: رمادي تسجيل NEF (RAW): حساسية ISO بمعدل 14 بت إعدادات حساسية ISO: 100 (يطابق هذا ببساطة أي ISO تستخدمه) التحكم التلقائي في حساسية ISO: تشغيل (على الرغم من أنك من المحتمل أن تقوم بإيقاف تشغيل هذا بشكل متكرر، مثل العمل القائم على حامل ثلاثي الأرجل حيث تريد دائمًا نفس ISO؛ راجع مقالتنا تشغيل ISO تلقائي) الحد الأقصى للحساسية: 3200 الحد الأقصى للحساسية مع الفلاش: 3200 الحد الأدنى لسرعة الغالق: تلقائي -> الخيار المركزي توازن اللون الأبيض: ضبط تلقائي لبرنامج التحكم بالصورة Picture Control: SD (قياسي)، القيم الافتراضية، إلا إذا كنت تعلم بالفعل أن لديك سببًا محددًا لتغييره (لا يوجد) لا تؤثر على الصورة نفسها إذا كنت مصور RAW)إدارة برنامج التحكم بالصورة Picture Control: —مساحة اللون: Adobe RGB إذا قمت بتصوير RAW، نظرًا لأنه لا يؤثر على الصورة نفسها ويوفر رسمًا بيانيًا أكثر دقة قليلاً داخل الكاميرا. استخدم sRGB إذا قمت بالتصوير بصيغة JPEGActive D-Lighting: OFF، وهو أمر مهم بشكل خاص إذا قمت بالتصوير بصيغة RAW، لأنه يؤثر على كيفية قياس الكاميرا للمشهد (راجع قائمة بجميع الإعدادات التي تؤثر على صور RAW) HDR: يصبح باللون الرمادي في حالة التصوير بصيغة RAW، وضع الإصدار: إطار فردي للصور النموذجية، وإطار مرتفع مستمر للتصوير الفوتوغرافي للحركة حيث تحتاج إلى مجموعة من اللقطات، والوضع الهادئ إذا كنت بحاجة إلى كاميرا أكثر هدوءًا قليلاً، ومؤقت ذاتي إذا كنت بحاجة إلى تأخير بين الضغط على زر الغالق والتقاط الصورة. (لاحظ أنه يمكنك أيضًا تغيير ذلك عبر الزر الموجود على الجانب الأيسر من كاميرا D5600، في المقدمة، بالقرب من حامل العدسة.) NR التعريض الضوئي الطويل: إيقاف، إلا إذا كنت تلتقط تعريضات ضوئية طويلة نسبيًا (20-30 ثانية أو أكثر) ولا تمانع في الانتظار مرتين لالتقاط الصورة، ISO NR العالي: إيقاف (لا يؤثر على صور RAW) التحكم في التظليل: إيقاف (لا يؤثر على صور RAW) التحكم التلقائي في التشوه: إيقاف (لا يؤثر صور RAW) تقليل الاهتزاز البصري: يتم تشغيله في معظم الحالات، إذا كان من الممكن تعديل تقليل اهتزاز العدسة فقط من خلال قائمة، مثل أحدث إعدادات فيلم AF-P مقاس 18-55 مم من Nikon، حجم الإطار/معدل الإطار: 1920×1080؛ 30 بكسل (على الرغم من استخدام 24 بكسل إذا كان هذا هو ما تحدده متطلبات الإخراج الخاصة بك، واستخدام 60 بكسل إذا كنت تريد الحركة البطيئة) جودة الفيلم: ميكروفون عالي: تلقائي (يؤثر هذا فقط على الميكروفون الموجود في الكاميرا) تقليل ضوضاء الرياح: تشغيل (يؤثر أيضًا على الميكروفون الداخلي فقط) ميكروفون الكاميرا) إعدادات الفيلم اليدوية: تشغيل (يتيح القدرة على ضبط سرعة الغالق وISO يدويًا لمقاطع الفيديو عندما تكون في الوضع اليدوي)


      Photo Shooting Menu


      Next up is the Photo Shooting Menu, which has several options. I’ll add a note whenever something about the recommendation is worth clarifying:
      • Reset photo shooting menu: —
      • Storage folder: default, no need to change
      • File naming: DSC (default), no need to change, unless you use several cameras and want the file names from each to start in a unique way (such as NIK_1234 rather than the default DSC_1234)
      • Image quality: NEF (RAW) – but see our article on RAW vs JPEG if you aren’t sure, since a number of D5600 users may prefer JPEGs
      • Image size: grayed out
      • NEF (RAW) recording: 14-bit
      • ISO sensitivity settings
        • ISO sensitivity: 100 (this simply matches whatever ISO you’re using)
        • Auto ISO sensitivity control: ON (though you will potentially be turning this off quite frequently, such as tripod-based work where you always want the same ISO; see our article on Auto ISO)
        • Maximum sensitivity: 3200
        • Maximum sensitivity with flash: 3200
        • Minimum shutter speed: Auto -> Center option
      • White balance: AUTO
      • Set Picture Control: SD (Standard), Default values, unless you already know you have a specific reason to change it (doesn’t affect the photo itself if you’re a RAW shooter)
      • Manage Picture Control: —
      • Color space: Adobe RGB if you shoot RAW, since it doesn’t affect the photo itself and provides a slightly more accurate in-camera histogram. Use sRGB if you shoot JPEG
      • Active D-Lighting: OFF, especially important if you shoot RAW, since it affects how your camera meters a scene (see a list of all the settings which affect RAW photos)
      • HDR: Grayed out if shooting RAW
      • Release mode: Single Frame for typical photos, Continuous High for action photography where you need a burst of shots, Quiet mode if you need a slightly quieter camera, and self timer if you need a delay between pressing the shutter button and taking the photo. (Note that you can also change this via the button on the left-hand side of the D5600, on the front, near the lens mount.)
      • Long Exposure NR: OFF, unless you are taking relatively long exposures (20-30 seconds or more) and you don’t mind waiting twice as long to capture the photo
      • High ISO NR: OFF (doesn’t affect RAW photos)
      • Vignette control: OFF (doesn’t affect RAW photos)
      • Auto distortion control: OFF (doesn’t affect RAW photos)
      • Optical VR: ON in most cases, if your lens’s vibration reduction can only be adjusted via a menu, like Nikon’s newest 18-55mm AF-P
      • Movie Settings
        • Frame size/frame rate: 1920×1080; 30p (though use 24p if that’s what your output requirements specify, and use 60p if you want slow motion)
        • Movie quality: High
        • Microphone: Auto (this only affects the in-camera microphone)
        • Wind noise reduction: ON (also only affects the in-camera microphone)
        • Manual movie settings: ON (enables the ability to adjust shutter speed and ISO manually for videos when in manual mode)

      تعليق


      • #4
        قائمة الإعدادات المخصصة

        التالي في كاميرا D5600 هو قائمة الإعدادات المخصصة (رمز القلم الرصاص)، والتي تتضمن خيارات مهمة مثل إعدادات التركيز التلقائي وتخطيطات الأزرار المخصصة.

        تحديد أولوية التركيز البؤري التلقائي AF-C: التحرير (نظرًا لأن أولوية التحرير تلتقط صورة عند الضغط على زر الغالق، بينما تنتظر أولوية التركيز حتى تعتقد كاميرا D5600 أن هدفك يتم التركيز عليه قبل القيام بذلك. أجد أن كاميرا D5600 يمكن أن تستغرق وقتًا طويلاً جدًا عند التعيين على أولوية التركيز، ولكن هذا تفضيل شخصي)اختيار أولوية AF-S: الإصدار (نفس الملاحظة المذكورة أعلاه) مصباح مساعد التركيز البؤري التلقائي المدمج: OFFRangefinder: OFF (يضع هذا أسهمًا صغيرة في عدسة الكاميرا لمساعدتك في استخدام التركيز اليدوي، ولكن أنا شخصياً لم أجدها مفيدة أبدًا؛ يختلف المصورون الآخرون) حلقة التركيز اليدوية في وضع التركيز البؤري التلقائي: خطوات ONExposureEV للتعريض الضوئي Cntrl: 1/3 شاشة ISO: تشغيل


        Custom Setting Menu


        Next up on the D5600 is the custom settings menu (the pencil icon), which includes important options like autofocus settings and custom button layouts.
        • Autofocus
          • AF-C priority selection: Release (since release priority takes a photo when you press the shutter button, while focus priority waits until the D5600 thinks your subject is in focus before doing so. I find that the D5600 can take too long when set to focus priority, but this is a personal preference)
          • AF-S priority selection: Release (same note as above)
          • Built-in AF-assist illuminator: OFF
          • Rangefinder: OFF (this puts little arrows in the viewfinder to help you use manual focus, but I personally have never found them helpful; other photographers differ)
          • Manual focus ring in AF mode: ON
        • Exposure
          • EV steps for exposure cntrl: 1/3
          • ISO display: ON

        تعليق


        • #5

          قفل المؤقتات/التعريض الضوئي التلقائي زر تحرير الغالق AE-L: إيقاف (لا أريد أن يتم قفل التعريض الضوئي لكاميرا D5600 في اللحظة التي أضغط فيها نصف ضغط على زر الغالق) مؤقتات إيقاف التشغيل التلقائي: أفضل "عادي" في هذا، ولكنه تفضيل شخصي تمامًا ، ويمكنك تخصيص كل خيار على حدة مؤقت ذاتي تأخير الموقت الذاتي: 5 ثوانٍ (قد يتغير وفقًا لاحتياجاتك للصورة) عدد اللقطات: 1 (قد يتغير أيضًا) تأخير إيقاف تشغيل الشاشة: 1 م، 1 م، 5 م، 20 ثانية، 5 م تشغيل جهاز التحكم عن بعد المدة (ML-L3): 5 م التصوير/العرض وضع تأخير التعريض: إيقاف (ولكن يمكن أن يكون هذا مفيدًا جدًا للتشغيل للتصوير باستخدام حامل ثلاثي الأرجل)تسلسل رقم الملف: إيقاف (ليس مشكلة كبيرة بغض النظر)عرض شبكة محدد المنظر: تشغيل (تفضيل شخصي)التاريخ الختم: OFFالمؤشرات العكسية: الخيار السفلي (أيضًا التفضيل الشخصي؛ أفضّله عند الإشارة إلى التعريض الزائد على الجانب الأيمن والإشارة إلى التعريض المنخفض على الجانب الأيسر) بين قوسين/فلاش التحكم في الفلاش للفلاش المدمج: مجموعة تصحيح TTLAuto : AE بين قوسين
          • Timers/AE lock
            • Shutter-release button AE-L: OFF (I don’t want the D5600’s exposure to lock the moment I half-press the shutter button)
            • Auto off timers: I prefer “Normal” on this, but it’s totally personal preference, and you can customize each option individually
            • Self-timer
              • Self-timer delay: 5s (may change depending upon your needs for the photo)
              • Number of shots: 1 (also may change)
            • Monitor off delay: 1m, 1m, 5m, 20s, 5m
            • Remote on duration (ML-L3): 5m
          • Shooting/display
            • Exposure delay mode: OFF (but this can be very useful to turn on for tripod shooting)
            • File number sequence: OFF (not a big deal regardless)
            • Viewfinder grid display: ON (personal preference)
            • Date stamp: OFF
            • Reverse indicators: The bottom option (also personal preference; I prefer it when overexposure is indicated on the right-hand side and underexposure is indicated on the left-hand side)
          • Bracketing/flash
            • Flash control for built-in flash: TTL
            • Auto bracketing set: AE bracketing

          تعليق


          • #6

            زر ControlsAssign Fn: ISOAssign AE-L/AF-L: AF-ON (هذا إعداد موصى به للغاية - فهو يفصل التركيز البؤري التلقائي عن زر الغالق. لذلك، ستركز بالضغط على زر AE-L/AF-L بدلاً من ذلك ، المعروف أيضًا باسم التركيز على الزر الخلفي. بمجرد تجربته، أشك في أنك ستعود مرة أخرى!)تعيين اللمس FN: أنا شخصياً لا أستخدم شاشة اللمس في كاميرا D5600 (أو أي كاميرا أخرى في الوقت الحالي)، لذا فإن هذا الخيار متاح متروك تماما لتفضيلاتك الشخصية. قد تجد بعض القيمة في ضبطه على "تصحيح تلقائي"، نظرًا لعدم وجود زر تصحيح في كاميرا D5600. دوران القرص العكسي: لم يتم تحديده لتعويض التعريض الضوئي، وتم التحقق منه لسرعة الغالق/فتحة العدسة. هذه هي الطريقة التي تعلمتها بها؛ قد تكون مختلفا.
            ​​​​​​​
            • Controls
              • Assign Fn button: ISO
              • Assign AE-L/AF-L: AF-ON (this is a highly recommended setting – it decouples autofocus from your shutter button. So, you’ll focus by pressing the AE-L/AF-L button instead, also known as back-button focusing. Once you try it, I doubt you will go back!)
              • Assign touch FN: I personally do not use the touchscreen on the D5600 (or any other camera at the moment), so this option is totally up to your personal preference. You might find some value in setting it to “Auto bracketing,” since there is not a bracketing button on the D5600.
              • Reverse dial rotation: Unchecked for exposure compensation, checked for shutter speed/aperture. That’s just how I learned it; you may be different.

            تعليق


            • #7
              قائمة الإعداد (رمز مفتاح الربط)

              باستخدام هذه القائمة، بمجرد ضبطها، من المحتمل أن تتركها هناك - أشياء مثل الوقت والتاريخ. ومع ذلك، لا يزال من المهم معرفة بعض هذه الإعدادات، لذا سأقوم بتغطيتها أدناه. الخيارات التي لا أدرجها أدناه إما ليست ذات صلة بإعداد الكاميرا (مثل التعليق على الصورة، حيث تكتب ملاحظة على صورة معينة) أو شخصية جدًا (مثل اللغة والمنطقة الزمنية).

              تهيئة بطاقة الذاكرة: انقر فقط على "نعم" عندما تريد حذف جميع الصور الموجودة على بطاقة الذاكرة الخاصة بك. لا يمكن التراجع عن هذا الأمر، ولكن من المهم القيام بذلك عندما تقوم بتحويل بطاقة الذاكرة إلى كاميرا D5600 من كاميرا أخرى، أو عند الانتهاء من تفريغ جميع صورك على الكمبيوتر وتريد الحصول على بطاقة واضحة. معلومات حقوق الطبع والنشر: إنها فكرة جيدة أن ضع معلوماتك هنا في حالة فقدان الكاميرا الخاصة بك خيارات الصفير: OFF عناصر التحكم باللمس: OFF، شخصيًا، ولكن معظم المصورين يريدون تشغيلها (أنا لا أحب استخدام شاشات اللمس مع الكاميرا) تنسيق عرض المعلومات: متروك لك تمامًا، لكنني تجد أن الخيار الأوسط العلوي (نص أسود بخلفية بيضاء) يتسبب في أقل إجهاد للعين. عرض المعلومات التلقائية: OFF (يمكن أن ينبثق بشكل مزعج عند الضغط نصف زر على زر الغالق، ويمكنك تشغيله/إيقاف تشغيله على أي حال عن طريق الضغط على زر " زر "INFO") إيقاف عرض المعلومات تلقائيًا: إيقاف (لا يعمل دائمًا؛ ومرة ​​أخرى، أفضّل القيام بذلك يدويًا عن طريق الضغط على زر INFO) تنظيف مستشعر الصورة: التنظيف عند بدء التشغيل/إيقاف التشغيل قفل المرآة للتنظيف: — (يظهر باللون الرمادي عندما لا يكون لديك ما يكفي من عمر البطارية؛ وهذا مخصص للتنظيف اليدوي للمستشعر فقط) تقليل الوميض: قفل التحرير الفارغ للفتحة التلقائية: LOCKHDMIOدقة الإخراج: تلقائي التحكم في الجهاز: تشغيل وضع الطائرة: هذا مناسب فقط لتعطيل اتصالات نقل الصور إلى جهاز هاتف ذكي. إذا لم تقم بإعداد هذه الاتصالات أو لا تستخدمها بشكل نشط، فإن إيقاف التشغيل يفعل نفس الشيء الذي يفعله ONConnect بجهاز ذكي: استخدمه فقط عندما تريد الوصول إلى SnapBridge (المستخدم لنقل ملفات JPEG منخفضة الدقة من كاميرا D5600 إلى هاتفك في الخلفية - شاهد المزيد على صفحة Nikon لـ SnapBridge)الإرسال إلى الجهاز الذكي (تلقائي): إيقاف - ولكن قم بتشغيله إذا كنت تريد إرسال الصور إلى هاتفكWi-Fi: الإعدادات الافتراضيةالبلوتوث: إيقاف


              Setup Menu (Wrench Icon)


              With this menu, once you set it, you probably will leave it there – things like time and date. However, some of these settings are still important to know, so I’ll cover them below. The options I don’t list below are either irrelevant to setting up your camera (like Image Comment, where you write a note on a particular image) or very personal (like language and time zone).
              • Format memory card: Only click “YES” when you want all the photos on your memory card to be deleted. This is irreversible, but it is important to do when you switch a memory card into the D5600 from another camera, or you’ve finished offloading all your images onto the computer and you want a clear card.
              • Copyright information: It’s a good idea to put your info here in case you lose your camera
              • Beep options: OFF
              • Touch controls: OFF, personally, but most photographers will want them ON (I just don’t like using touchscreens with a camera)
              • Info display format: Totally up to you, but I find that the top center option (black text with white background) causes the least eye strain
              • Auto info display: OFF (can pop up annoyingly when you half-press the shutter button, and you can turn it on/off anyway by just pressing the “INFO” button)
              • Info display auto off: OFF (doesn’t always work; and, again, I’d prefer just to do it manually by pressing the INFO button)
              • Clean image sensor: Clean at startup/shutdown
              • Lock mirror up for cleaning: — (grayed out when you don’t have enough battery life; this is for manual sensor cleaning only)
              • Flicker reduction: AUTO
              • Slot empty release lock: LOCK
              • HDMI
                • Output resolution: AUTO
                • Device control: ON
              • Airplane mode: This is only relevant for disabling image transfer connections to a smartphone. If you haven’t set up these connections or are not actively using them, OFF does the same thing as ON
              • Connect to a smart device: Only use when you want to access SnapBridge (used for transferring low resolution JPEGs from the D5600 to your phone in the background – see more on Nikon’s page for SnapBridge)
              • Send to smart device (auto): OFF – but turn it on if you do want to send photos to your phone
              • Wi-Fi: Defaults
              • Bluetooth: OFF

              تعليق


              • #8

                خاتمة

                هذا كل شئ! أنت الآن تعرف جميع إعدادات كاميرا D5600 الأكثر أهمية والخيارات التي يمكنك تحديدها بنفسك. مرة أخرى، التوصيات المحددة أعلاه هي ببساطة ما يناسبني، وقد تكون احتياجاتك الخاصة مختلفة (وهذا هو سبب وجود العديد من الإعدادات في المقام الأول) - ولكن يجب أن تكون هذه الخيارات نقطة بداية جيدة. لاحظ أيضًا أنه يمكنك إضافة الإعدادات التي من المحتمل أن تغيرها في أغلب الأحيان (مثل إعدادات حساسية ISO، ووضع تأخير التعريض، وNR التعريض الطويل، ومجموعة التصحيح التلقائي، وربما بعض الإعدادات الأخرى الخاصة بأسلوب التصوير الخاص بك) إلى جهازك "القائمة الخاصة بي" للوصول بشكل أسرع.

                آمل أن تكون هذه التوصيات مفيدة وتتيح لك تحقيق أقصى استفادة من كاميرا Nikon D5600! إذا كانت لديك أية أسئلة حول سبب التوصية ببعض هذه الإعدادات المحددة


                Conclusion


                That’s all! Now you know all of the D5600’s most important settings and which options to select for yourself. Again, the specific recommendations above are simply what work for me, and your own needs may be different (which is why so many settings exist in the first place) – but these options should be a good starting point. Also, note that you can add the ones you’re likely to change most often (such as ISO sensitivity settings, exposure delay mode, long exposure NR, auto bracketing set, and perhaps a few others specific to your style of shooting) to your “MY MENU” for quicker access.

                I hope that these recommendations will be helpful and allow you to get the most out of your Nikon D5600! If you have any questions about why I recommended some of these particular settings

                تعليق

                يعمل...
                X