كيف تم تصوير هذه الصورة١١؟ How Was This Picture Made #11?
تقليص
X
 
  • تصفية - فلترة
  • الوقت
  • عرض
إلغاء تحديد الكل
مشاركات جديدة

  • كيف تم تصوير هذه الصورة١١؟ How Was This Picture Made #11?

    كيف تم تصوير هذه الصورة١١؟
    How Was This Picture Made #11?


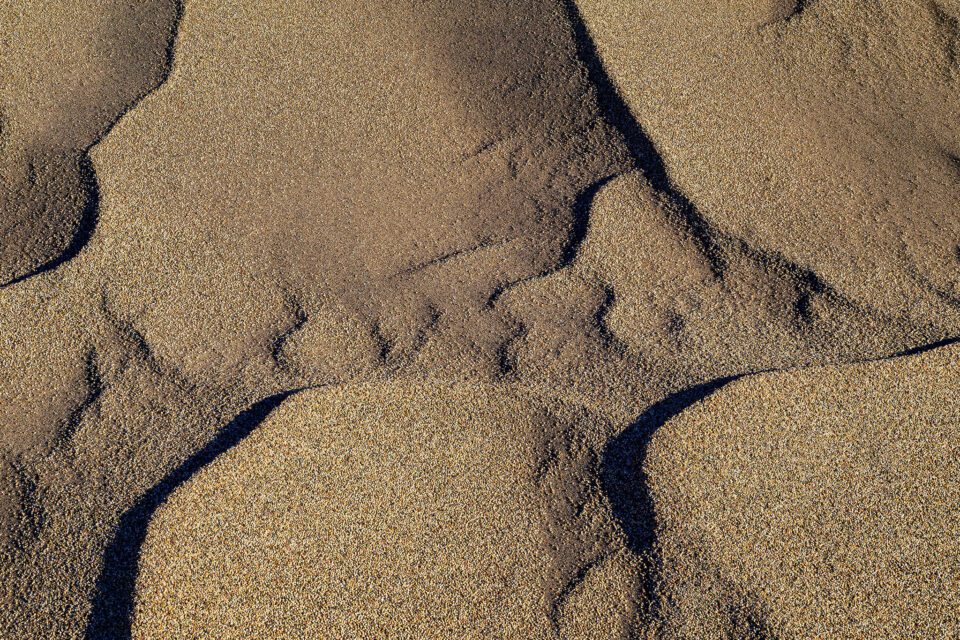
    The image is massive in size and has a lot of resolution. And that’s the whole point, because I wanted to capture all the detail of the little pebbles and sand that you get to see in some areas of the national park. You could be walking right over it and not even seeing all this insane detail. Spencer found out the hard way, because he was barefoot – he did not want to cross the little stream with his tennis shoes (he would have destroyed them). So after walking a little bit over these tiny rocks, he had to slow down and rest to avoid bruising his feet. Yup, they hurt for sure!

    It was another boring, cloudless morning (very typical for that region), so after the sun came up, both Spencer and I worked on capturing some abstracts. I decided to focus on the detail, so I set up my tripod and shot away. The original image has around 36 MP of resolution, but it sure feels like the image was captured with a medium format camera – those details are just incredible; nothing like I have ever seen from a digital camera. Well, I already gave away plenty of information, so now I leave it up to our readers to guess how the image was captured and with what camera.


    الصورة ضخمة الحجم ولها دقة كبيرة. وهذا هو بيت القصيد، لأنني أردت التقاط كل تفاصيل الحصى والرمال الصغيرة التي يمكنك رؤيتها في بعض مناطق الحديقة الوطنية. يمكن أن تمشي فوقه مباشرة ولا ترى حتى كل هذه التفاصيل المجنونة. اكتشف سبنسر ذلك بالطريقة الصعبة، لأنه كان حافي القدمين، ولم يكن يريد عبور الجدول الصغير بحذاء التنس الخاص به (كان سيدمره). لذلك بعد المشي قليلاً فوق هذه الصخور الصغيرة، كان عليه أن يبطئ ويرتاح لتجنب كدمات قدميه. نعم، إنهم يتألمون بالتأكيد!

    لقد كان صباحًا مملًا وصافيًا (نموذجيًا جدًا لتلك المنطقة)، لذلك بعد شروق الشمس، عملنا أنا وسبنسر على التقاط بعض الملخصات. قررت التركيز على التفاصيل، لذلك قمت بإعداد حامل ثلاثي القوائم وأطلقت النار. تبلغ دقة الصورة الأصلية حوالي 36 ميجابكسل، ولكن من المؤكد أنها تبدو وكأنها تم التقاطها بكاميرا متوسطة الحجم - فهذه التفاصيل لا تصدق؛ لا شيء مثل رأيته من كاميرا رقمية. حسنًا، لقد قدمت بالفعل الكثير من المعلومات، لذا أترك الأمر الآن لقرائنا لتخمين كيفية التقاط الصورة وبأي كاميرا.

  • #2
    So here are the main questions to answer:
    • What camera was used to capture the image and why?
    • What lens do you think I used to capture this shot? No need to get super detailed, just approximate focal length is enough
    • What specific technique was used to capture the above image and why?
    • What kind of post-processing was done to the image?

    This one will be fun, so good luck!
    لذا، إليك الأسئلة الرئيسية التي يجب الإجابة عليها:

    ما هي الكاميرا التي تم استخدامها لالتقاط الصورة ولماذا؟ ما هي العدسة التي تعتقد أنني استخدمتها لالتقاط هذه اللقطة؟ لا داعي للحصول على تفاصيل فائقة، فالبعد البؤري التقريبي يكفي فقط. ما هي التقنية المحددة التي تم استخدامها لالتقاط الصورة أعلاه ولماذا؟ ما نوع المعالجة اللاحقة التي تمت على الصورة؟

    سيكون هذا ممتعًا، حظًا سعيدًا جدًا!

    تعليق


    • #3
      How Was This Picture Made #11: The Answer

      It has been a while since I posted the “How was this picture made #11?” article, where I showcased a very high-resolution image of sand particles with tons of detail. The image was massive in size and resolution when I extracted it out of Lightroom. In fact, the image was so big, that I had to downsize it to 4096 pixel long resolution in order to keep the size at less than 10 MB with as much JPEG optimization as I could. When dealing with so much detail, even the highest JPEG compression levels will still yield large files, since there is so much pixel-level data. And that’s what you get when you have an image produced from a sensor that moves one pixel at a time in order to create a super high-resolution image! And combined with the power of focus stacking multiple images, you get insane levels of detail from a macro shot like this. So how did I do it? Let’s talk about the specifics of this particular shot.


      كيف تم صنع هذه الصورة #11: الجواب

      لقد مر وقت طويل منذ أن نشرت "كيف تم التقاط هذه الصورة رقم 11؟" مقالة، حيث قمت بعرض صورة عالية الدقة لجزيئات الرمل مع الكثير من التفاصيل. كانت الصورة ضخمة من حيث الحجم والدقة عندما استخرجتها من Lightroom. في الواقع، كانت الصورة كبيرة جدًا، لدرجة أنني اضطررت إلى تصغير حجمها إلى دقة تبلغ 4096 بكسل للحفاظ على الحجم عند أقل من 10 ميغابايت مع أكبر قدر ممكن من تحسين JPEG. عند التعامل مع الكثير من التفاصيل، فحتى أعلى مستويات ضغط JPEG ستظل تنتج ملفات كبيرة، نظرًا لوجود الكثير من البيانات على مستوى البكسل. وهذا ما تحصل عليه عندما يكون لديك صورة يتم إنتاجها من خلال مستشعر يتحرك بمقدار بكسل واحد في كل مرة لإنشاء صورة فائقة الدقة! ومع الجمع بين قوة التركيز وتكديس صور متعددة، يمكنك الحصول على مستويات مذهلة من التفاصيل من لقطة ماكرو مثل هذه. فكيف فعلت ذلك؟ دعونا نتحدث عن تفاصيل هذه اللقطة بالذات.

      تعليق


      • #4
        I have already kind of revealed the answer in the opening paragraph – the image was captured by the Pentax K-1 DSLR, the camera that has the amazing pixel-shift technology capable of creating extreme details, something typical sensors with a bayer filter are unable to reproduce. Stephen Bennion, great job at guessing the setup! The lens that I used was the Pentax 24-70mm f/2.8, which is basically a re-branded Tamron 24-70mm f/2.8 with its VC disabled. Although I had the Pentax 70-200mm f/2.8 with me as well, it would have been a bit too long to use for this particular shot, since I was pointing my camera directly down from my tripod. I zoomed to around the 70mm mark to get the details and the tight framing I wanted and at that distance and focal length, it would have been impossible to capture all the details in the frame from the center all the way to the extreme corners, even if I stopped down significantly. I personally try to stay away from small apertures past f/11 for these kinds of shots, because diffraction can seriously hurt resolution, so my choice was to take multiple shots focused at different areas of the frame, then stitch them together for a single shot in Photoshop.
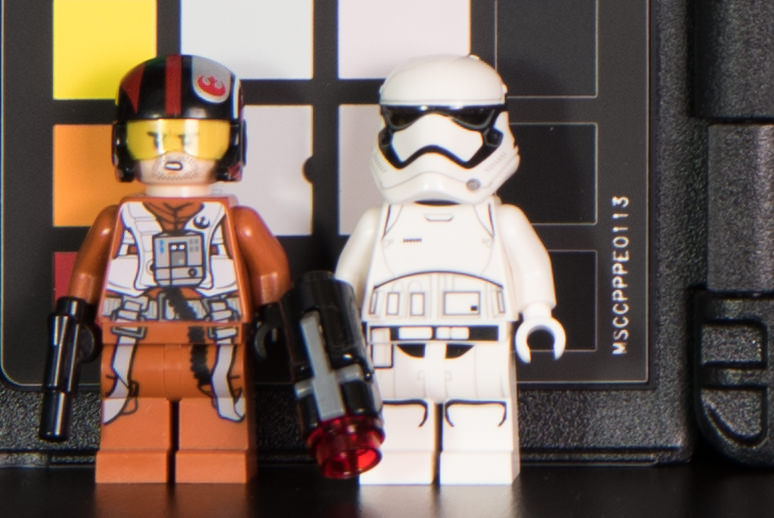
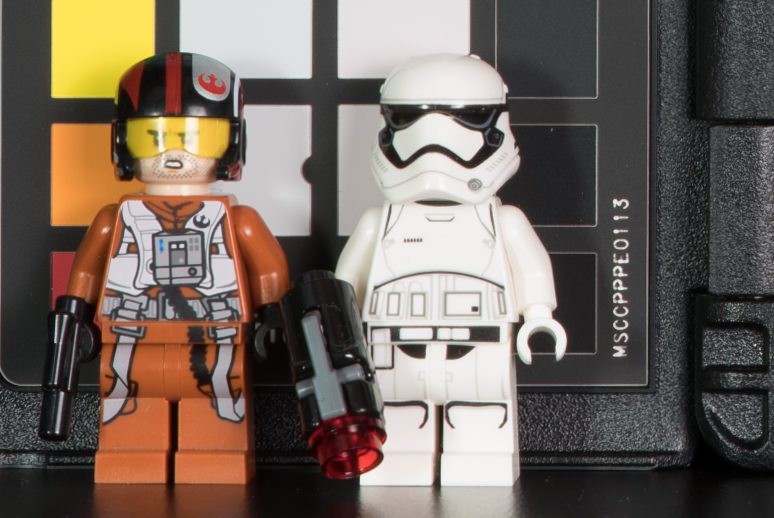
        Before I talk about how I did that, let me first talk about the advantage of pixel shift technology, particularly for such shots. What kind of additional detail can cameras such as the Pentax K-1 add? Just take a look at the following two images (studio scene to soon be published in the upcoming Pentax K-1 review):


        لقد كشفت بالفعل عن الإجابة في الفقرة الافتتاحية - تم التقاط الصورة بواسطة كاميرا Pentax K-1 DSLR، وهي الكاميرا التي تتمتع بتقنية تحويل البكسل المذهلة القادرة على إنشاء تفاصيل فائقة، وهو أمر لا تستطيع أجهزة الاستشعار التقليدية المزودة بمرشح باير لإعادة إنتاج. ستيفن بينيون، عمل عظيم في تخمين الإعداد! العدسة التي استخدمتها كانت Pentax 24-70mm f/2.8، والتي هي في الأساس عدسة Tamron مقاس 24-70 مم f/2.8 مُعاد تسميتها مع تعطيل VC الخاص بها. على الرغم من أنني كنت أحمل معي أيضًا عدسة Pentax 70-200mm f/2.8، إلا أنها كانت ستستغرق وقتًا طويلًا جدًا لاستخدامها في هذه اللقطة تحديدًا، حيث كنت أقوم بتوجيه الكاميرا مباشرة إلى الأسفل من حامل ثلاثي الأرجل الخاص بي. لقد قمت بالتكبير إلى حوالي علامة 70 مم للحصول على التفاصيل والإطار الضيق الذي أردته، وعند تلك المسافة والبعد البؤري، كان من المستحيل التقاط كل التفاصيل في الإطار من المركز وحتى الزوايا القصوى، حتى إذا توقفت بشكل ملحوظ. أنا شخصيًا أحاول الابتعاد عن الفتحات الصغيرة التي تتجاوز f/11 في هذه الأنواع من اللقطات، لأن الانحراف يمكن أن يضر الدقة بشكل خطير، لذلك كان خياري هو التقاط لقطات متعددة مع التركيز على مناطق مختلفة من الإطار، ثم تجميعها معًا للحصول على لقطة واحدة في الفوتوشوب.

        قبل أن أتحدث عن كيفية القيام بذلك، اسمحوا لي أولاً أن أتحدث عن ميزة تقنية تحويل البكسل، خاصة بالنسبة لمثل هذه اللقطات. ما نوع التفاصيل الإضافية التي يمكن لكاميرات مثل Pentax K-1 إضافتها؟ ما عليك سوى إلقاء نظرة على الصورتين التاليتين (سيتم نشر مشهد الاستوديو قريبًا في مراجعة Pentax K-1 القادمة):

        تعليق


        • #5
          I know what you are thinkin – one looks like a blurred mess, almost like an out-of-focus image, while the other looks quite detailed in comparison. But I can assure you, both images are 100% in focus. The “before” image was shot with the Nikon D810, whereas the “after” image was shot with the Pentax K-1. The difference is literally in the bayer pattern – even without an anti-aliasing/low-pass filter in place, the Nikon D810, which is supposed to be a camera that can produce tons of detail, is not capable of providing full pixel-level details of the scene. The Pentax K-1, on the other hand, has the ability to shift its sensor one pixel at a time (thanks to its IBIS), in order to resolve every bit of detail available. Now that’s amazing!

          Of course, this pixel shift technology does not work for every type of scene, especially if there is a lot of subject movement. However, for static shots like this and when there is no wind, pixel shift technology is absolutely amazing. In fact, the detail level one can get with such a mode is pretty darn close to what a medium format camera can do, once images are down-sampled.

          أعرف ما تفكر فيه - - يبدو أحدهما وكأنه فوضى غير واضحة، تقريبًا مثل صورة خارج نطاق التركيز، بينما يبدو الآخر مفصلاً تمامًا بالمقارنة. لكن يمكنني أن أؤكد لك أن كلا الصورتين تم التركيز عليهما بنسبة 100%. تم التقاط الصورة "قبل" بكاميرا Nikon D810، في حين تم التقاط الصورة "بعدها" بكاميرا Pentax K-1. يكمن الاختلاف حرفيًا في نمط باير - حتى بدون وجود مرشح منع التعرجات/التمرير المنخفض، فإن كاميرا Nikon D810، التي من المفترض أن تكون كاميرا يمكنها إنتاج الكثير من التفاصيل، غير قادرة على توفير مستوى بكسل كامل تفاصيل المشهد. من ناحية أخرى، يتمتع Pentax K-1 بالقدرة على تحويل مستشعره بمقدار بكسل واحد في كل مرة (بفضل IBIS الخاص به)، من أجل حل كل جزء من التفاصيل المتاحة. الآن هذا مذهل!

          بالطبع، لا تعمل تقنية تحويل البكسل هذه مع كل أنواع المشاهد، خاصة إذا كان هناك الكثير من حركة الهدف. ومع ذلك، بالنسبة للقطات ثابتة مثل هذه وفي حالة عدم وجود رياح، فإن تقنية تحويل البكسل مذهلة للغاية. في الواقع، مستوى التفاصيل الذي يمكن للمرء الحصول عليه باستخدام مثل هذا الوضع قريب جدًا مما يمكن أن تفعله الكاميرا ذات التنسيق المتوسط، بمجرد تقليل عينات الصور.
          التعديل الأخير تم بواسطة غدير معروف; الساعة 12-29-2023, 09:32 AM.

          تعليق


          • #6
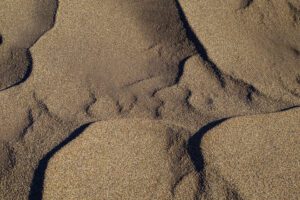
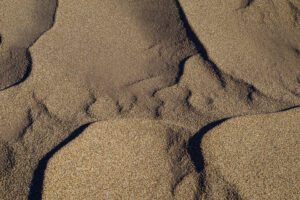
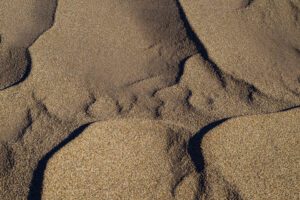
            Now imagine the potential of using pixel shift, along with focus stacking for a single composite. And that’s exactly what I did here. I started out by focusing on the bottom edge of the frame, then moved up bit by bit, by capturing a total of 6 images. Take a look at the following sequence of the last three images:

            تخيل الآن إمكانية استخدام إزاحة البكسل، جنبًا إلى جنب مع تجميع التركيز لمركب واحد. وهذا بالضبط ما فعلته هنا. لقد بدأت بالتركيز على الحافة السفلية للإطار، ثم تحركت للأعلى شيئًا فشيئًا، من خلال التقاط إجمالي 6 صور. ألق نظرة على التسلسل التالي للصور الثلاث الأخيرة:

            تعليق


            • #7
              As you can see, there is a slight change of framing between the three shots. And that’s the unfortunate issue you are going to get with most lenses – when you focus at different areas of the frame, there is a potential for a change in focal length, which can mess up the framing! This means that if you were to take such images to Photoshop and try to automatically stitch them, they might not stitch properly due to alignment issues.

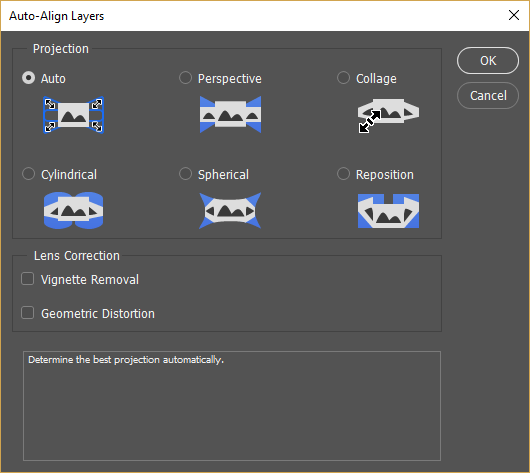
              After right-clicking the six images in Lightroom and selecting “Open as Layers in Photoshop” and letting Photoshop do its initial work, I selected all layers, then went to Edit->Auto-Align Layers:

              كما ترون، هناك تغيير طفيف في الإطار بين اللقطات الثلاث. وهذه هي المشكلة المؤسفة التي ستواجهها مع معظم العدسات - عندما تركز على مناطق مختلفة من الإطار، هناك احتمال لحدوث تغيير في البعد البؤري، مما قد يؤدي إلى إفساد الإطار! هذا يعني أنه إذا قمت بالتقاط مثل هذه الصور إلى Photoshop وحاولت دمجها تلقائيًا، فقد لا يتم دمجها بشكل صحيح بسبب مشكلات المحاذاة.

              بعد النقر بزر الماوس الأيمن فوق الصور الست في Lightroom وتحديد "فتح كطبقات في Photoshop" والسماح لبرنامج Photoshop بالقيام بعمله الأولي، قمت بتحديد جميع الطبقات، ثم انتقلت إلى تحرير->محاذاة الطبقات تلقائيًا:

              تعليق


              • #8
                What this does, is align layers and cut off parts that are not present in all layers. After the process was complete, I cropped the image a little bit to only be left with the full image. Next, I visited Edit->Auto-Blend Layers and picked “Stack Images”. I deselected both “Seamless Tones and Colors” and “Content Aware Fill Transparent Areas” since I did not need them.

                Once blending was done, I ended up with layer masks on top of each layer. Although Photoshop did a wonderful job, I still selected a soft brush and brushed off the abrupt edges manually from some areas. The image was ready and it only took me about 3-5 minutes to get this all done.

                The pixel shift technology offered by some modern cameras is amazing. If manufacturers continue to work on advancing this feature a bit further by taking quicker shots and processing them, finding ways to blend images better, and take care of other issues and limitations, this will be a very desirable feature to have on every camera.

                Pentax has done an amazing job with the K-1. If Pentax had a comparable lens line-up to Nikon, I would seriously consider switching. The Pentax K-1, being a sub-$2K full-frame camera, offers so much amazing technology, that it is now becoming a reference camera when it comes to a rich set of features, image quality, dynamic range, and overall performance. I hope Nikon and Canon wake up from their deep sleep and shake the industry once again. Abandoning the Nikon 1 mirrorless system or releasing cameras such as the EOS M5 that can barely compete with other mirrorless offers won’t get the two far…
                ما يفعله هذا هو محاذاة الطبقات وقطع الأجزاء غير الموجودة في جميع الطبقات. بعد الانتهاء من العملية، قمت بقص الصورة قليلاً بحيث لم يتبق سوى الصورة الكاملة. بعد ذلك، قمت بزيارة تحرير->دمج الطبقات تلقائيًا واخترت "تكديس الصور". لقد قمت بإلغاء تحديد كلاً من "Seamless Tones and Colors" و"Content Aware ملء المناطق الشفافة" لأنني لم أكن في حاجة إليها.

                بمجرد الانتهاء من المزج، انتهى بي الأمر بوضع أقنعة طبقة فوق كل طبقة. على الرغم من أن Photoshop قام بعمل رائع، إلا أنني مازلت أختار فرشاة ناعمة وأزيل الحواف المفاجئة يدويًا من بعض المناطق. كانت الصورة جاهزة ولم يستغرق الأمر مني سوى حوالي 3-5 دقائق لإنجاز كل هذا.

                تقنية تحويل البكسل التي تقدمها بعض الكاميرات الحديثة مذهلة. إذا واصل المصنعون العمل على تطوير هذه الميزة بشكل أكبر قليلاً من خلال التقاط لقطات أسرع ومعالجتها، وإيجاد طرق لمزج الصور بشكل أفضل، والعناية بالمشكلات والقيود الأخرى، فستكون هذه ميزة مرغوبة جدًا في كل كاميرا.

                قامت شركة Pentax بعمل رائع مع K-1. إذا كان لدى Pentax مجموعة عدسات مماثلة لنيكون، فسأفكر جديًا في التبديل. توفر كاميرا Pentax K-1، كونها كاميرا ذات إطار كامل يقل سعرها عن 2 ألف دولار، الكثير من التكنولوجيا المذهلة، لدرجة أنها أصبحت الآن كاميرا مرجعية عندما يتعلق الأمر بمجموعة غنية من الميزات وجودة الصورة والنطاق الديناميكي والأداء العام . أتمنى أن تستيقظ نيكون وكانون من سباتهما العميق وأن تهز الصناعة مرة أخرى. إن التخلي عن نظام Nikon 1 بدون مرآة أو إطلاق كاميرات مثل EOS M5 التي بالكاد يمكنها التنافس مع العروض الأخرى غير المزودة بمرآة لن يحقق الهدفين…

                تعليق

                يعمل...
                X