٢١ نصيحة لتصوير الطيور 21 Tips for Bird Photography

تقليص
X
 
  • تصفية - فلترة
  • الوقت
  • عرض
إلغاء تحديد الكل
مشاركات جديدة

  • ٢١ نصيحة لتصوير الطيور 21 Tips for Bird Photography

    ٢١ نصيحة لتصوير الطيور
    21 Tips for Bird Photography

    In this article, 21 Tips for Bird Photography, I have penned down what matters most to me for photographing birds in the field. Nasim & Elizabeth already have great articles on the most common tips. So, the thoughts below are simply a way to gather the most useful tips I’ve found, as well as common mistakes a lot of bird photographers make at first.


    Table of Contentsفي هذه المقالة، 21 نصيحة لتصوير الطيور، قمت بتدوين ما يهمني أكثر عند تصوير الطيور في الميدان. لدى نسيم وإليزابيث بالفعل مقالات رائعة حول النصائح الأكثر شيوعًا. لذا، فإن الأفكار الواردة أدناه هي مجرد طريقة لجمع النصائح الأكثر فائدة التي وجدتها، بالإضافة إلى الأخطاء الشائعة التي يرتكبها الكثير من مصوري الطيور في البداية.

    جدول المحتويات

    افهم هدفك، لا تطلق النار على مرمى البصر، اهتم بإعدادات الكاميرا الخاصة بك، استخدم سرعة الغالق المناسبة، نادرًا ما تكون "اللقطات المسجلة" صورًا فوتوغرافية جيدة، لا تتجاهل الموضوعات الشائعة، اقترب من هدفك، اقترب من هدفك بصبر، واحصل على مستوى العين، لا تقص كثيرًا، انتظر الحدث، كسر الصور النمطية، إن المعدات مهمة، استخدم ISO تلقائي، استخدم جهاز تحكم عن بعد/WiFi أو مخبأ للطيور، استخدم كاميرات كاملة الإطار، مشاهد عالية التباين بمقياس البقع، كن شمبانزيًا بسيطًا يدفع الأجر، لكن لا تكثر من الشمبانزي، احصل على مساحة سلبية كافية، استمتع بالتصوير الفوتوغرافي وكن أخلاقيًا

  • #2
    Understand Your Subject


    I have put this as the first above all else. This is because, when it comes to bird photography, if we do not understand our subject’s temperament we will end up with no subject at all.

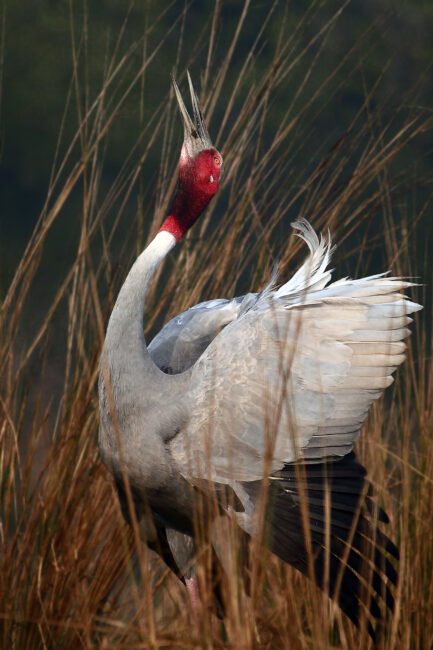
    Of course, this holds true for any wildlife, but it means all the more when it comes to birds. Some birds are very cooperative and allow us to get really close, while some will take off at the slightest sign of any movement. Even more so, the same individuals behave differently with respect to different environments. Take an example of the Sarus crane below, which I photographed in the Bharatpur bird sanctuary. I was pretty close to the bird when I shot this photograph:
    Sarus Crane courtship dance | NIKON D7000 @ 500mm, ISO 1000, 1/4000, f/5.6
    Inside the confines of the sanctuary, the cranes do not care much about humans. But, the same individuals fly off to nearby farmlands where they start to get very shy. This is because, in the sanctuary, no human tries to shoo them away. In the farms, farmers are always vigil of their crops guarding them from birds.

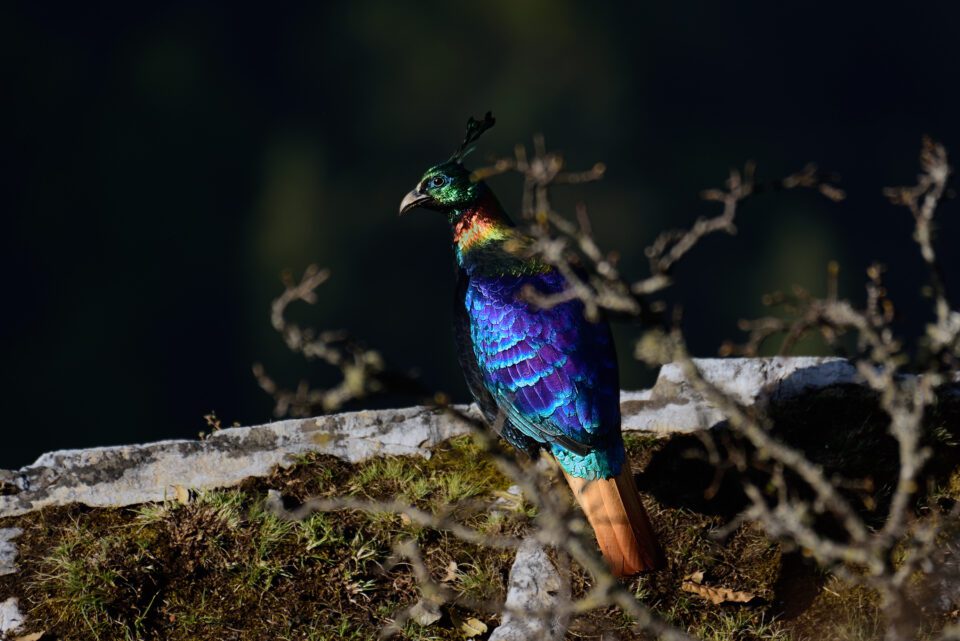
    Some birds are seen only during certain hours of the day, like the Himalayan Monal. Monals feed on grassy patches during the early and late hours of the day. They would be nowhere to be seen during mid-day. This knowledge comes in handy when photographing such birds. Along the same lines, a lot of birds are migratory, sometimes traveling far and wide enough to traverse the earth. Other birds display vibrant colors during breeding but are not as colorful at other times of the year.

    So, you should be aware of the time of year if you are planning a bird photography trip. I have seen quite a few photographers leave on a bird photography trip the moment they have their holidays approved – only to realize that the most interesting birding season has already passed in that location. Research beforehand and plan your trips to harness the maximum opportunity.
    Himalayan Monal | NIKON D750 @ 500mm, ISO 100, 1/400, f/5.6

    تعليق


    • #3
      افهم موضوعك

      لقد وضعت هذا كأول قبل كل شيء. وذلك لأنه عندما يتعلق الأمر بتصوير الطيور، إذا لم نفهم مزاج هدفنا، فسوف ينتهي بنا الأمر بلا موضوع على الإطلاق.

      وبطبيعة الحال، هذا ينطبق على أي حياة برية، ولكنه يعني أكثر عندما يتعلق الأمر بالطيور. بعض الطيور متعاونة جدًا وتسمح لنا بالاقتراب حقًا، بينما ينطلق البعض الآخر عند أدنى إشارة إلى أي حركة. والأكثر من ذلك، أن نفس الأفراد يتصرفون بشكل مختلف فيما يتعلق بالبيئات المختلفة. لنأخذ مثالاً على طائر الكركي ساروس أدناه، والذي قمت بتصويره في محمية بهاراتبور للطيور. لقد كنت قريبًا جدًا من الطائر عندما التقطت هذه الصورة:

      رقصة مغازلة ساروس كرين | نيكون D7000 عند 500 مم، ISO 1000، 1/4000، f/5.6

      داخل حدود الحرم، لا تهتم طيور الكركي كثيرًا بالبشر. لكن نفس الأفراد يطيرون إلى الأراضي الزراعية القريبة حيث يبدأون بالخجل الشديد. وذلك لأنه، في الحرم، لا يوجد إنسان يحاول إبعادهم. وفي المزارع، يراقب المزارعون محاصيلهم دائمًا ويحرسونها من الطيور.

      بعض الطيور لا يمكن رؤيتها إلا خلال ساعات معينة من اليوم، مثل مونال الهيمالايا. تتغذى المونال على البقع العشبية خلال الساعات المبكرة والمتأخرة من اليوم. لن يكونوا في أي مكان يمكن رؤيتهم خلال منتصف النهار. هذه المعرفة مفيدة عند تصوير مثل هذه الطيور. وعلى نفس المنوال، هناك الكثير من الطيور المهاجرة، وأحيانًا تسافر بعيدًا وعلى نطاق واسع بما يكفي لاجتياز الأرض. تعرض الطيور الأخرى ألوانًا نابضة بالحياة أثناء التكاثر ولكنها لا تكون ملونة في أوقات أخرى من العام.

      لذا، يجب أن تكون على دراية بالوقت من العام إذا كنت تخطط لرحلة تصوير الطيور. لقد رأيت عددًا لا بأس به من المصورين يغادرون في رحلة تصوير الطيور في اللحظة التي تمت فيها الموافقة على إجازاتهم - فقط ليدركوا أن موسم الطيور الأكثر إثارة للاهتمام قد مر بالفعل في ذلك الموقع. ابحث مسبقًا وخطط لرحلاتك لاستغلال أقصى قدر من الفرص.

       مونال الهيمالايا | نيكون D750 @ 500 مم، ISO 100، 1/400، f/5.6

      تعليق


      • #4
        Don’t Fire on Sight


        At one point in time, I kept doing this, and I am certain many of us do it: The moment we see a bird, we start firing in Continuous mode.

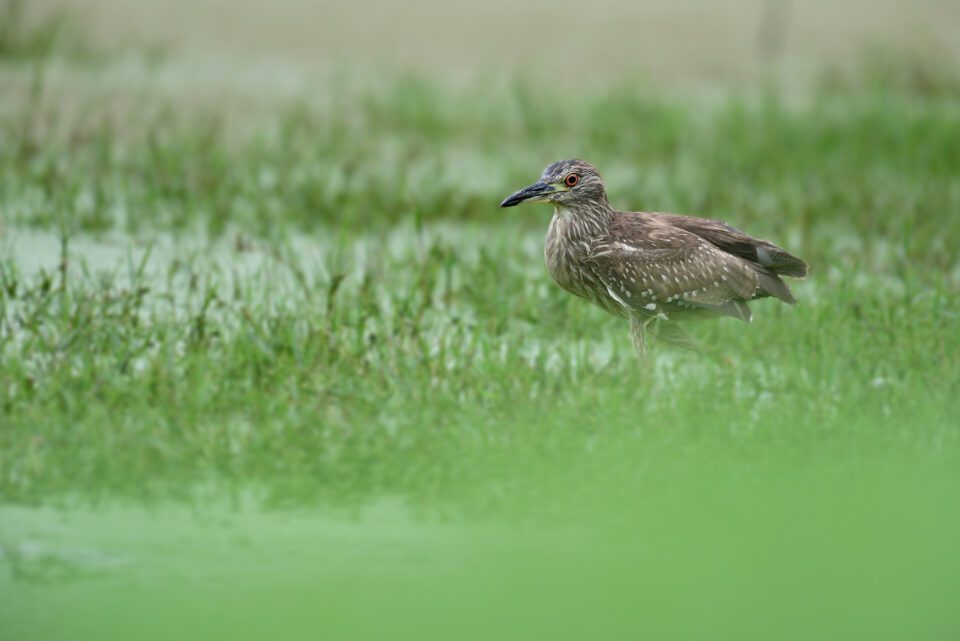
        It is true that our anxiety to grab a photograph before the bird would probably take off is understandable. But a photograph is much beyond just the subject. It includes the story that is being told, the light that adds emotion, the background that adds to the aesthetics and many more. To understand all these, you need to relax for a few minutes, understand the scene and then press the shutter. Such a picture will almost always be better than the one you clicked the moment you saw the bird. There might be patches with good light and the ones with not so good light. A photograph of a bird in shadows with harsh sunlight all around will get it nowhere. Similarly, there might be patches with distracting background. Move around to see if you get a better angle or a less distracting background. It takes a few minutes to process it all, and if you end up taking a photograph before that, it would very likely qualify to get culled.
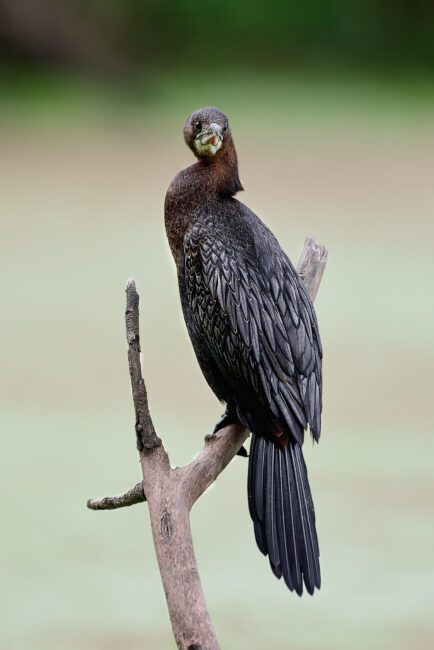
        Great Cormorand | NIKON D750 @ 500mm, ISO 280, 1/400, f/5.6Sub-adult Night Heron | NIKON D750 @ 500mm, ISO 400, 1/500, f/5.6

        تعليق


        • #5
          لا تطلق النار على البصر

          في وقت ما، واصلت القيام بذلك، وأنا متأكد من أن الكثير منا يفعل ذلك: في اللحظة التي نرى فيها طائرًا، نبدأ في إطلاق النار في الوضع المستمر.

          صحيح أن قلقنا من التقاط صورة قبل إقلاع الطائر أمر مفهوم. لكن الصورة تتجاوز مجرد الموضوع. فهو يتضمن القصة التي يتم سردها، والضوء الذي يضيف العاطفة، والخلفية التي تضيف إلى الجماليات وغيرها الكثير. لفهم كل هذا، تحتاج إلى الاسترخاء لبضع دقائق، وفهم المشهد ثم الضغط على زر التصوير. ستكون مثل هذه الصورة دائمًا أفضل من تلك التي نقرت عليها في اللحظة التي رأيت فيها الطائر. قد تكون هناك بقع ذات إضاءة جيدة وأخرى ذات إضاءة غير جيدة. إن صورة طائر في الظل مع ضوء الشمس القاسي في كل مكان لن تصل إلى أي مكان. وبالمثل، قد تكون هناك بقع ذات خلفية مشتتة للانتباه. تحرك لترى ما إذا كنت ستحصل على زاوية أفضل أم خلفية أقل تشتيتًا. يستغرق الأمر بضع دقائق لمعالجة كل شيء، وإذا انتهى بك الأمر بالتقاط صورة قبل ذلك، فمن المحتمل جدًا أن يتم إعدامها.

           طائر الغاق العظيم | نيكون D750 عند 500 مم، ISO 280، 1/400، f/5.6 مالك الحزين الليلي شبه البالغ | نيكون D750 عند 500 مم، ISO 400، 1/500، f/5.6

          تعليق


          • #6
            Mind Your Camera Settings


            Every scene is distinct, even if one frame falls a few inches away from the previous one or a few minutes after. There is no single group of camera settings that would allow you to photograph all through the day without modification. (This issue is again one more reason for tip #2.)

            For example, you might have set your camera to photograph a bright bird with a dark background, and the image looks good. But the same settings could be catastrophic for a dark bird a few feet away. Always remember your previous photo or the previous setting.

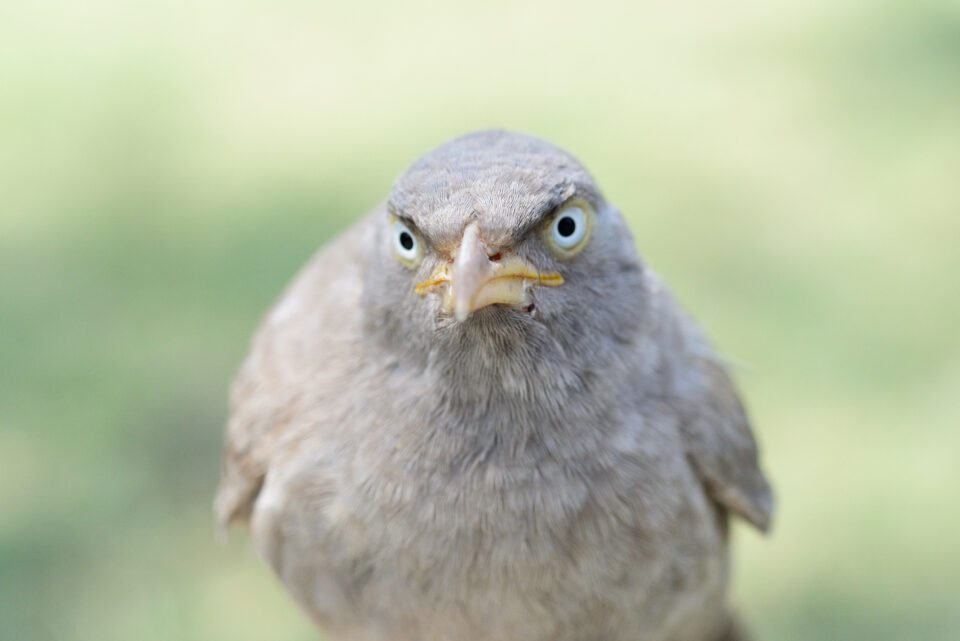
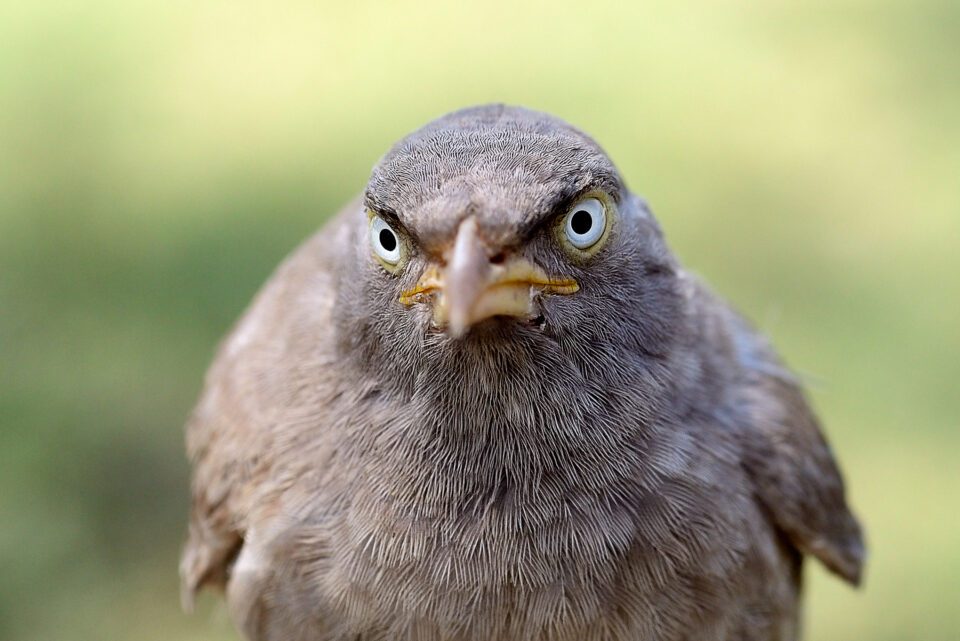
            Take a look at the two pictures below. I initially had the camera on group-area autofocus. I focused on the bird’s right eye, which was less illuminated than its beak. The camera acquired focus on the high contrast forehead, leaving me with blurry eyes. Then, I shifted the focus to the left eye which was properly illuminated, giving me a shot with sharp eyes:
            NIKON D750 @ 60mm, ISO 1100, 1/1600, f/5.6NIKON D750 @ 60mm, ISO 720, 1/1600, f/5.6
            It’s not only focus settings that matter so much. Another critical one is exposure compensation, something we might end up forgetting most of the time. If we leave exposure compensation as it was for the previous photo, it is easy to over- or under-expose a set of photos. Sometimes we might be able to fix issues in post, but, as always, nothing beats getting it right in the camera.

            I personally have developed a habit of looking into the settings display every once in a while to remind me of the settings that are currently in use, so that I change it when the scene changes. If you do not actively keep track of your current settings, especially vital settings like focus and exposure compensation, you are not going to remember to change them when the scene changes.

            تعليق


            • #7
              اهتم بإعدادات الكاميرا

              كل مشهد مميز، حتى لو كان أحد الإطارات يقع على بعد بضع بوصات من المشهد السابق أو بعد دقائق قليلة. لا توجد مجموعة واحدة من إعدادات الكاميرا التي تسمح لك بالتصوير طوال اليوم دون تعديل. (هذه المشكلة مرة أخرى هي سبب آخر للنصيحة رقم 2.)

              على سبيل المثال، ربما قمت بضبط الكاميرا لتصوير طائر مشرق بخلفية داكنة، وتبدو الصورة جيدة. لكن نفس الإعدادات يمكن أن تكون كارثية بالنسبة لطائر أسود على بعد بضعة أقدام. تذكر دائمًا صورتك السابقة أو الإعداد السابق.

              ألق نظرة على الصورتين أدناه. كان لدي في البداية الكاميرا ذات التركيز التلقائي لمنطقة المجموعة. ركزت على عين الطائر اليمنى، التي كانت أقل إضاءة من منقاره. ركزت الكاميرا على الجبهة ذات التباين العالي، مما تركني بعيون ضبابية. بعد ذلك، حولت التركيز إلى العين اليسرى التي كانت مضاءة بشكل صحيح، مما أعطاني لقطة بعيون حادة:

              نيكون D750 عند 60 ملم، ISO 1100، 1/1600، f/5.6 نيكون D750 عند 60 ملم، ISO 720، 1/1600، f/5.6

              ليست إعدادات التركيز فقط هي التي تهم كثيرًا. هناك أمر آخر بالغ الأهمية وهو تعويض التعريض الضوئي، وهو أمر قد ينتهي بنا الأمر إلى نسيانه في معظم الأوقات. إذا تركنا تعويض التعريض الضوئي كما كان في الصورة السابقة، فمن السهل الإفراط في تعريض مجموعة من الصور أو تقليل تعريضها للضوء. في بعض الأحيان قد نتمكن من إصلاح المشكلات في المنشور، ولكن، كما هو الحال دائمًا، لا شيء يضاهي تصحيح المشكلة في الكاميرا.

              لقد اعتدت شخصيًا على النظر إلى شاشة الإعدادات بين الحين والآخر لتذكيري بالإعدادات المستخدمة حاليًا، حتى أقوم بتغييرها عندما يتغير المشهد. إذا لم تقم بتتبع إعداداتك الحالية بشكل فعال، وخاصة الإعدادات الحيوية مثل التركيز البؤري وتعويض التعرض للضوء، فلن تتذكر تغييرها عندما يتغير المشهد.

              تعليق


              • #8
                Use the Right Shutter Speed


                The right shutter speed is crucial for birds. Perched birds can often be taken at 1/400, birds moving on a branch often need 1/800, while birds in flight might need something as fast as 1/2500.

                However, one of the most frequent mistakes I’ve seen beginners make is using too fast a shutter speed. Often this happens because they needed something fast in one moment such as 1/1600, but then they forget to turn the shutter speed down for a perched bird.

                This is why I recommend having a quick way to switch between perched birds and birds in flight. If you forget to do this, you risk having much more noise in your bird photographs than is necessary. Instead, by turning down your shutter speed when you don’t need it, you’ll ensure that you always use as much light as you can.
                استخدم سرعة الغالق المناسبة

                تعد سرعة الغالق الصحيحة أمرًا بالغ الأهمية بالنسبة للطيور. غالبًا ما يمكن التقاط الطيور الجاثمة بسرعة 1/400، وغالبًا ما تحتاج الطيور التي تتحرك على فرع إلى سرعة 1/800، بينما قد تحتاج الطيور أثناء الطيران إلى شيء بسرعة تصل إلى 1/2500.

                ومع ذلك، فإن أحد الأخطاء الأكثر شيوعًا التي رأيت المبتدئين يرتكبونها هو استخدام سرعة غالق سريعة جدًا. يحدث هذا غالبًا لأنهم يحتاجون إلى شيء سريع في لحظة واحدة مثل 1/1600، لكنهم ينسون بعد ذلك خفض سرعة الغالق لطائر جاثم.

                ولهذا السبب أوصي بوجود طريقة سريعة للتبديل بين الطيور الجاثمة والطيور أثناء الطيران. إذا نسيت القيام بذلك، فإنك تخاطر بحدوث ضوضاء أكبر بكثير في صور الطيور الخاصة بك مما هو ضروري. بدلاً من ذلك، من خلال خفض سرعة الغالق عندما لا تحتاج إليها، ستضمن أنك تستخدم دائمًا أكبر قدر ممكن من الضوء.

                تعليق


                • #9
                  Record Shots” Are Seldom Good Photographs


                  Bird watching is very different from bird photography. At the same time, if you are one, there’s a good chance you’re also the other.

                  In bird watching, a “record shot” is merely a picture of a rare bird, and it most of the time serves as a proof that you have seen such a bird. But this sort of documentary shot will seldom make it a good photograph unless it conveys a concrete message and/or portrays the bird with all its textual details. I personally have quite a few pictures of very rare birds and mammals that are sleeping in my hard drives. None of them will never make it to any exhibiting platform.

                  Many times, I have seen a lot of photographers spot a bird, take a few photographs and move to the next spot. Most of these photographs are likely to be just record shots which would not be interesting for most viewers. Instead, spending more time with one subject will yield better photographs than trying to click every bird that flies around you. So, if your purpose is to capture the highest quality bird photos rather than a plain documentary record of what you saw, you will need to put in some extra effort.
                  "اللقطات المسجلة" نادراً ما تكون صوراً جيدة

                  تختلف مراقبة الطيور كثيرًا عن تصوير الطيور. وفي الوقت نفسه، إذا كنت واحدًا، فهناك فرصة جيدة لأن تكون الآخر أيضًا.

                  في مراقبة الطيور، "اللقطة القياسية" هي مجرد صورة لطائر نادر، وفي معظم الأحيان تكون بمثابة دليل على أنك رأيت مثل هذا الطائر. لكن هذا النوع من اللقطات الوثائقية نادرًا ما يجعله صورة فوتوغرافية جيدة ما لم ينقل رسالة ملموسة و/أو يصور الطائر بكل تفاصيله النصية. لدي شخصيًا عدد لا بأس به من الصور لطيور وثدييات نادرة جدًا نائمة في محركات الأقراص الثابتة الخاصة بي. لن يتمكن أي منهم من الوصول إلى أي منصة عرض.

                  في كثير من الأحيان، رأيت الكثير من المصورين يكتشفون طائرًا، ويلتقطون بعض الصور وينتقلون إلى المكان التالي. من المرجح أن تكون معظم هذه الصور مجرد لقطات تسجيلية لن تكون مثيرة للاهتمام بالنسبة لمعظم المشاهدين. وبدلاً من ذلك، فإن قضاء المزيد من الوقت مع موضوع واحد سيؤدي إلى الحصول على صور أفضل من محاولة التقاط كل طائر يطير حولك. لذا، إذا كان هدفك هو التقاط صور عالية الجودة للطيور بدلاً من تسجيل سجل وثائقي عادي لما شاهدته، فستحتاج إلى بذل بعض الجهد الإضافي.

                  تعليق


                  • #10
                    Don’t Ignore Common Subjects


                    Along the same lines as the previous tip – All of us love to come back with brilliant photographs of rare birds and animals. Great if we get such images. But, most of the time, we tend to ignore common subjects that make great photographs.

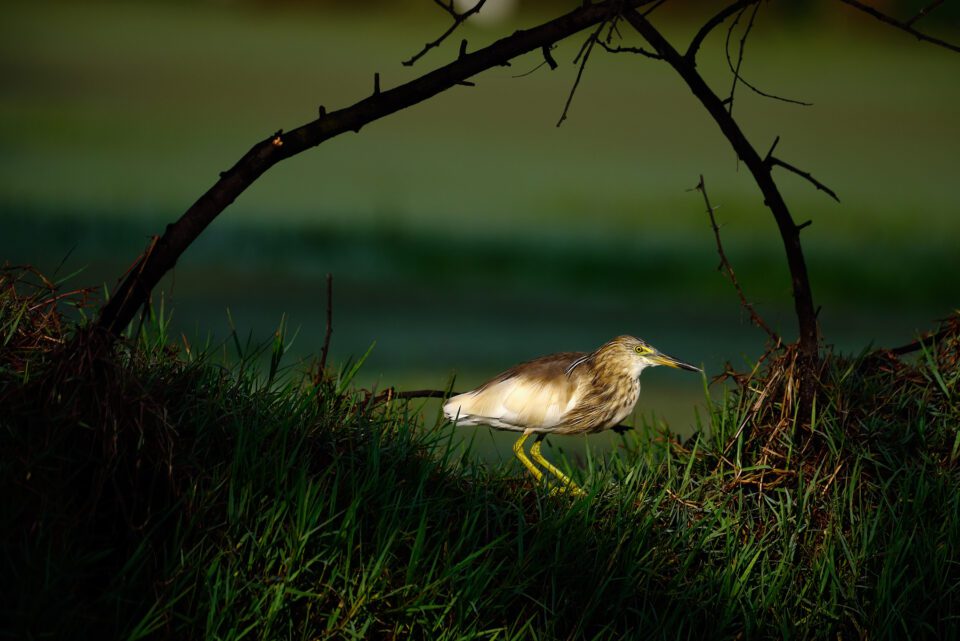
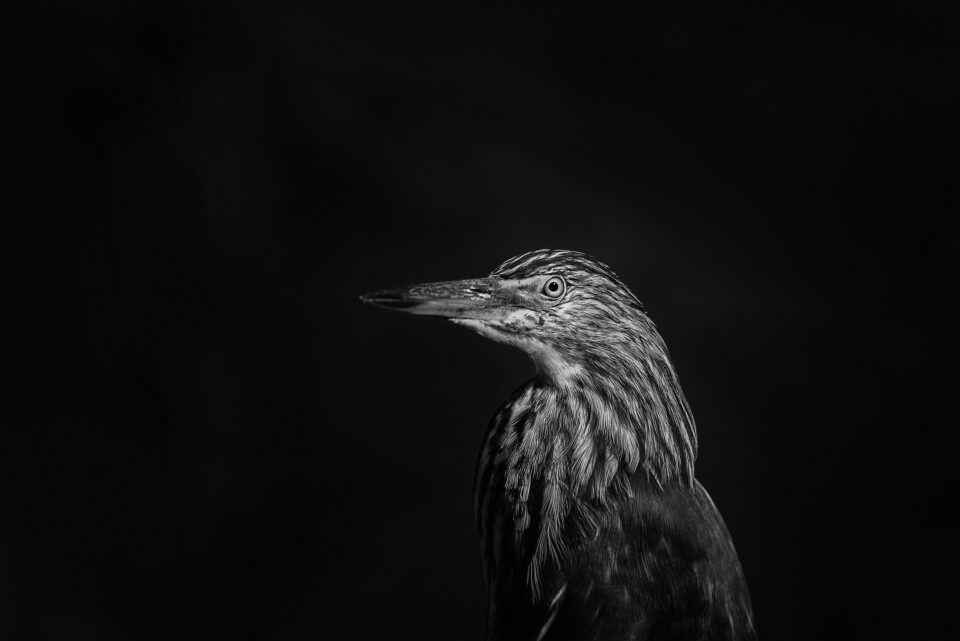
                    For obvious reasons, most viewers might not admire a common crow or a household sparrow. But do not forget that a photograph is much more than merely the subject! It goes beyond that – things like light, behavior, and composition are just as important if not more so. Below is a picture of a humble Indian pond heron, which is a very common bird in India, but the light and the frame were too good to miss.
                    Indian Pond Heron | NIKON D750 @ 500mm, ISO 140, 1/1000, f/5.6
                    On top of that, there is only one way to master photography: Practice! Photographing common birds is a great way to practice, which one day will help us out tremendously when we are photographing rare birds.
                    لا تتجاهل المواضيع الشائعة

                    على غرار النصيحة السابقة – كلنا نحب أن نعود بصور رائعة للطيور والحيوانات النادرة. عظيم إذا حصلنا على مثل هذه الصور. ولكن، في معظم الأحيان، نميل إلى تجاهل الموضوعات الشائعة التي تصنع صورًا رائعة.

                    لأسباب واضحة، قد لا يعجب معظم المشاهدين بغراب عادي أو عصفور منزلي. ولكن لا تنس أن الصورة هي أكثر بكثير من مجرد الموضوع! ويتجاوز الأمر ذلك - فأشياء مثل الضوء والسلوك والتكوين لا تقل أهمية إن لم تكن أكثر أهمية. يوجد أدناه صورة لطائر مالك الحزين الهندي المتواضع، وهو طائر شائع جدًا في الهند، ولكن الضوء والإطار كانا رائعين للغاية بحيث لا يمكن تفويتهم.

                    بلشون البركة الهندي | نيكون D750 @ 500 مم، ISO 140، 1/1000، f/5.6

                    علاوة على ذلك، هناك طريقة واحدة فقط لإتقان التصوير الفوتوغرافي: الممارسة! يعد تصوير الطيور الشائعة طريقة رائعة للتدرب، والتي ستساعدنا يومًا ما بشكل كبير عندما نقوم بتصوير الطيور النادرة.

                    تعليق


                    • #11
                      Get Close to Your Subject


                      Bird photography is, in part, about getting the textual details. This is where most photographers say, “Reach is almost everything in bird photography.” It is true to a certain extent. But there is a difference between you getting close to your subject and getting a similar frame using a large focal length.

                      Personally, I do not think most photographers would need anything more than a 600mm reach (in full frame terms). Beyond that, issues like haze come into play, which affect the overall contrast and colors to a noticeable extent. A person sitting closer to a bird shooting at 300mm is likely to get more textual details as compared to one getting a similar composition at 750mm.

                      It does depend upon the gear to a large extent, but most of the time we get much better pictures when we are at the closest possible to our subjects. Also, the closer we are to the subject, the better the quality of bokeh that aids in subject separation.
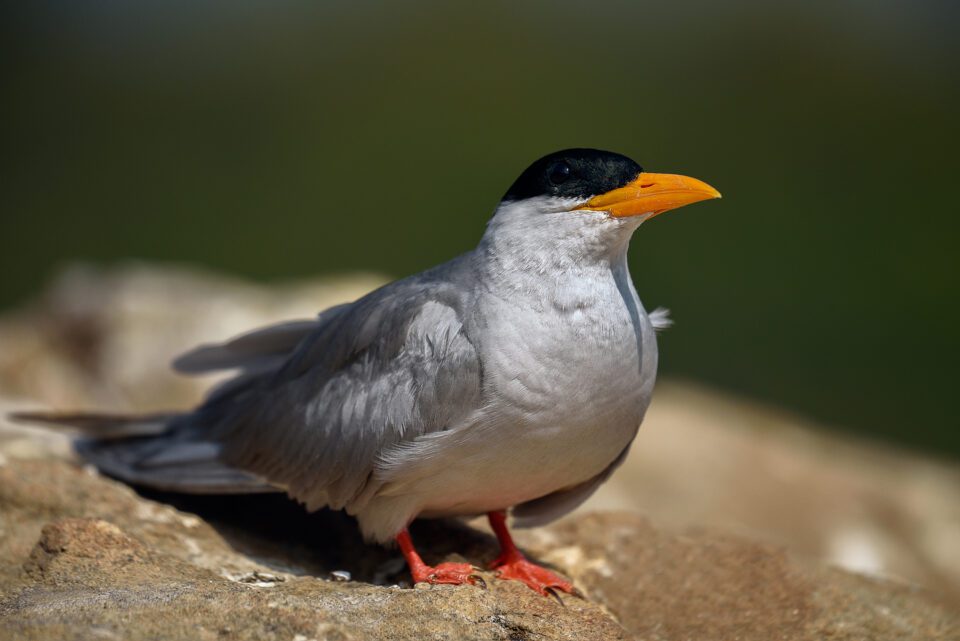
                      River Tern | NIKON D750 @ 500mm, ISO 320, 1/2000, f/5.6

                      اقترب من موضوعك

                      يدور تصوير الطيور، جزئيًا، حول الحصول على التفاصيل النصية. هذا هو المكان الذي يقول فيه معظم المصورين: "الوصول هو كل شيء تقريبًا في تصوير الطيور". وهذا صحيح إلى حد ما. ولكن هناك فرق بين الاقتراب من الهدف والحصول على إطار مماثل باستخدام طول بؤري كبير.

                      أنا شخصياً لا أعتقد أن معظم المصورين سيحتاجون إلى أي شيء يزيد عن مدى وصوله إلى 600 ملم (في الإطار الكامل). علاوة على ذلك، هناك مشكلات مثل الضباب، والتي تؤثر على التباين العام والألوان إلى حد ملحوظ. من المرجح أن يحصل الشخص الذي يجلس بالقرب من طائر يطلق النار على مسافة 300 ملم على تفاصيل نصية أكثر مقارنةً بشخص يحصل على تركيبة مماثلة على مسافة 750 ملم.

                      يعتمد الأمر على المعدات إلى حد كبير، ولكن في معظم الأحيان نحصل على صور أفضل بكثير عندما نكون في أقرب مكان ممكن من أهدافنا. وأيضًا، كلما اقتربنا من الهدف، كلما كانت جودة البوكيه التي تساعد في فصل الهدف أفضل.

                       نهر الخرشنة | نيكون D750 @ 500 مم، ISO 320، 1/2000، f/5.6

                      تعليق


                      • #12
                        Approach Your Subject with Patience


                        Now that we know there is no substitute for getting close to your subject, the next question would be, how to get close? Below are a few pointers that I use, and it works out most of the time:
                        • The speed with which you approach your subject is indirectly proportional to the probability of it flying off. In other words, the slower you are, the greater are your chances of getting the shot.
                        • Most birds seem to have a circle of comfort. They will be cool until you cross a particular radius, after which they become very cautious. This circle will vary with every individual.
                        • Once a bird gets cautious, it will look around to take off – and, worse, it will turn away from you. If you see the bird take a deep breath, it often means it is going to take off. Once you see that the bird is stressed, you have probably entered its circle of comfort. Stop moving. There is a chance it will cool down and stay. Sometimes, the bird will even come close to you. If your subject gets comfortable with you around, your chances of getting a head-on shot maximize. The bird is also more likely to display its natural characters.
                        • Stay low. Crawl toward your subject if possible. Crawling freaks out your subjects way less than walking at full height.
                        • If you see a bird in a particular perch, chances are you might see it in the same perch again later. If you find feces on one particular perch, it means that’s a favorite.

                        تعامل مع موضوعك بالصبر

                        الآن بعد أن علمنا أنه لا يوجد بديل للاقتراب من موضوعك، فإن السؤال التالي سيكون، كيف يمكنك الاقتراب؟ وفيما يلي بعض المؤشرات التي أستخدمها، وهي تعمل في معظم الأوقات:

                        إن السرعة التي تقترب بها من هدفك تتناسب بشكل غير مباشر مع احتمال طيرانه. بمعنى آخر، كلما كنت أبطأ، زادت فرصك في الحصول على اللقطة. يبدو أن معظم الطيور لديها دائرة من الراحة. سيكونون هادئين حتى تعبر نصف قطر معين، وبعد ذلك يصبحون حذرين للغاية. ستختلف هذه الدائرة من شخص لآخر. بمجرد أن يصبح الطائر حذرًا، فإنه سينظر حوله ليقلع - والأسوأ من ذلك أنه سوف يبتعد عنك. إذا رأيت الطائر يأخذ نفساً عميقاً، فهذا غالباً ما يعني أنه سيقلع. بمجرد أن ترى أن الطائر متوتر، فمن المحتمل أنك دخلت دائرة الراحة الخاصة به. توقف عن الحركة. هناك احتمال أن يبرد ويبقى. في بعض الأحيان، سوف يقترب منك الطائر. إذا شعر هدفك بالارتياح معك، فستزيد فرصك في الحصول على لقطة مباشرة. من المرجح أيضًا أن يُظهر الطائر خصائصه الطبيعية. ابق منخفضًا. قم بالزحف نحو موضوعك إن أمكن. الزحف يخيف أهدافك بطريقة أقل من المشي على ارتفاع كامل. إذا رأيت طائرًا في مجثم معين، فمن المحتمل أنك قد تراه في نفس المجثم مرة أخرى لاحقًا. إذا وجدت برازًا على مكان معين، فهذا يعني أن هذا هو المكان المفضل لديك.

                        تعليق


                        • #13
                          Get to Eye Level


                          This could be a cliche, but an article on bird photography is incomplete without it. The best bird photographs are mostly eye-level shots. The feel and the connection that eye-level shots give is unmatched. Especially, if you get your lens to the eye level of your subject or a bit lower and get your subject to look into the lens. Then there is nothing more you can ask for.

                          Eye-level shots also throw out the best possible bokeh. When you are above the eye of the subject, you mostly get the ground which most often tends to be distracting. If it happens to be water it is even less desirable as the reflections from the surface make it way too distractive. Eye-level shots mean that the background is farther away by comparison, making it more likely to look interesting and less distracting.
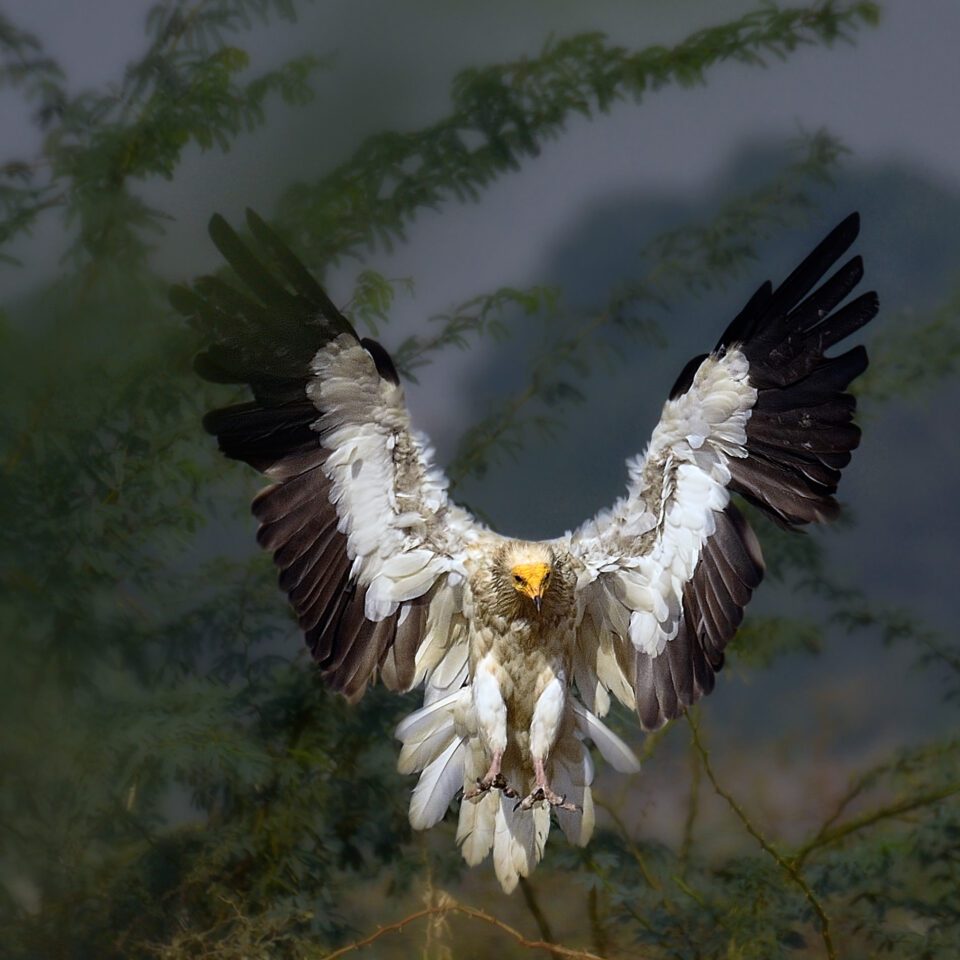
                          Egyptian Vulture | NIKON D750 @ 500mm, ISO 1100, 1/4000, f/8.0NIKON D750 @ 500mm, ISO 100, 1/1000, f/5.6

                          تعليق


                          • #14
                            الوصول إلى مستوى العين

                            قد يكون هذا كلامًا مبتذلاً، لكن المقالة عن تصوير الطيور غير مكتملة بدونها. أفضل صور الطيور هي في الغالب لقطات على مستوى العين. إن الإحساس والاتصال الذي توفره اللقطات على مستوى العين لا مثيل لهما. خاصة، إذا قمت بإيصال عدستك إلى مستوى عين هدفك أو أقل قليلاً وجعلت هدفك ينظر إلى العدسة. ثم لا يوجد شيء آخر يمكنك أن تطلبه.

                            كما تنتج اللقطات على مستوى العين أفضل تأثير بوكيه ممكن. عندما تكون فوق عين الهدف، فإنك تحصل في الغالب على الأرض التي غالبًا ما تكون مشتتة للانتباه. أما إذا كان الماء فهو أقل رغبةً لأن الانعكاسات من السطح تجعله مشتتًا للغاية. تعني اللقطات على مستوى العين أن الخلفية بعيدة بالمقارنة، مما يجعلها تبدو أكثر إثارة للاهتمام وأقل تشتيتًا للانتباه.

                             النسر المصري | نيكون D750 @ 500 مم، ISO 1100، 1/4000، f/8.0نيكون D750 @ 500 مم، ISO 100، 1/1000، f/5.6

                            تعليق


                            • #15
                              Don’t Crop Too Much


                              Let’s admit it. Most of us do it. Cropping becomes almost inevitable with bird photography. But, in reality, the quality of my pictures increases exponentially when I do not have to crop my images to 30%, 50%, or almost 100%.

                              It is true that modern cameras like the Nikon D850 give us 48MP, and other brands are just as strong in the megapixel war, allowing us to crop quite a lot. To a certain extent, it does help. But if your subject is a tiny dot before cropping, you will end up with a low-quality image most of the time even if the image is acceptably sharp.

                              I have found that, regardless of what megapixel camera you use, if you crop a picture more than 50% you are compromising heavily on its quality. I generally make sure not to get over the 50% crop mark. Most of the time, the cropped portion is about 20% or less, where I have to straighten the lines or get a perspective that I want. But it takes some practice to get to that point, especially in terms of learning your subject’s behavior so you can approach close enough.

                              The reason why most photographers go for crop bodies when it comes to birding is, in part, the crop factor. The pixel pitch (no. of pixels per sq. inch) is higher in a 24 MP crop body than a 24 MP full-frame camera, meaning you can get more total pixels on your subject at a given focal length. This is certainly a good thing sometimes, but it is no substitute for approaching your subject properly and using the right lens. I would much rather be close to my subject on a full-frame camera than farther away on a crop-sensor camera with the same composition.

                              Lastly, there is one more issue with over-cropping. Most of the time with bird photography, we are forced to shoot at higher ISOs. It literally means more noise. By cropping the image too much, we are magnifying the noise. We could use noise reduction algorithms in post-processing. But noise reduction has its own problems, like loss of details, so it is best to keep at a minimum.

                              تعليق

                              يعمل...
                              X