كيف تشتري معدات التصوير لأول مرة Beginning Photography Equipment

تقليص
X
 
  • تصفية - فلترة
  • الوقت
  • عرض
إلغاء تحديد الكل
مشاركات جديدة

  • كيف تشتري معدات التصوير لأول مرة Beginning Photography Equipment

    Beginning Photography Equipment


    Buying photography equipment for the first time is a daunting task. Useful guides exist to help beginners choose a good camera, but few newcomers realize that the camera itself is only the first of many pieces of equipment necessary to create a full setup for photography. In this guide, I will suggest a complete kit — everything from lens cloths to computer monitors — that will provide a beginner with high quality images (and room to grow) for a price of around 2000 US dollars.
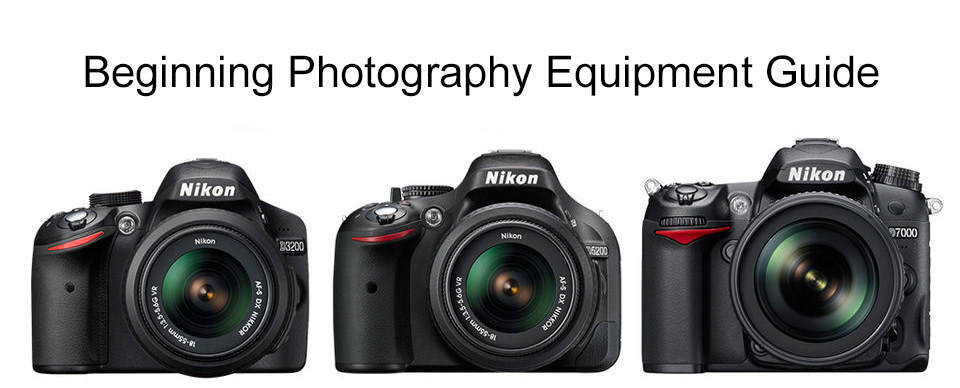


    Note that this guide is not a comprehensive list of equipment that will work for every type of photographer. As your photography becomes more specialized — portraiture, landscapes, wildlife, or anything else — you will gravitate towards more specialized equipment as well. The recommendations below can be considered an all-purpose starter kit rather than a list tuned to one specific type of photographer.
    بداية معدات التصوير


    بقلم سبنسر كوكس 135 تعليقًا
    تم التحديث الأخير في 20 يناير 2022

    يعد شراء معدات التصوير الفوتوغرافي لأول مرة مهمة شاقة. توجد أدلة مفيدة لمساعدة المبتدئين في اختيار كاميرا جيدة، ولكن القليل من القادمين الجدد يدركون أن الكاميرا نفسها ليست سوى القطعة الأولى من العديد من المعدات اللازمة لإنشاء إعداد كامل للتصوير الفوتوغرافي. في هذا الدليل، سأقترح مجموعة كاملة - كل شيء بدءًا من أقمشة العدسات وحتى شاشات الكمبيوتر - والتي ستوفر للمبتدئين صورًا عالية الجودة (ومساحة للنمو) بسعر يبلغ حوالي 2000 دولار أمريكي.


    لاحظ أن هذا الدليل ليس قائمة شاملة بالمعدات التي تناسب جميع أنواع المصورين. عندما يصبح التصوير الفوتوغرافي الخاص بك أكثر تخصصًا - الصور الشخصية أو المناظر الطبيعية أو الحياة البرية أو أي شيء آخر - فسوف تنجذب نحو معدات أكثر تخصصًا أيضًا. يمكن اعتبار التوصيات الواردة أدناه مجموعة أدوات أولية متعددة الأغراض وليست قائمة مخصصة لنوع واحد محدد من المصورين.

  • #2
    Table of Contents

    جدول المحتويات

    الكاميرا
    العدسات
    البرامج
    الحامل الثلاثي
    الشاشات
    مرشحات الإضاءة
    الإضافات
    الملخص

    تعليق


    • #3
      The Camera


      The core of photography is a camera, or at least the sensor of a camera. At the moment, one of the biggest debates in the photography world is between two different types of cameras: mirrorless and DSLR cameras. Both have their merits, but a beginning photographer on a tight budget should be looking more closely at DSLRs. With entry-level models, new mirrorless cameras cost about the same as new DSLRs, and sometimes less. However, you can still buy older, high-quality DSLR equipment (including lenses) for a lower price than similar mirrorless gear. Mirrorless cameras are filling this gap quickly, but the best camera for a beginner on a budget is almost certainly a DSLR.

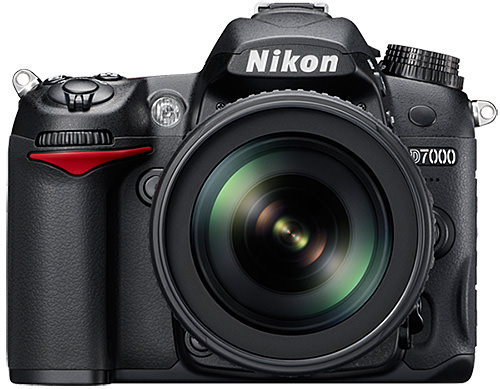
      Of all the possible DSLR cameras, my strong recommendation is to buy the Nikon D7000, used, from the camera store Adorama. Some people find too much risk in buying a used camera from eBay and Adorama is one of the most respected names in the camera business — when they rate a used camera at E-, its condition will be as good as most “mint” cameras sold through eBay.

      The D7000 is better than an entry-level DSLR because it give you room to grow. Although it has the same sensor as some cheaper cameras, it gives you so many more features (including extra dials that make it easier to change settings once you learn about your camera) that make it indispensable. How do I know that the D7000 is so good? Simple — I have taken more than 60,000 photos with it! Check out the three images below, all taken with the D7000:
      D7000D7000D7000
      To find some more info and sample photos from the D7000, check out our review. If you want more details on entry-level Nikon DSLRs, we have a general outline as well.

      Keep in mind that the D7000 can be a complex camera for a beginner. However, if you’re dedicated enough to be reading this article in the first place, you are probably the type of person who will grow to appreciate the many benefits offered by the D7000.

      Here is a link to the Nikon D7000 at Adorama. Note that this camera has been discontinued, so you have to click on the “Buy it used” heading to see your options. Generally, an “E” quality D7000 will be about $400.

      Another great option, especially if you are just starting out, is one of Nikon’s entry-level DSLRs. These cameras have slightly-better image quality than the D7000, and they are easier to use, but they don’t have as many features for learning photography. Nikon’s newest is the D3300. When you buy it with a kit lens, the D3300 from Adorama is $500.

      Total: $400 for the D7000

      تعليق


      • #4
        الكاميرا


        جوهر التصوير الفوتوغرافي هو الكاميرا، أو على الأقل مستشعر الكاميرا. في الوقت الحالي، يدور أحد أكبر الجدل في عالم التصوير الفوتوغرافي بين نوعين مختلفين من الكاميرات: الكاميرات بدون مرآة وكاميرات DSLR. يتمتع كل منهما بمزاياه، ولكن يجب على المصور المبتدئ بميزانية محدودة أن ينظر عن كثب إلى كاميرات DSLR. مع الطرز المبتدئة، تبلغ تكلفة الكاميرات الجديدة غير المزودة بمرآة نفس تكلفة كاميرات DSLR الجديدة تقريبًا، وأحيانًا أقل. ومع ذلك، لا يزال بإمكانك شراء معدات DSLR قديمة وعالية الجودة (بما في ذلك العدسات) بسعر أقل من المعدات المماثلة التي لا تحتوي على مرايا. تعمل الكاميرات عديمة المرآة على سد هذه الفجوة بسرعة، ولكن من المؤكد تقريبًا أن أفضل كاميرا للمبتدئين بميزانية محدودة هي كاميرا DSLR.

        من بين جميع كاميرات DSLR الممكنة، أوصي بشدة بشراء كاميرا Nikon D7000 المستخدمة من متجر الكاميرات Adorama. يجد بعض الأشخاص مخاطرة كبيرة في شراء كاميرا مستعملة من موقع eBay، وتعد Adorama واحدة من أكثر الأسماء احترامًا في مجال صناعة الكاميرات - عندما يقيمون كاميرا مستعملة بـ E-، فإن حالتها ستكون جيدة مثل معظم الكاميرات "النعناعية" المباعة من خلال موقع ئي باي.

        تعد كاميرا D7000 أفضل من كاميرا DSLR للمبتدئين لأنها تمنحك مساحة للنمو. على الرغم من أنه يحتوي على نفس المستشعر الموجود في بعض الكاميرات الرخيصة، فإنه يوفر لك العديد من الميزات (بما في ذلك الأقراص الإضافية التي تسهل تغيير الإعدادات بمجرد التعرف على الكاميرا) مما يجعلها لا غنى عنها. كيف أعرف أن كاميرا D7000 جيدة جدًا؟ بسيطة – لقد التقطت أكثر من 60.000 صورة به! ألق نظرة على الصور الثلاث أدناه، والتي تم التقاطها جميعًا بكاميرا D7000:

        7000D70007000D

        للعثور على مزيد من المعلومات ونماذج الصور من كاميرا D7000، راجع مراجعتنا. إذا كنت تريد المزيد من التفاصيل حول كاميرات Nikon DSLR للمبتدئين، فلدينا مخطط عام أيضًا.

        ضع في اعتبارك أن كاميرا D7000 يمكن أن تكون كاميرا معقدة بالنسبة للمبتدئين. ومع ذلك، إذا كنت ملتزمًا بما يكفي لقراءة هذه المقالة في المقام الأول، فمن المحتمل أنك من النوع الذي سيقدر المزايا العديدة التي تقدمها كاميرا D7000.

        إليك رابط لكاميرا Nikon D7000 في Adorama. لاحظ أنه تم إيقاف إنتاج هذه الكاميرا، لذا يتعين عليك النقر على عنوان "شراءها مستعملة" لمعرفة الخيارات المتاحة أمامك. بشكل عام، تبلغ تكلفة كاميرا D7000 ذات الجودة "E" حوالي 400 دولار.

        هناك خيار رائع آخر، خاصة إذا كنت بدأت للتو، وهو إحدى كاميرات DSLR للمبتدئين من نيكون. تتمتع هذه الكاميرات بجودة صورة أفضل قليلاً من كاميرا D7000، وهي أسهل في الاستخدام، ولكنها لا تحتوي على العديد من الميزات لتعلم التصوير الفوتوغرافي. أحدث نيكون هو D3300. عند شرائها مع مجموعة عدسات، فإن سعر كاميرا D3300 من Adorama هو 500 دولار.

        المجموع: 400 دولار للكاميرا D7000

        تعليق


        • #5
          Lenses


          Whereas a camera sensor will record the light that it receives, a lens’s job is arguably even more important: help the light get to the sensor in the first place.

          Lenses range from the “free” — those which come in a kit with the camera — to the unbelievably expensive. As a beginner, it can be tough to determine which lenses are worth their asking price, especially if you have no prior knowledge of which lenses even exist in the first place (although our lens database can help).

          If you want a high-quality beginning lens for the lowest possible price, you should look at prime lenses (those which do not zoom) or third-party lenses. I do not recommend starting with the kit lens that comes with some cameras (usually an 18-55mm zoom), since you will soon realize that you want something better.

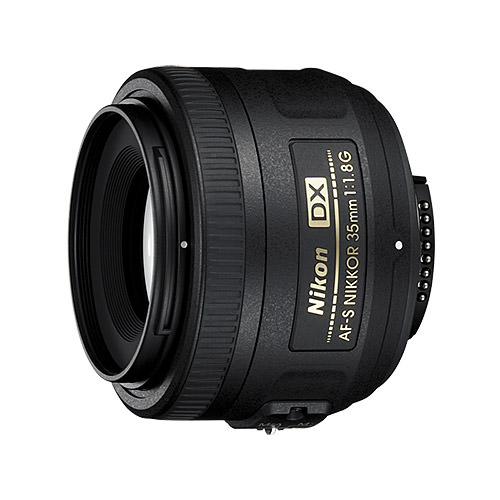
          My first recommendation, if you use a Nikon camera like the D7000, is to buy the wonderful Nikon 35mm f/1.8 DX lens. This tiny gem is sharp — check out our sample photos — and it costs just under $200. Here is a link to the 35mm f/1.8 DX at Adorama.

          To add to the 35mm f/1.8, you will probably want a wide-to-telephoto zoom, and a good choice is the Sigma 17-50mm f/2.8 OS lens. This is a particularly useful lens because it not only has a wide aperture of f/2.8 (which lets it work well in dark scenes), but it also has image stabilization to help make your handheld images sharper. Here is a link to the Sigma 17-50mm f/2.8 OS, which costs $520 at Adorama.

          Or, if you would rather stick to a single lens, the revolutionary Sigma 18-35mm f/1.8 is $800, and it would replace both the lenses above. It is a heavy lens, but it is amazingly high-quality — just check out our review. Here is a link to the Sigma 18-35mm f/1.8 lens at Adorama.

          Lenses are an individual decision, and these three are nothing more than my own recommendations. If you practice a more specific type of photography (such as wildlife), you could prefer completely different lenses. However, for a typical beginner, these lenses are a great way to find out what type of photography you like the most. Plus, they are good enough to keep even as you grow more specialized.

          Total: $720 or $800, depending upon the lenses you choose

          تعليق


          • #6
            العدسات


            في حين أن مستشعر الكاميرا سوف يسجل الضوء الذي يتلقاه، يمكن القول أن وظيفة العدسة أكثر أهمية: مساعدة الضوء على الوصول إلى المستشعر في المقام الأول.

            تتراوح العدسات من "المجانية" - تلك التي تأتي ضمن مجموعة مع الكاميرا - إلى العدسات الباهظة الثمن بشكل لا يصدق. باعتبارك مبتدئًا، قد يكون من الصعب تحديد العدسات التي تستحق سعرها المطلوب، خاصة إذا لم تكن لديك معرفة مسبقة بالعدسات الموجودة في المقام الأول (على الرغم من أن قاعدة بيانات العدسات لدينا يمكن أن تساعدك).

            إذا كنت تريد عدسة أولية عالية الجودة بأقل سعر ممكن، فيجب عليك النظر إلى العدسات الأولية (تلك التي لا تقوم بالتكبير) أو العدسات الخارجية. لا أوصي بالبدء باستخدام العدسات المجمعة التي تأتي مع بعض الكاميرات (عادةً ما تكون عدسة تكبير مقاس 18-55 مم)، لأنك ستدرك قريبًا أنك تريد شيئًا أفضل.

            توصيتي الأولى، إذا كنت تستخدم كاميرا نيكون مثل D7000، هي شراء عدسة نيكون الرائعة مقاس 35 ملم f/1.8 DX. هذه الجوهرة الصغيرة حادة للغاية — اطلع على عينات الصور لدينا — وتكلف أقل بقليل من 200 دولار. إليك رابط لعدسة 35 مم f/1.8 DX في Adorama.

            للإضافة إلى عدسة f/1.8 مقاس 35 مم، ستحتاج على الأرجح إلى تكبير/تصغير واسع إلى تقريب، والخيار الجيد هو عدسة Sigma مقاس 17-50 مم f/2.8 OS. تعد هذه العدسة مفيدة بشكل خاص لأنها لا تحتوي فقط على فتحة واسعة تبلغ f/2.8 (مما يتيح لها العمل بشكل جيد في المشاهد المظلمة)، ولكنها تحتوي أيضًا على ميزة تثبيت الصورة للمساعدة في جعل الصور المحمولة باليد أكثر وضوحًا. إليك رابط لنظام التشغيل Sigma 17-50mm f/2.8، والذي يكلف 520 دولارًا في Adorama.

            أو، إذا كنت تفضل التمسك بعدسة واحدة، فإن سعر عدسة Sigma 18-35mm f/1.8 الثورية هو 800 دولار، وستحل محل العدستين المذكورتين أعلاه. إنها عدسة ثقيلة، ولكنها ذات جودة عالية بشكل مدهش — ما عليك سوى الاطلاع على مراجعتنا. إليك رابط لعدسة Sigma 18-35mm f/1.8 في Adorama.

            العدسات هي قرار فردي، وهذه الثلاثة ليست أكثر من توصياتي الخاصة. إذا كنت تمارس نوعًا أكثر تحديدًا من التصوير الفوتوغرافي (مثل الحياة البرية)، فقد تفضل عدسات مختلفة تمامًا. ومع ذلك، بالنسبة للمبتدئين العاديين، تعد هذه العدسات طريقة رائعة لمعرفة نوع التصوير الفوتوغرافي الذي يعجبك أكثر. بالإضافة إلى ذلك، فهي جيدة بما يكفي للاحتفاظ بها حتى عندما تصبح أكثر تخصصًا.

            الإجمالي: 720 دولارًا أو 800 دولارًا، حسب العدسات التي تختارها

            تعليق


            • #7
              The Tripod


              Often overlooked and undervalued, a tripod doesn’t seem nearly as important as it really is. After all, three aluminum sticks glued together are no more complex than three sticks glued together. Right? Unfortunately, that logic is why many photographers choose to buy the least expensive tripod they can find, then leave it at home all the time because it’s cheaply-made and hard to use. A tripod should be as popular as its buddies Camera and Lens, but somewhere along the way it got the short end of the stick.

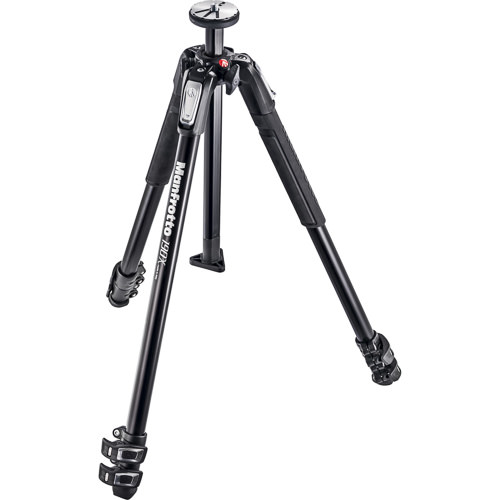
              You will realize over time whether or not you need a tripod for your photography (and if you do, you will want a more expensive model at some point in the future), but it is important for a beginner to have a solid model as well. With that in mind, my recommendation is to get the Manfrotto MT190X3 tripod. It is not a perfect tripod, but I can say (having used the older version of this tripod extensively) that it should be more than enough for most beginners. Plus, at $150, it is pretty inexpensive (as far as good tripods go). Here is a link to the MT190X3 at Adorama.

              However, a tripod is not enough — you still need a ballhead so that you can adjust the position of the camera. I have tried a handful of ballheads in the $100 range, and I can say that the best (by far) that I have used is the Oben BE-126 ballhead. Even with my heaviest camera and longest telephoto lens, this ballhead has never slipped out of position, and it always locks tightly. This head isn’t quite as good as the most expensive ballheads from companies like Really Right Stuff or Arca Swiss, but it is fantastic for the price. Here is a link to the BE-126 at B&H, another highly-reputable camera store.

              Total: $260

              تعليق


              • #8
                الحامل الثلاثي


                غالبًا ما يتم التغاضي عنه والتقليل من قيمته، لا يبدو الحامل ثلاثي الأرجل بنفس أهمية ما هو عليه بالفعل. بعد كل شيء، ثلاثة أعواد من الألومنيوم ملتصقة ببعضها البعض ليست أكثر تعقيدًا من ثلاثة أعواد ملتصقة معًا. يمين؟ لسوء الحظ، هذا المنطق هو السبب وراء اختيار العديد من المصورين شراء الحامل ثلاثي الأرجل الأقل تكلفة الذي يمكنهم العثور عليه، ثم تركه في المنزل طوال الوقت لأنه رخيص الصنع ويصعب استخدامه. من المفترض أن يحظى الحامل ثلاثي الأرجل بشعبية كبيرة مثل رفاقه الكاميرا والعدسة، ولكن في مكان ما على طول الطريق حصل على الطرف القصير من العصا.

                ستدرك بمرور الوقت ما إذا كنت بحاجة إلى حامل ثلاثي الأرجل للتصوير الفوتوغرافي الخاص بك أم لا (وإذا فعلت ذلك، فستحتاج إلى نموذج أكثر تكلفة في وقت ما في المستقبل)، ولكن من المهم للمبتدئين أن يكون لديهم نموذج قوي أيضًا . مع أخذ ذلك في الاعتبار، فإن توصيتي هي الحصول على حامل ثلاثي القوائم Manfrotto MT190X3. إنه ليس حاملًا ثلاثي القوائم مثاليًا، لكن يمكنني القول (بعد استخدام الإصدار الأقدم من هذا الحامل ثلاثي القوائم على نطاق واسع) أنه يجب أن يكون أكثر من كافٍ لمعظم المبتدئين. بالإضافة إلى ذلك، بسعر 150 دولارًا، فهو غير مكلف جدًا (فيما يتعلق بالحوامل الثلاثية الجيدة). إليك رابط إلى MT190X3 في Adorama.

                ومع ذلك، فإن الحامل ثلاثي الأرجل ليس كافيًا، فأنت لا تزال بحاجة إلى رأس كروي حتى تتمكن من ضبط موضع الكاميرا. لقد جربت عددًا قليلًا من رؤوس الكرات في نطاق 100 دولار، ويمكنني القول إن أفضل رأس استخدمته (حتى الآن) هو رأس الكرة Oben BE-126. حتى مع أثقل كاميرتي وأطول عدسة مقربة، لم ينزلق رأس الكرة هذا من موضعه أبدًا، ويتم قفله بإحكام دائمًا. هذا الرأس ليس بنفس جودة رؤوس الكرات الأغلى ثمناً من شركات مثل Real Right Stuff أو Arca Swiss، ولكنه رائع بالنسبة للسعر. فيما يلي رابط إلى BE-126 في B&H، وهو متجر كاميرات آخر يتمتع بسمعة طيبة.

                المجموع: 260 دولارًا

                تعليق


                • #9
                  Software


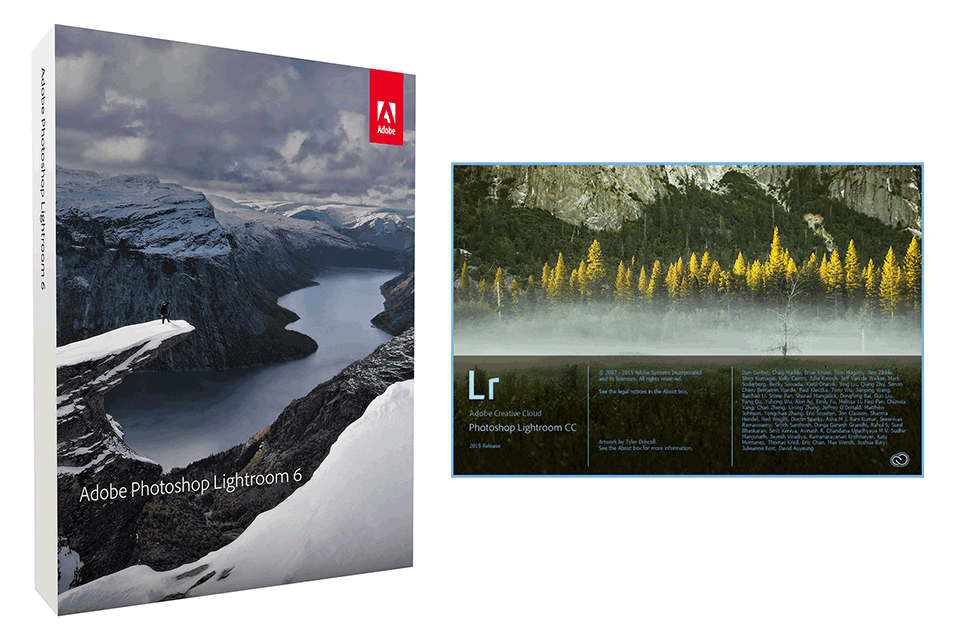
                  There is a lot of competition for software that processes images, with the two most popular options being Capture One Pro and Adobe Lightroom. These two programs are similar — they both allow you to organize and edit your photos — but Lightroom is far less expensive. Some argue that Capture One Pro is better (whereas some argue the opposite), but Lightroom will is ideal for those on a budget, since it costs half the price. For what it’s worth, I only ever use Lightroom, and I find it to be wonderful.

                  To purchase Adobe Lightroom 6 for $145, visit this link to Adorama. Note, though, that some products (including the lenses that I listed earlier on this page) can be bundled with Lightroom and save you an additional $40. If you want, you can also download trial versions, both for Capture One Pro and for Adobe Lightroom.

                  Also, don’t give into the temptation to buy Photoshop just because it is so popular — most photographers will not actually need its features, since it is more of a graphics-oriented specialist program than something like Lightroom. Plus, it is far more expensive (and the newest version is only offered through a frustrating subscription program).

                  Total: $140, but $100 when you bundle Lightroom with a lens.

                  تعليق


                  • #10
                    البرامج


                    هناك منافسة شديدة على البرامج التي تعالج الصور، والخياران الأكثر شيوعًا هما Capture One Pro وAdobe Lightroom. هذان البرنامجان متشابهان – كلاهما يسمح لك بتنظيم وتحرير صورك – لكن Lightroom أقل تكلفة بكثير. يجادل البعض بأن Capture One Pro هو الأفضل (بينما يجادل البعض بالعكس)، لكن Lightroom مثالي لأولئك الذين لديهم ميزانية محدودة، لأنه يكلف نصف السعر. نظرًا لقيمته، فأنا أستخدم Lightroom فقط، وأجده رائعًا.

                    لشراء Adobe Lightroom 6 مقابل 145 دولارًا أمريكيًا، تفضل بزيارة هذا الرابط إلى Adorama. ومع ذلك، لاحظ أن بعض المنتجات (بما في ذلك العدسات التي أدرجتها سابقًا في هذه الصفحة) يمكن تجميعها مع Lightroom وتوفير 40 دولارًا إضافيًا. إذا أردت، يمكنك أيضًا تنزيل الإصدارات التجريبية لكل من Capture One Pro وAdobe Lightroom.

                    وأيضًا، لا تستسلم لإغراء شراء Photoshop لمجرد أنه يحظى بشعبية كبيرة - فلن يحتاج معظم المصورين فعليًا إلى ميزاته، نظرًا لأنه برنامج متخصص موجه نحو الرسومات أكثر من كونه برنامجًا مثل Lightroom. بالإضافة إلى ذلك، فهو أكثر تكلفة بكثير (ولا يتم تقديم الإصدار الأحدث إلا من خلال برنامج اشتراك محبط).

                    الإجمالي: 140 دولارًا أمريكيًا، ولكن 100 دولار أمريكي عند تجميع Lightroom مع العدسة.

                    تعليق


                    • #11
                      Monitors


                      If you are a just starting photography, your current monitor probably is not good enough for serious editing work. Specifically, the colors on your screen will almost certainly be wrong — you will not be editing anything how you think you are.

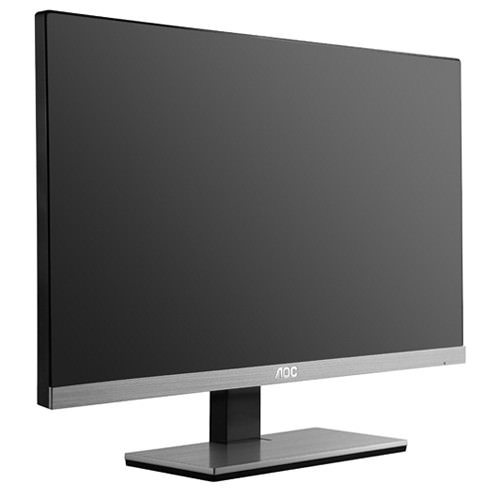
                      Check out our monitor purchase guide for more information, although note that several new monitors have come onto the market since it was published. One of the best new models is the AOC 12367FH 23” screen. Don’t be fooled by the bizarre name — at $160, this is one of the least expensive IPS monitors on the market, and you absolutely need and IPS monitor if you want to do serious color work on your computer. Yes, better options exist (often for significantly more money), but this monitor is a great start for a beginner. Here is a link to the AOC monitor from B&H.

                      Unfortunately, getting a good monitor is only half the battle — step two is color calibration. My strong recommendation is to buy a piece of hardware to calibrate your monitor, such as the $60 Spyder4Express. It does not have all the same features as its $190 older brother, Spyder5Pro, but it gets the job done for a much lower price (assuming you only use one monitor). I edited my photos for almost a year without any calibration, and I never realized how wrong my colors really were. I had to re-edit everything! Save yourself some time and buy a real calibration unit. Here is a link to the Spyder4Express from B&H.

                      Total: $220

                      تعليق


                      • #12
                        الشاشات


                        إذا كنت مبتدئًا في التصوير الفوتوغرافي، فمن المحتمل أن شاشتك الحالية ليست جيدة بما يكفي للقيام بأعمال التحرير الجادة. على وجه التحديد، من المؤكد تقريبًا أن الألوان التي تظهر على شاشتك ستكون خاطئة، فلن تقوم بتعديل أي شيء بالطريقة التي تظنها.

                        راجع دليل شراء الشاشات للحصول على مزيد من المعلومات، مع ملاحظة أن العديد من الشاشات الجديدة قد ظهرت في السوق منذ نشرها. ومن أفضل الموديلات الجديدة شاشة AOC 12367FH مقاس 23 بوصة. لا تنخدع بالاسم الغريب - بسعر 160 دولارًا، فهي واحدة من شاشات IPS الأقل تكلفة في السوق، وتحتاج تمامًا إلى شاشة IPS إذا كنت تريد القيام بأعمال ألوان جادة على جهاز الكمبيوتر الخاص بك. نعم، توجد خيارات أفضل (غالبًا مقابل أموال أكثر بكثير)، ولكن هذه الشاشة تعد بداية رائعة للمبتدئين. إليك رابط لشاشة AOC من B&H.

                        لسوء الحظ، الحصول على شاشة جيدة هو نصف المعركة فقط - الخطوة الثانية هي معايرة الألوان. توصيتي القوية هي شراء قطعة من الأجهزة لمعايرة شاشتك، مثل Spyder4Express بسعر 60 دولارًا. لا يحتوي على نفس الميزات التي يتمتع بها أخيه الأكبر Spyder5Pro، والذي يبلغ سعره 190 دولارًا، ولكنه ينجز المهمة بسعر أقل بكثير (بافتراض أنك تستخدم شاشة واحدة فقط). لقد قمت بتحرير صوري لمدة عام تقريبًا دون أي معايرة، ولم أدرك أبدًا مدى خطأ ألواني حقًا. اضطررت إلى إعادة تحرير كل شيء! وفر لنفسك بعض الوقت واشتري وحدة معايرة حقيقية. إليك رابط إلى Spyder4Express من B&H.

                        المجموع: 220 دولارًا

                        تعليق


                        • #13
                          Lighting


                          Disclaimer: I don’t use much external lighting for my photos, mainly because I do not take many images of people. That said, most photographers will need a flash at some time or another, whether for portraits or for creative still-life photography.

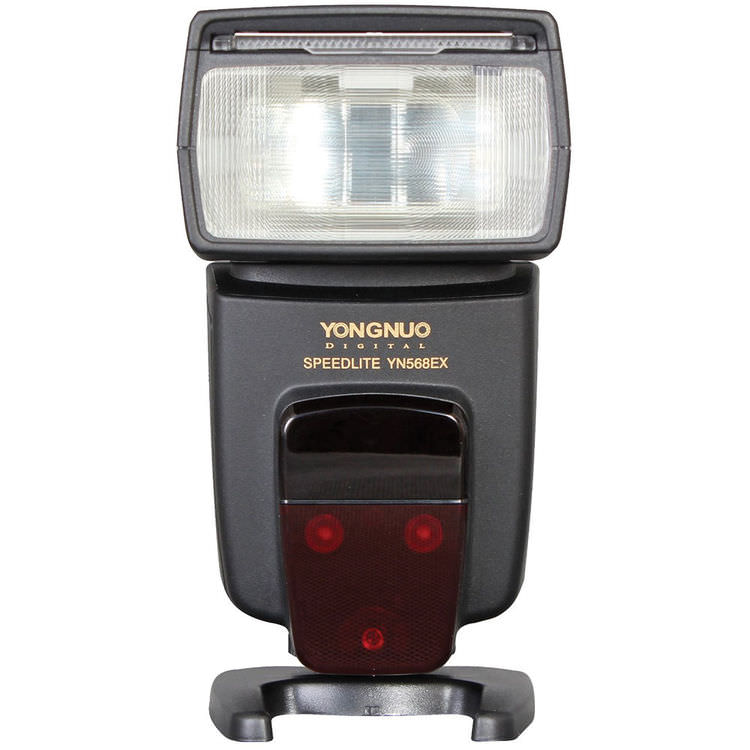
                          Nikon brand flashes cost hundreds of dollars, assuming that you want a flash that can function off-camera in an automatic (TTL) mode. However, third-party flashes with those features can be fairly cheap — check out the Yongnuo YN-568EX, an extremely well-specified flash for the price of $105. Depending upon the genre of photography you practice most, this may be the only flash you need. (Or you may need dozens more — ask any portrait photographer!) Here is a link to the Yongnuo flash at B&H.

                          You may also want some light modifiers (such as reflectors), but I don’t recommend getting anything more until you are sure that you want to do portrait photography. There is no end to the world of light modifiers, and a beginner should learn the basics before deciding which complex lighting setups to buy.

                          Total: $105

                          تعليق


                          • #14
                            الإضاءة


                            إخلاء المسؤولية: لا أستخدم الكثير من الإضاءة الخارجية لصوري، ويرجع ذلك أساسًا إلى أنني لا ألتقط العديد من الصور للأشخاص. ومع ذلك، سيحتاج معظم المصورين إلى فلاش في وقت أو آخر، سواء لالتقاط الصور الشخصية أو التصوير الفوتوغرافي الإبداعي للحياة الساكنة.

                            تبلغ تكلفة فلاشات العلامة التجارية Nikon مئات الدولارات، على افتراض أنك تريد فلاشًا يمكن أن يعمل خارج الكاميرا في الوضع التلقائي (TTL). ومع ذلك، فإن فلاشات الطرف الثالث التي تحتوي على هذه الميزات يمكن أن تكون رخيصة إلى حد ما – تحقق من Yongnuo YN-568EX، وهو فلاش محدد جيدًا بسعر 105 دولارات. اعتمادًا على نوع التصوير الفوتوغرافي الذي تمارسه كثيرًا، قد يكون هذا هو الفلاش الوحيد الذي تحتاجه. (أو قد تحتاج إلى عشرات أخرى — اسأل أي مصور فوتوغرافي!) إليك رابط لفلاش Yongnuo في B&H.

                            قد تحتاج أيضًا إلى بعض معدّلات الإضاءة (مثل العاكسات)، لكنني لا أوصي بالحصول على أي شيء أكثر حتى تتأكد من رغبتك في التصوير الفوتوغرافي للصور الشخصية. ليس هناك نهاية لعالم معدّلات الإضاءة، وينبغي للمبتدئين أن يتعلموا الأساسيات قبل أن يقرروا أي إعدادات الإضاءة المعقدة التي سيشترونها.

                            المجموع: 105 دولار

                            تعليق


                            • #15
                              Filters


                              Filters are another essential element of a photographer’s toolbox. With digital cameras, only a few filters are even necessary in the first place (the old color-correction filters for film can be replicated using software like Adobe Lightroom) — but some filters cannot be replicated in post-processing. The single most useful filter for digital photography is a polarizer. Just like polarized sunglasses, these filters cut glare from shiny surfaces (other than metal), they darken skies, and they reduce haze. Plus, they make images look more vibrant and saturated.

                              If you are not a landscape photographer, you will want a polarizer because of these benefits — and if you are a landscape photographer, you will probably never remove the polarizer from your lens! Depending upon the lens or lenses that you use, you will need to get a polarizer of a specific size. Polarizing filters (and filters in general) are sized in millimeters — just like the front rings on a lens. For a lens with a 72mm ring (like the Sigma 18-35mm f/1.8 that I suggested above), you would need a 72mm filter.

                              If you are on a budget, buy a polarizer that is the same size as the filter ring of your largest lens. For example, you may choose to go with my suggestion to buy both the Nikon 35mm f/1.8 DX and the Sigma 17-55mm f/2.8 OS. If you do, these lenses have different filter ring sizes — the Nikon is 52mm, whereas the Sigma is 77mm. To use the same filter on both lenses, get a 77mm filter a plus a 52mm-to-77mm step-up ring. This is a lot less expensive than buying two filters!

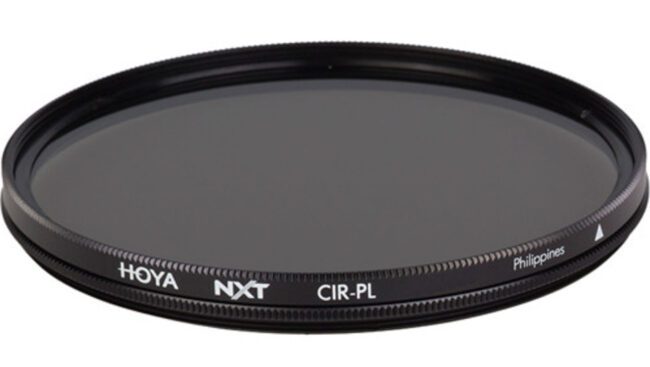
                              Filters can be expensive, and with good reason — a bad filter will harm the image quality of every image you take. So, don’t skimp on a filter! One brand known for a good balance of price and quality is Hoya, which is my first recommendation for a beginning photographer.

                              Here is a link to the Hoya 77mm polarizer at B&H. You would use this size if you choose the Sigma 17-50mm f/2.8 OS lens, which has a 77mm filter ring. This filter costs just under $90.

                              Here is a link to the Hoya 72mm polarizer at B&H. You would use this size if you choose the Sigma 18-35mm f/1.8 lens, which has a 72mm filter ring. This filter costs $60.

                              Here is a link to B&H for the 52mm to 77mm step-up ring that you would use on the Nikon 35mm f/1.8 lens, if you also bought the 17-50mm f/2.8 lens (which has a 77mm filter thread). This ring costs less than $4.

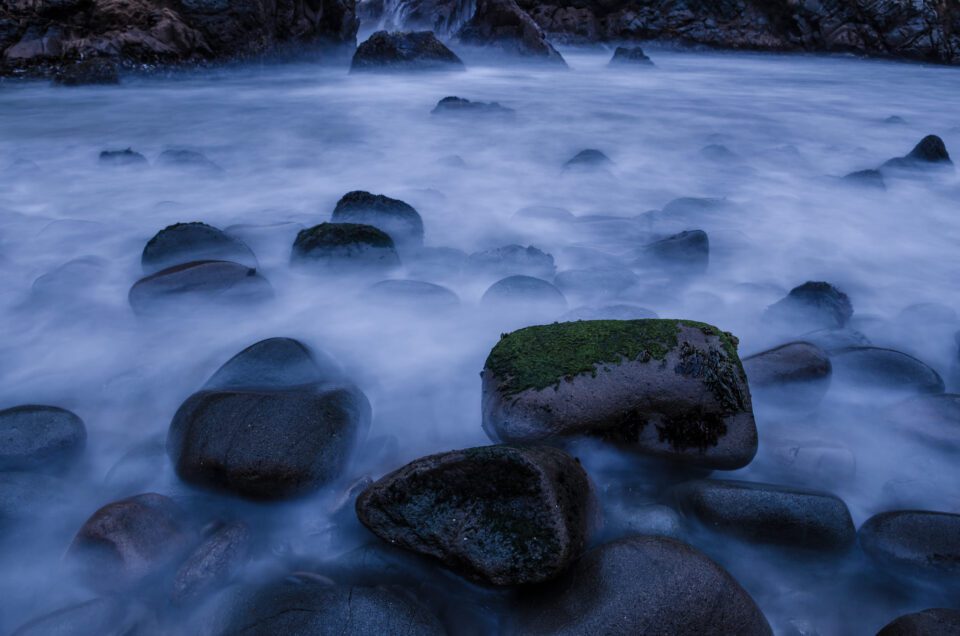
                              If you decide that landscape photography is your favorite type, you will probably need two additional filters: a graduated neutral density filter to darken skies (get a rectangular graduated filter, not a circular one) and a regular neutral density filter to blur moving water. However, both of these are specialist filters, and I recommend waiting until you know what you want before buying either. For now, a high-quality polarizing filter should be more than enough.

                              Total: $60 if you bought the Sigma 18-35mm f/1.8, a bit over $90 if you bought the Nikon 35mm f/1.8 and Sigma 17-50mm f/2.8 OS.

                              تعليق

                              يعمل...
                              X