مرشحات الاستقصاب والأشعة فوق البنفسجية Are Polarizing, ND and UV Filters Useless?

تقليص
X
 
  • تصفية - فلترة
  • الوقت
  • عرض
إلغاء تحديد الكل
مشاركات جديدة

  • مرشحات الاستقصاب والأشعة فوق البنفسجية Are Polarizing, ND and UV Filters Useless?

    Are Polarizing, ND and UV Filters Useless?

    Every once in a while, you will hear some photographers claim that lens filters are completely useless. Some will argue that only specific types of filters such as UV and protective filters are evil, while others will also include polarizing and ND filters into the mix, claiming that one could reproduce the effects of all those filters in post-processing software. Arguments for or against filters can spark a lot of heated debates in the photography community, similar to topics such as “Nikon vs Canon”, or “DSLR vs Mirrorless”. There are certainly some passionate individuals out there who are ready to stand their ground no matter what. And there is nothing wrong with that, as that’s what typically happens when there is truth on both sides of the coin, depending on what angle you are looking at – there are certainly both pros and cons to using lens filters. Having been teaching photography for a number of years now, I have come across many different photographers of all skill levels in the field and I have come to realize that there is sadly quite a lot of misinformation out there regarding lens filters and their proper use. Many of us simply don’t know enough about not just filters themselves, but also their significant effect on our post-processing workflow. Although we have previously written many articles on lens filters, let’s explore filters once again and hopefully address some of the misconceptions about these important tools.

    هل مرشحات الاستقطاب وND والأشعة فوق البنفسجية عديمة الفائدة؟


    بين الحين والآخر، سوف تسمع بعض المصورين يدعون أن مرشحات العدسات عديمة الفائدة تمامًا. سيجادل البعض بأن أنواعًا محددة فقط من المرشحات مثل مرشحات الأشعة فوق البنفسجية والمرشحات الواقية هي الشر، بينما سيدرج البعض الآخر أيضًا مرشحات الاستقطاب وND في المزيج، مدعين أنه يمكن إعادة إنتاج تأثيرات كل تلك المرشحات في برامج ما بعد المعالجة. يمكن أن تثير الحجج المؤيدة أو المعارضة للمرشحات الكثير من المناقشات الساخنة في مجتمع التصوير الفوتوغرافي، على غرار موضوعات مثل "Nikon vs Canon"، أو "DSLR vs Mirrorless". من المؤكد أن هناك بعض الأفراد المتحمسين الذين هم على استعداد للوقوف على موقفهم مهما حدث. ولا حرج في ذلك، لأن هذا ما يحدث عادةً عندما تكون هناك حقيقة على جانبي العملة، اعتمادًا على الزاوية التي تنظر إليها - هناك بالتأكيد إيجابيات وسلبيات لاستخدام مرشحات العدسات. بعد أن قمت بتدريس التصوير الفوتوغرافي لعدد من السنوات حتى الآن، قابلت العديد من المصورين المختلفين من جميع مستويات المهارة في هذا المجال، وقد أدركت أنه من المؤسف أن هناك الكثير من المعلومات الخاطئة فيما يتعلق بمرشحات العدسات واستخدامها السليم. الكثير منا لا يعرف ما يكفي ليس فقط عن المرشحات نفسها، ولكن أيضًا عن تأثيرها الكبير على سير عمل ما بعد المعالجة. على الرغم من أننا كتبنا سابقًا العديد من المقالات حول فلاتر العدسات، فلنستكشف الفلاتر مرة أخرى ونأمل في معالجة بعض المفاهيم الخاطئة حول هذه الأدوات المهمة.

  • #2
    Polarizing Filter


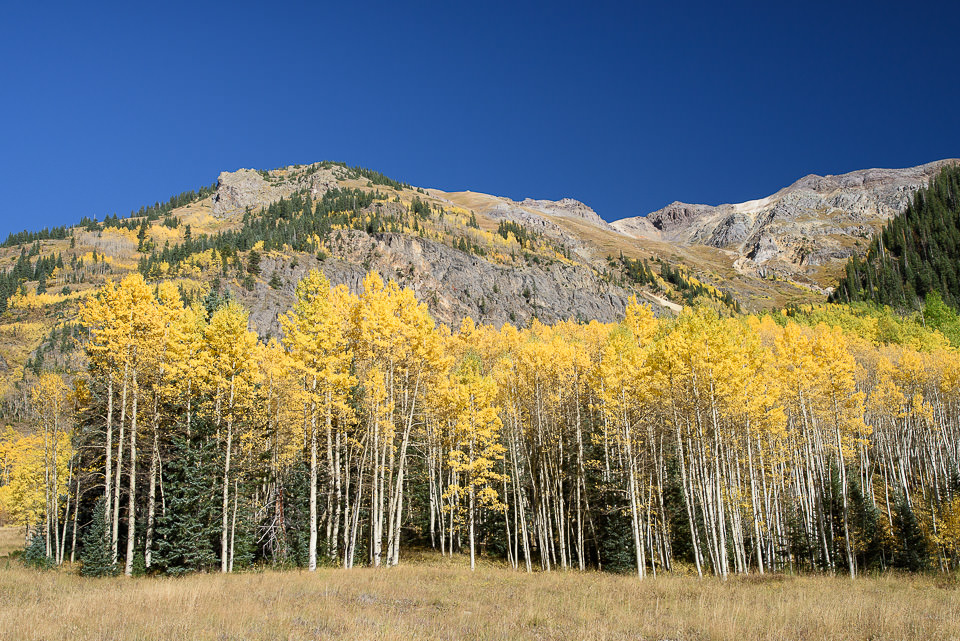
    A circular polarizing filter is a must-have tool for landscape and architecture photographers because it does some things that software can never replicate. If you shoot side by side with a pro who knows what he/she is doing, you will see that they always carry one or more polarizing filters in their bag at all times. So what is the use of a polarizing filter and why would anyone need it? If you have been thinking that a polarizing filter is only needed to make the sky bluer, you certainly need some help in understanding their primary role. When I teach workshops, the first thing I point out, is that a polarizing filter is NOT designed for the purpose of darkening the sky. It is one of the outcomes and in fact, often an undesired one! When using wide-angle lenses, one could screw up the sky by making one part of it appear much darker than the other, as seen below:
    Using a wide-angle lens can result in a gradient sky that can be tough to fix in post-processing
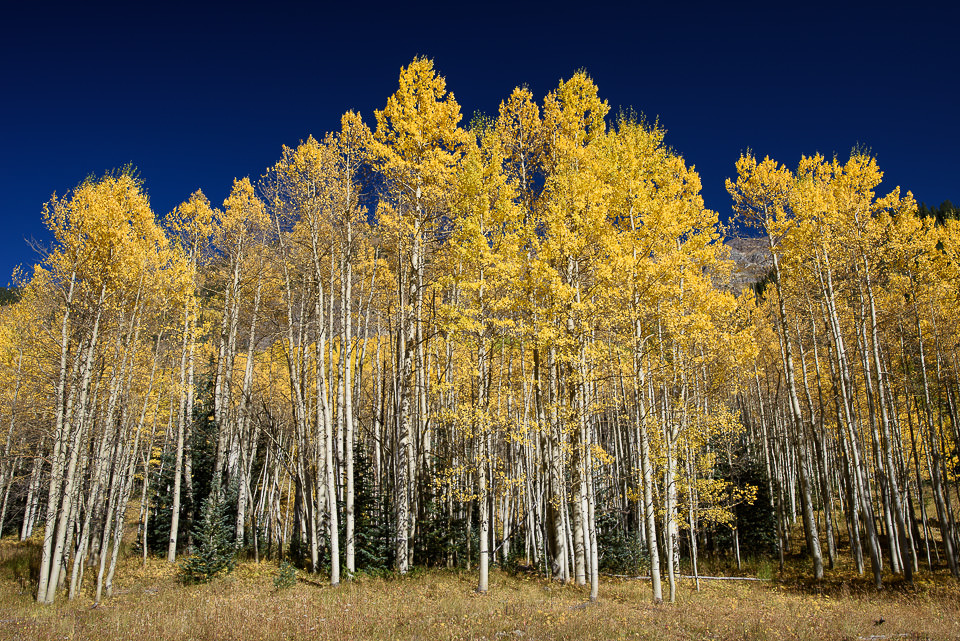
    And when a lens is pointed at a point of the maximum degree of polarization, the sky can turn unnaturally dark, as seen below:
    Pointing the camera at the area with the maximum degree of polarization can result in the unnaturally dark sky
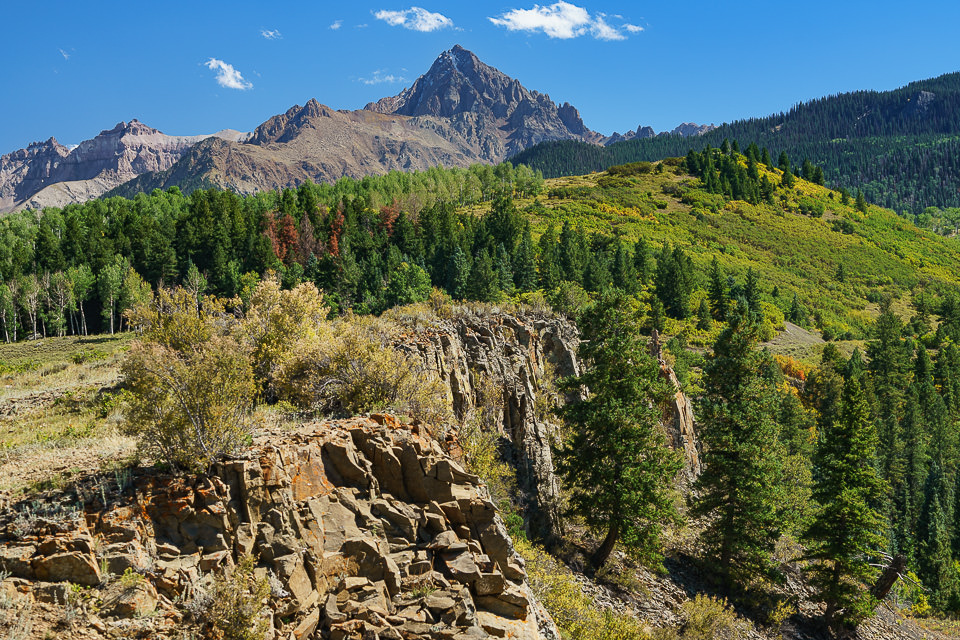
    Hence, one must know how to properly use a polarizing filter to avoid such strange effects on images.

    تعليق


    • #3
      فلتر استقطاب

      يعد مرشح الاستقطاب الدائري أداة ضرورية لمصوري المناظر الطبيعية والهندسة المعمارية لأنه يقوم ببعض الأشياء التي لا يمكن للبرنامج تكرارها أبدًا. إذا قمت بالتصوير جنبًا إلى جنب مع محترف يعرف ما يفعله، فستجد أنه يحمل دائمًا واحدًا أو أكثر من مرشحات الاستقطاب في حقيبته في جميع الأوقات. إذن ما فائدة مرشح الاستقطاب ولماذا يحتاجه أي شخص؟ إذا كنت تعتقد أن مرشح الاستقطاب ضروري فقط لجعل السماء أكثر زرقة، فأنت بالتأكيد بحاجة إلى بعض المساعدة في فهم دوره الأساسي. عندما أقوم بتدريس ورش العمل، أول شيء أشير إليه هو أن مرشح الاستقطاب ليس مصممًا بغرض تعتيم السماء. إنها إحدى النتائج، وفي الواقع، غالبًا ما تكون غير مرغوب فيها! عند استخدام عدسات واسعة الزاوية، يمكن للمرء أن يفسد السماء بجعل جزء منها يبدو أغمق بكثير من الآخر، كما هو موضح أدناه:

      يمكن أن يؤدي استخدام عدسة ذات زاوية واسعة إلى ظهور سماء متدرجة يصعب إصلاحها في مرحلة ما بعد المعالجة

      وعندما يتم توجيه العدسة إلى نقطة الحد الأقصى لدرجة الاستقطاب، يمكن أن تتحول السماء إلى ظلام غير طبيعي، كما هو موضح أدناه:

      يمكن أن يؤدي توجيه الكاميرا نحو المنطقة ذات أقصى درجة من الاستقطاب إلى سماء مظلمة بشكل غير طبيعي

      ومن ثم، يجب على المرء أن يعرف كيفية استخدام مرشح الاستقطاب بشكل صحيح لتجنب مثل هذه التأثيرات الغريبة على الصور.

      تعليق


      • #4
        Does this make the polarizing filter useless? Of course not. In fact, I will not leave my house to photograph landscapes without one in my bag – that’s how valuable a polarizing filter is for me! My primary purpose for using a polarizing filter is to reduce haze. As you may already know, haze can be really difficult to deal with. When photographing distant landscapes, haze is a very common occurrence. It can happen due to humidity, pollution, dust and smoke presence in the air, which all reflect sun rays back into the camera, resulting in reduced contrast. It can happen any time during the day, even during the golden hours.

        Polarizing filters, first and foremost, are designed to reduce reflections. By reducing direct reflections (which is achieved by finding the right angle through rotating the front element of a polarizing filter), one can effectively reduce and sometimes even completely eliminate such atmospheric reflections.
        Let’s take a look at a couple of images that I quickly grabbed from my Lightroom catalog:

        Looking at these two images, you would quickly realize that there is a dramatic difference between the two images. Both are “as is, straight out of the camera”, meaning, I did not apply any post-processing to them. The “Before” image is the one I captured before mounting a polarizing filter and the “After” image was captured with a polarizer attached and rotated to reduce the reflections in the scene. As you can see, there are huge differences throughout the image. First, the image with the polarizing filter has significantly less haze in the distant mountains. Second, take a look at the colorful areas of the image – the reds and the yellows appear more saturated. Also note how the evergreens appear completely different, looking greener and lighter in comparison. This is all the result of reduced direct reflections. Without a polarizing filter, the greens appear “dirty”, giving evergreens a much darker and uglier tone. Lastly, note the difference in the sky – the clouds appear to pop out much more and the sky looks a bit more saturated and darker. This is all the result of cutting down on the reflections, something you could never reproduce in post.

        The only downside here is the uneven sky introduced by the polarizer, but with a couple of good techniques in software, I could address such problems very easily.

        Now one could argue that with good post-processing skills, it would be possible to simulate the effects of a polarizing filter. And to those who bring up this point, my argument would be that I have a much better starting point to work with in comparison. With just a couple of adjustments in Lightroom, which took me no more than a minute, I was able to make my image look even better:

        All I did was even out the sky with two GND filters, adjust camera profile, add a bit more contrast and a few minor tweaks here and there. I cannot even imagine trying to adjust all the colors selectively in my image. It would take me hours of work in Photoshop and I can guarantee that the result would not even be close.

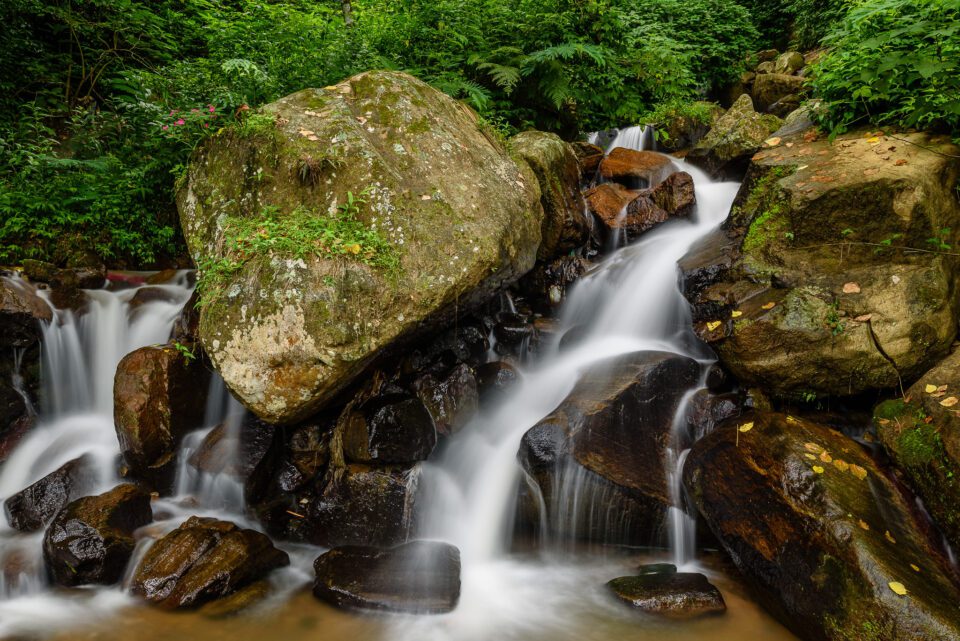
        And this is just one sample image. I could showcase hundreds of images, which would not have been possible without a polarizing filter. For example, when photographing waterfalls, a polarizing filter is an indispensable tool. I would love to see someone recreate the following photograph without a polarizing filter:
        NIKON D750 + 24mm f/1.4 @ 24mm, ISO 50, 5/1, f/11.0
        When photographing waterfalls, you deal with highly reflective rocks, since they have water and other wet vegetation on them, all of which send nasty reflections right into your camera. A polarizing filter makes a huge difference in such situations, not only significantly cutting down on those reflections, but also increasing the overall saturation and contrast of the image.

        In short, it is impossible to simulate the effect of a polarizing filter using software!

        تعليق


        • #5
          هل هذا يجعل مرشح الاستقطاب عديم الفائدة؟ بالطبع لا. في الواقع، لن أغادر منزلي لتصوير المناظر الطبيعية دون وجود واحد في حقيبتي - هذه هي قيمة مرشح الاستقطاب بالنسبة لي! هدفي الأساسي من استخدام مرشح الاستقطاب هو تقليل الضباب. كما تعلم بالفعل، قد يكون من الصعب حقًا التعامل مع الضباب. عند تصوير المناظر الطبيعية البعيدة، يكون الضباب أمرًا شائعًا جدًا. يمكن أن يحدث ذلك بسبب وجود الرطوبة والتلوث والغبار والدخان في الهواء، والتي تعكس جميعها أشعة الشمس مرة أخرى إلى الكاميرا، مما يؤدي إلى تقليل التباين. ويمكن أن يحدث في أي وقت خلال اليوم، حتى خلال الساعات الذهبية.

          تم تصميم مرشحات الاستقطاب، أولاً وقبل كل شيء، لتقليل الانعكاسات. من خلال تقليل الانعكاسات المباشرة (والتي يتم تحقيقها من خلال إيجاد الزاوية الصحيحة من خلال تدوير العنصر الأمامي لمرشح الاستقطاب)، يمكن تقليل هذه الانعكاسات الجوية بشكل فعال وأحيانًا إزالتها تمامًا.
          دعونا نلقي نظرة على بعض الصور التي التقطتها بسرعة من كتالوج Lightroom الخاص بي:

          بالنظر إلى هاتين الصورتين، ستدرك بسرعة أن هناك فرقًا كبيرًا بين الصورتين. كلاهما "كما هو، مباشرة خارج الكاميرا"، مما يعني أنني لم أطبق عليهما أي معالجة لاحقة. الصورة "قبل" هي التي التقطتها قبل تركيب مرشح الاستقطاب والصورة "بعد" تم التقاطها باستخدام مستقطب متصل وتدويره لتقليل الانعكاسات في المشهد. كما ترون، هناك اختلافات كبيرة في جميع أنحاء الصورة. أولاً، الصورة المزودة بمرشح الاستقطاب تحتوي على ضباب أقل بكثير في الجبال البعيدة. ثانيًا، ألقِ نظرة على المناطق الملونة في الصورة - حيث يبدو اللون الأحمر والأصفر أكثر تشبعًا. لاحظ أيضًا كيف تبدو النباتات دائمة الخضرة مختلفة تمامًا، وتبدو أكثر خضرة وأخف وزنًا بالمقارنة. وهذا كله نتيجة انخفاض الانعكاسات المباشرة. بدون مرشح الاستقطاب، تبدو النباتات الخضراء "قذرة"، مما يمنح النباتات دائمة الخضرة لونًا أغمق وأكثر قبحًا. وأخيرًا، لاحظ الفرق في السماء، حيث تبدو السحب بارزة بشكل أكبر وتبدو السماء أكثر تشبعًا وأكثر قتامة. كل هذا نتيجة لتقليل الانعكاسات، وهو أمر لا يمكنك إعادة إنتاجه أبدًا في المنشور.

          الجانب السلبي الوحيد هنا هو السماء غير المستوية التي قدمها المستقطب، ولكن مع اثنين من التقنيات الجيدة في البرمجيات، يمكنني معالجة مثل هذه المشاكل بسهولة شديدة.

          الآن يمكن للمرء أن يجادل بأنه مع مهارات ما بعد المعالجة الجيدة، سيكون من الممكن محاكاة تأثيرات مرشح الاستقطاب. ولأولئك الذين يثيرون هذه النقطة، فإن حجتي هي أن لدي نقطة بداية أفضل بكثير للعمل عليها بالمقارنة. من خلال إجراء بعض التعديلات في Lightroom، والتي لم تستغرق مني أكثر من دقيقة، تمكنت من جعل صورتي تبدو أفضل:
          ​
          كل ما فعلته هو الخروج من السماء باستخدام مرشحي GND، وضبط ملف تعريف الكاميرا، وإضافة المزيد من التباين وبعض التعديلات الطفيفة هنا وهناك. لا أستطيع حتى أن أتخيل محاولة ضبط كل الألوان بشكل انتقائي في صورتي. سيستغرق الأمر ساعات من العمل في Photoshop ويمكنني أن أضمن أن النتيجة لن تكون قريبة حتى.

          وهذه مجرد صورة عينة واحدة. كان بإمكاني عرض مئات الصور، وهو الأمر الذي لم يكن ممكنًا بدون مرشح الاستقطاب. على سبيل المثال، عند تصوير الشلالات، يعد مرشح الاستقطاب أداة لا غنى عنها. أرغب في رؤية شخص ما يعيد إنشاء الصورة التالية بدون مرشح الاستقطاب:
          ​نيكون D750 + 24 مم f/1.4 @ 24 مم، ISO 50، 5/1، f/11.0
          عند تصوير الشلالات، فإنك تتعامل مع الصخور شديدة الانعكاس، نظرًا لوجود الماء والنباتات الرطبة الأخرى عليها، وكلها ترسل انعكاسات سيئة مباشرة إلى الكاميرا. يُحدث مرشح الاستقطاب فرقًا كبيرًا في مثل هذه المواقف، فهو لا يقلل بشكل كبير من تلك الانعكاسات فحسب، بل يزيد أيضًا من التشبع والتباين الإجمالي للصورة.

          باختصار، من المستحيل محاكاة تأثير مرشح الاستقطاب باستخدام البرمجيات!

          تعليق


          • #6
            ND and GND Filters


            Other filters that are impossible to simulate in post-processing are Neutral Density (ND) and Graduated Neutral Density (GND) filters. ND filters are often needed when photographing with fast primes in daylight. When shooting wide open at f/1.4, the amount of light entering into the lens can be too much for the camera to handle, maxing out the shutter speed. If an ND filter is not used, the image will be blown out, which is impossible to recover in post. And if one uses flash in such conditions, it makes matters even worse.

            Another case is using ND filters for slowing down the shutter speed. Sometimes one might want to intentionally blur fast action by “dragging” the shutter, or perhaps slow things down dramatically to make them disappear or appear smooth-looking.

            For the earlier image of the waterfall, I had to decrease my ISO to 50 with the polarizing filter, which gave me a shutter speed of 5 seconds. If I wanted to increase the exposure duration even further for long-exposure photography, my only option would be to use an ND filter.

            Now one could argue that capturing a sequence of images, then stacking them in Photoshop could result in a similar image, but I disagree for two reasons. First, how much time, storage, and effort would I have to waste by opening a bunch of RAW files and stacking them to produce a single TIFF file that I can no longer edit like RAW afterward? All I have to do is use a single filter, which takes 30 seconds to mount and I end up with a single exposure that works. With a filter, I could even take a few shots and stitch a panorama with massive resolution – good luck trying to do that with a few hundred stacked images – that just sounds ridiculous to me. Second, the result of using a single exposure vs a bunch of stacked images is never going to be the same. When doing long exposures, I could use different techniques, such as partially blocking one area of the image to reduce its brightness, in order to yield the results I need. With the image sequence technique, there is also more potential for camera shake. Why go through all this hassle if you can do it all right in the camera?
            Panning motion by dragging the shutter speed
            In other cases when panning motion, one needs to use slow shutter speeds, which can be problematic to achieve on a bright and sunny day, particularly at wider apertures. While decreasing ISO to the lowest number and stopping down the lens are good options, using an ND filter would simplify the task by cutting down the amount of light entering through the lens.

            And I won’t even go into the details on why GND filters are so valuable. If you are one of those photographers who thinks that “HDR can save it all”, good luck! The Internet is already full of over-saturated HDR images with zero contrast and your contributions to “Grunge HDR” will probably welcome you to a few local photography clubs with other HDR maniacs. In all seriousness, and not that I have anything against HDR (ahem, ahem), before you get stuck in that HDR hole, please take your time to learn how to properly use GND filters. Your camera has so much dynamic range, that if you couple it with GND filters, you can yield beautiful images that do not scream “unnatural” to your fans.

            تعليق


            • #7
              مرشحات ND وGND

              المرشحات الأخرى التي من المستحيل محاكاتها في مرحلة ما بعد المعالجة هي مرشحات الكثافة المحايدة (ND) والكثافة المحايدة المتدرجة (GND). غالبًا ما تكون هناك حاجة إلى مرشحات ND عند التصوير بأعداد أولية سريعة في وضح النهار. عند التصوير بفتحة واسعة بفتحة f/1.4، يمكن أن تكون كمية الضوء الداخلة إلى العدسة كبيرة جدًا بحيث لا تستطيع الكاميرا التعامل معها، مما يؤدي إلى زيادة سرعة الغالق إلى الحد الأقصى. إذا لم يتم استخدام مرشح ND، فسيتم نفخ الصورة، وهو أمر من المستحيل استعادته بعد ذلك. وإذا استخدم المرء الفلاش في مثل هذه الظروف، فإنه يجعل الأمور أسوأ.

              حالة أخرى هي استخدام مرشحات ND لإبطاء سرعة الغالق. في بعض الأحيان، قد يرغب المرء في تشويه الحركة السريعة عمدًا عن طريق "سحب" الغالق، أو ربما إبطاء الأشياء بشكل كبير لجعلها تختفي أو تبدو سلسة المظهر.

              بالنسبة للصورة السابقة للشلال، اضطررت إلى تقليل ISO إلى 50 باستخدام مرشح الاستقطاب، مما أعطاني سرعة غالق تبلغ 5 ثوانٍ. إذا أردت زيادة مدة التعريض الضوئي بشكل أكبر للتصوير الفوتوغرافي بتعريض ضوئي طويل، فسيكون خياري الوحيد هو استخدام مرشح ND.

              الآن يمكن للمرء أن يجادل بأن التقاط سلسلة من الصور، ثم تجميعها في Photoshop يمكن أن يؤدي إلى صورة مماثلة، لكنني لا أوافق على ذلك لسببين. أولاً، ما مقدار الوقت والتخزين والجهد الذي سأضطر إلى إهداره من خلال فتح مجموعة من ملفات RAW وتكديسها لإنتاج ملف TIFF واحد لم يعد بإمكاني تحريره مثل RAW بعد ذلك؟ كل ما علي فعله هو استخدام مرشح واحد، والذي يستغرق تركيبه 30 ثانية، وينتهي بي الأمر بتعريض ضوئي واحد ناجح. وباستخدام مرشح، يمكنني حتى التقاط بعض اللقطات وتركيب صورة بانورامية بدقة هائلة - حظًا سعيدًا في محاولة القيام بذلك باستخدام بضع مئات من الصور المكدسة - يبدو ذلك سخيفًا بالنسبة لي. ثانيًا، لن تكون نتيجة استخدام تعريض ضوئي واحد مقابل مجموعة من الصور المكدسة هي نفسها أبدًا. عند القيام بالتعريضات الضوئية الطويلة، يمكنني استخدام تقنيات مختلفة، مثل حجب منطقة واحدة من الصورة جزئيًا لتقليل سطوعها، من أجل الحصول على النتائج التي أحتاجها. مع تقنية تسلسل الصور، هناك أيضًا احتمال أكبر لاهتزاز الكاميرا. لماذا تتحمل كل هذه المتاعب إذا كان بإمكانك فعل كل شيء بشكل صحيح في الكاميرا؟

               تحريك الحركة عن طريق سحب سرعة الغالق

              وفي حالات أخرى، عند تحريك الحركة، يحتاج المرء إلى استخدام سرعات غالق بطيئة، الأمر الذي قد يكون من الصعب تحقيقه في يوم مشرق ومشمس، خاصة عند الفتحات الأوسع. في حين أن تقليل ISO إلى أقل رقم وإيقاف العدسة يعدان خيارين جيدين، فإن استخدام مرشح ND من شأنه أن يبسط المهمة عن طريق تقليل كمية الضوء التي تدخل عبر العدسة.

              ولن أخوض في التفاصيل حول سبب أهمية مرشحات GND. إذا كنت أحد هؤلاء المصورين الذين يعتقدون أن "تقنية HDR يمكنها حفظ كل شيء"، حظًا سعيدًا! الإنترنت مليء بالفعل بصور HDR شديدة التشبع بدون تباين ومن المحتمل أن ترحب بك مساهماتك في "Grunge HDR" في عدد قليل من نوادي التصوير الفوتوغرافي المحلية مع مهووسين آخرين بتقنية HDR. بكل جدية، وليس لدي أي شيء ضد HDR (مهم، مهم)، قبل أن تتعثر في فجوة HDR، يرجى أخذ وقتك لمعرفة كيفية استخدام مرشحات GND بشكل صحيح. تتمتع الكاميرا الخاصة بك بنطاق ديناميكي كبير جدًا، بحيث إذا قمت بإقرانها بمرشحات GND، فيمكنك إنتاج صور جميلة لا تصرخ "غير طبيعية" لمعجبيك.

              تعليق


              • #8
                UV / Protective Filters


                Let’s get UV filters out of the way – indeed, unless you are using a film camera, they are completely useless for the task of blocking UV. That’s already done by your sensor filter stack, which contains a UV-blocking filter. Today, UV filters are only used as “protective” filters, for the purpose of protecting your lenses against damage.

                Are protective filters necessary? It depends. For photographers who take good care of their gear and who rarely shoot in tough conditions, protective filters are probably not needed. However, I personally use protective filters on all of my lenses. Why? Because I shoot in all kinds of conditions, which can be quite damaging to gear. If you have never shot in sandy environments, you probably have not experienced sand scratching the front element of the lens when you try to clean it. I have shot in a number of very “sandy” locations like the Great Sand Dunes NP, Death Valley NP and White Sands NM and I have seen what sand can do to equipment. Similar to diamonds, sand can grind through pretty much any kind of glass, even the very tough “guerrilla” glass we see on high-end devices today. So having a protective filter really helps in such environments, because a piece of $80 glass is far cheaper to replace when compared to a $2K pro-level lens.

                And I don’t just do it for protection reasons – many lenses have round front elements, which can be really tough to clean. In some cases, the front element of a lens is deeply recessed inside the barrel (such as the Nikkor 50mm f/1.8G), making them really hard to clean! Attaching a filter on such a lens can save a lot of time in the field. So for me personally, it is insurance + convenience.

                Now some photographers will argue that damaged front elements do not harm images. It is true, but it again depends on what you photograph! A lens with a scratched front element might not lose its resolving power, but its overall contrast and ghosting + flare performance might diminish, especially if there are many deep cuts. And it also harms the resale value of a lens – very few people want to buy lenses with scratched-up front elements.

                Others will say that protective filters reduce image quality, which is why they advocate against using them. Again, it depends! If we are dealing with cheap, low-quality filters, then the statement is absolutely true! However, if one uses high-quality filters, there is zero degradation of image quality. In fact, I have provided a study before, which demonstrates the effect of using poor-quality vs high-quality filters. Another interesting study specifically addressed the effect of lens filters on the resolving power of lenses. As you can see from both studies, if you use high-quality lens filters, you have nothing to worry about!

                Now, this does not mean that I always leave protective filters on my lenses. In some situations (such as when including a bright source of light such as the sun in the frame), I typically remove all filters, as they can potentially add more flare and ghosting to images.

                تعليق


                • #9
                  مرشحات الأشعة فوق البنفسجية / الواقية

                  دعونا نتخلص من مرشحات الأشعة فوق البنفسجية - في الواقع، ما لم تكن تستخدم كاميرا فيلم، فهي عديمة الفائدة تمامًا لمهمة حجب الأشعة فوق البنفسجية. يتم ذلك بالفعل من خلال مجموعة مرشحات المستشعر الخاصة بك، والتي تحتوي على مرشح يحجب الأشعة فوق البنفسجية. اليوم، تُستخدم مرشحات الأشعة فوق البنفسجية فقط كمرشحات "واقية"، بغرض حماية عدساتك من التلف.

                  هل المرشحات الواقية ضرورية؟ هذا يعتمد. بالنسبة للمصورين الفوتوغرافيين الذين يعتنون بمعداتهم جيدًا والذين نادرًا ما يصورون في ظروف قاسية، ربما لا تكون هناك حاجة إلى مرشحات واقية. ومع ذلك، فأنا شخصيًا أستخدم المرشحات الواقية على جميع عدساتي. لماذا؟ لأنني أقوم بالتصوير في جميع أنواع الظروف، وهو ما يمكن أن يكون ضارًا جدًا بالمعدات. إذا لم تقم بالتصوير في بيئات رملية من قبل، فمن المحتمل أنك لم تواجه خدشًا رمليًا للعنصر الأمامي للعدسة عندما تحاول تنظيفها. لقد قمت بالتصوير في عدد من المواقع "الرملية" جدًا مثل Great Sand Dunes NP وDeath Valley NP وWhite Sands NM وشاهدت ما يمكن أن تفعله الرمال بالمعدات. كما هو الحال مع الألماس، يمكن للرمال أن تطحن خلال أي نوع من الزجاج تقريبًا، حتى الزجاج القوي جدًا الذي نراه في الأجهزة المتطورة اليوم. لذا فإن وجود مرشح وقائي يساعد حقًا في مثل هذه البيئات، لأن استبدال قطعة زجاج بقيمة 80 دولارًا أرخص بكثير عند مقارنتها بعدسة احترافية بقيمة 2 ألف دولار.

                  وأنا لا أفعل ذلك لأسباب تتعلق بالحماية فقط - فالعديد من العدسات تحتوي على عناصر أمامية مستديرة، مما قد يكون من الصعب جدًا تنظيفها. في بعض الحالات، يكون العنصر الأمامي للعدسة مجوفًا بعمق داخل الأسطوانة (مثل عدسة Nikkor مقاس 50 مم f/1.8G)، مما يجعل تنظيفها صعبًا حقًا! يمكن أن يؤدي تركيب مرشح على مثل هذه العدسة إلى توفير الكثير من الوقت في هذا المجال. بالنسبة لي شخصيًا، التأمين + الراحة.

                  الآن سوف يجادل بعض المصورين بأن العناصر الأمامية التالفة لا تضر الصور. هذا صحيح، لكنه يعتمد مرة أخرى على ما تقوم بتصويره! قد لا تفقد العدسة ذات العنصر الأمامي المخدوش قوتها التحليلية، ولكن قد يتضاءل أداء التباين والظلال والتوهج الإجمالي، خاصة إذا كان هناك العديد من الجروح العميقة. كما أنه يضر أيضًا بقيمة إعادة بيع العدسة - حيث يرغب عدد قليل جدًا من الأشخاص في شراء عدسات ذات عناصر أمامية مخدوشة.

                  سيقول آخرون أن المرشحات الواقية تقلل من جودة الصورة، ولهذا السبب يؤيدون عدم استخدامها. مرة أخرى، ذلك يعتمد! إذا كنا نتعامل مع مرشحات رخيصة ومنخفضة الجودة، فإن العبارة صحيحة تمامًا! ومع ذلك، إذا استخدم أحد المرشحات عالية الجودة، فلن يكون هناك أي تدهور في جودة الصورة. في الواقع، لقد قدمت دراسة من قبل توضح تأثير استخدام المرشحات ذات الجودة الرديئة مقابل المرشحات عالية الجودة. تناولت دراسة أخرى مثيرة للاهتمام على وجه التحديد تأثير مرشحات العدسات على قوة تحليل العدسات. كما ترون من الدراستين، إذا كنت تستخدم مرشحات عدسة عالية الجودة، فلا داعي للقلق!

                  الآن، هذا لا يعني أنني أترك دائمًا مرشحات الحماية على عدساتي. في بعض المواقف (مثل عند تضمين مصدر ضوء ساطع مثل الشمس في الإطار)، أقوم عادةً بإزالة جميع المرشحات، حيث من المحتمل أن تضيف المزيد من التوهج والظلال إلى الصور.

                  تعليق

                  يعمل...
                  X