A Guide to Black and White Conversion Using Photoshop
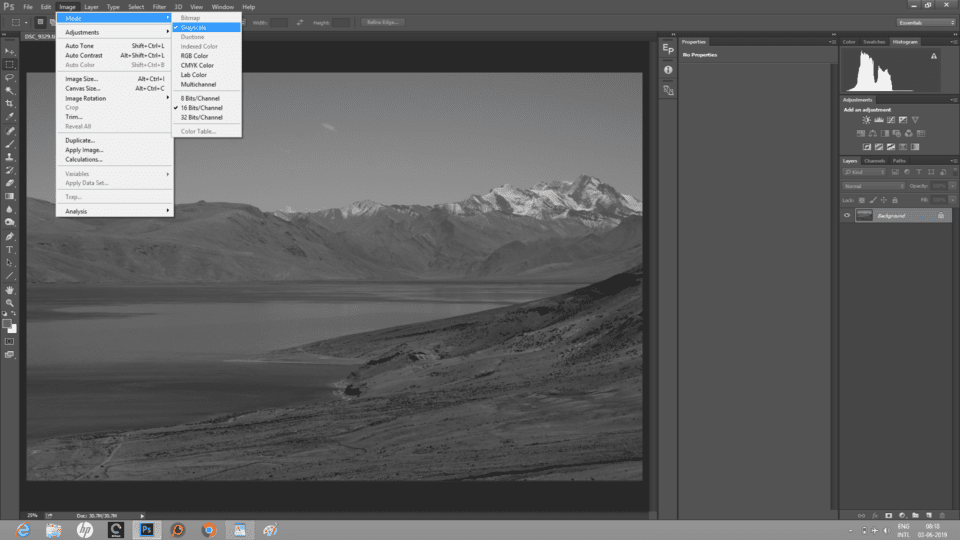
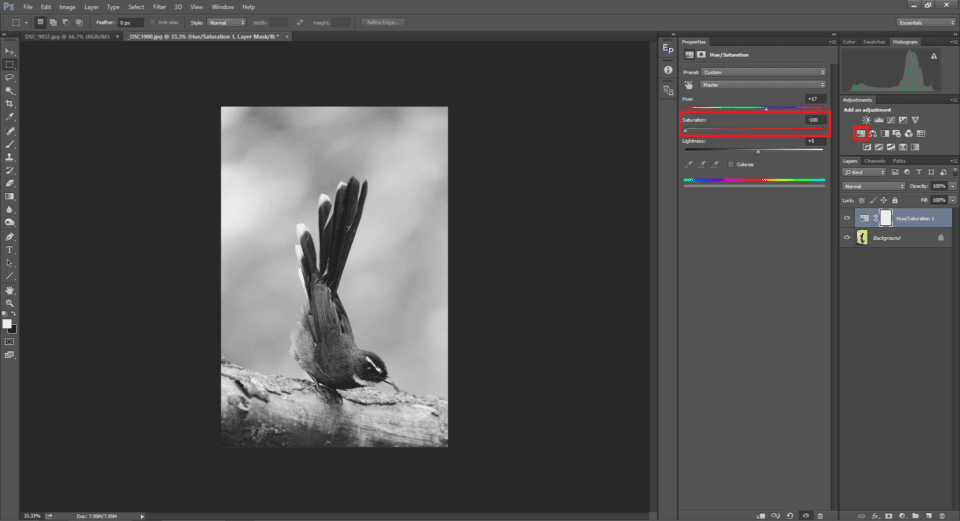
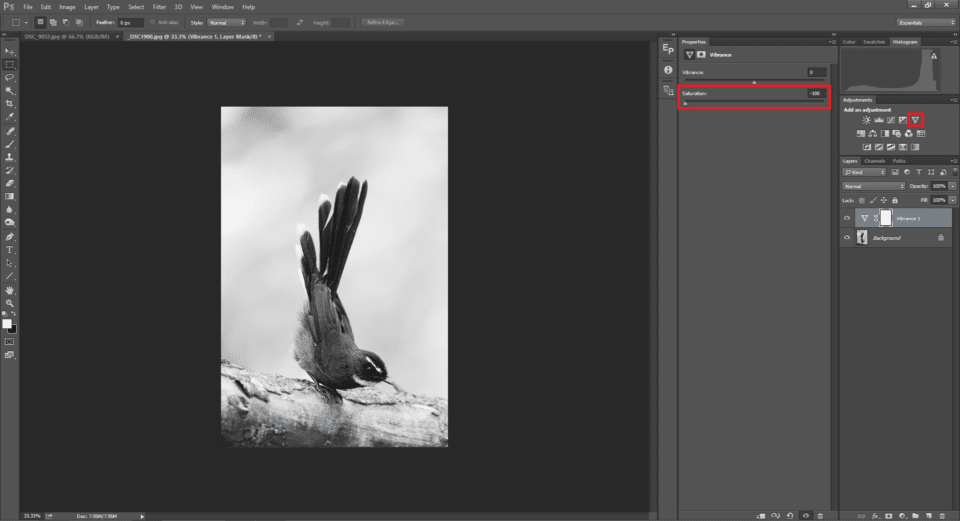
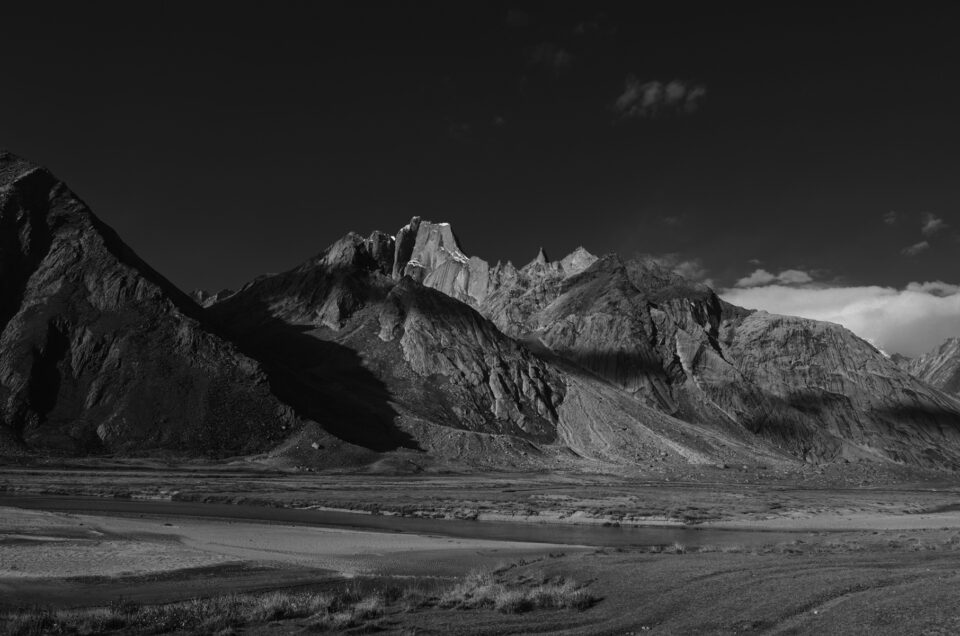
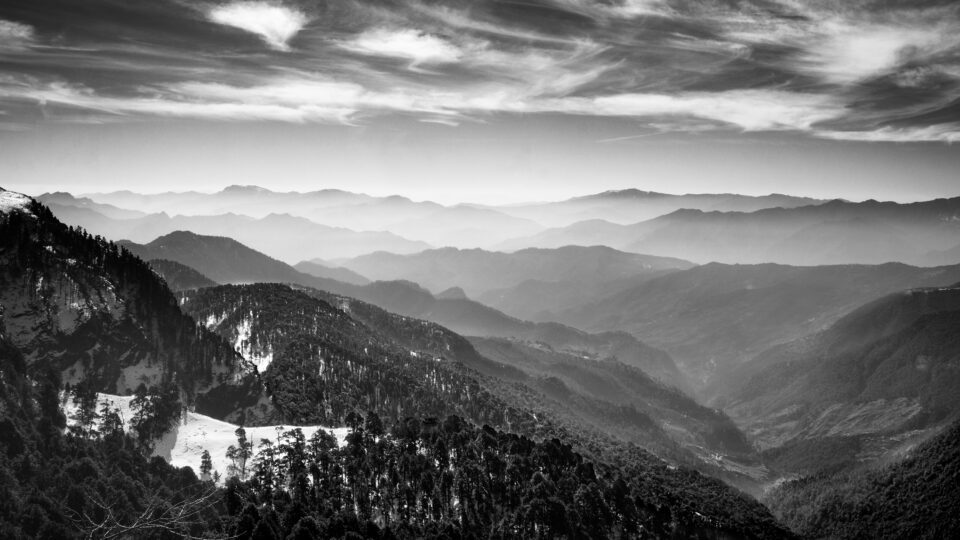
In this Guide to Black and White Conversion using Photoshop, we will look into the pros and cons of different options Photoshop offers to turn an image into monochrome. Practically, there is not one single method that suits everyone or more precisely, not one method that suits every single image shot by the same photographer. But certainly, some methods are more powerful than the others and give us more control over the output. Before you go through this article, please take a look at my article on Low-Key Monochrome Photography. You may wonder, by converting a picture into grey-scale, we are just removing the colors, then how does one method differ from the other. Let us look at these one-by-one and at the end of this article, you will know how each one is different from the other and hence decide on the ones to avoid and the ones to use. But before we get to the conversion itself, there are a few important steps.
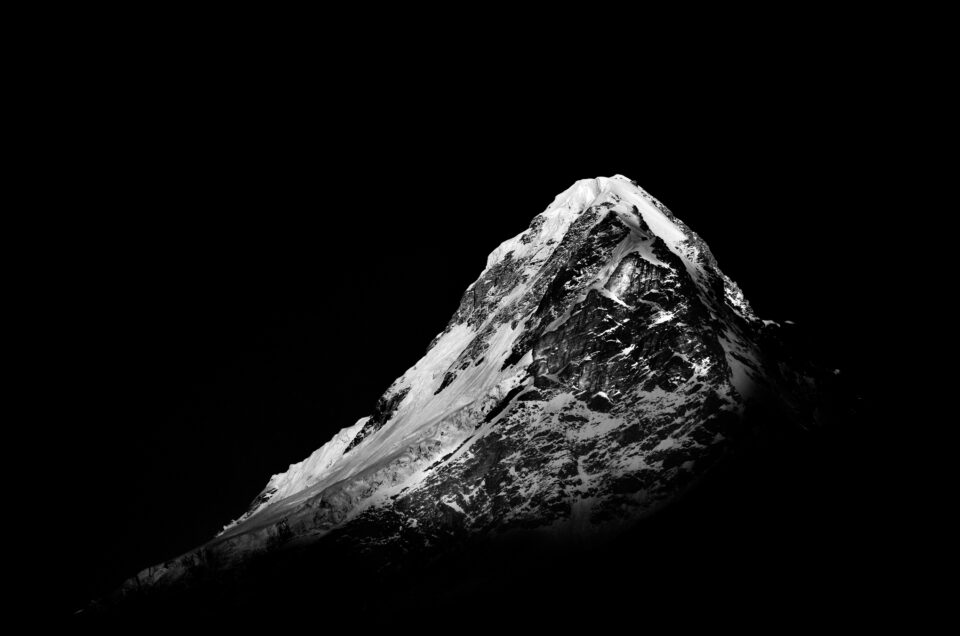 NIKON D7000 @ 62mm, ISO 100, 1/400, f/5.6
The first step in black and white conversion should be color correction. You may wonder why one should color correct an image that is going to end up without colors anyway? Take a look at the illustration below. Image #1 is straight out of the camera and you can see that it has a color cast and the one right below is a black and white version. On the other hand, Image #2 is color-corrected and the one below that one is a black and white version.
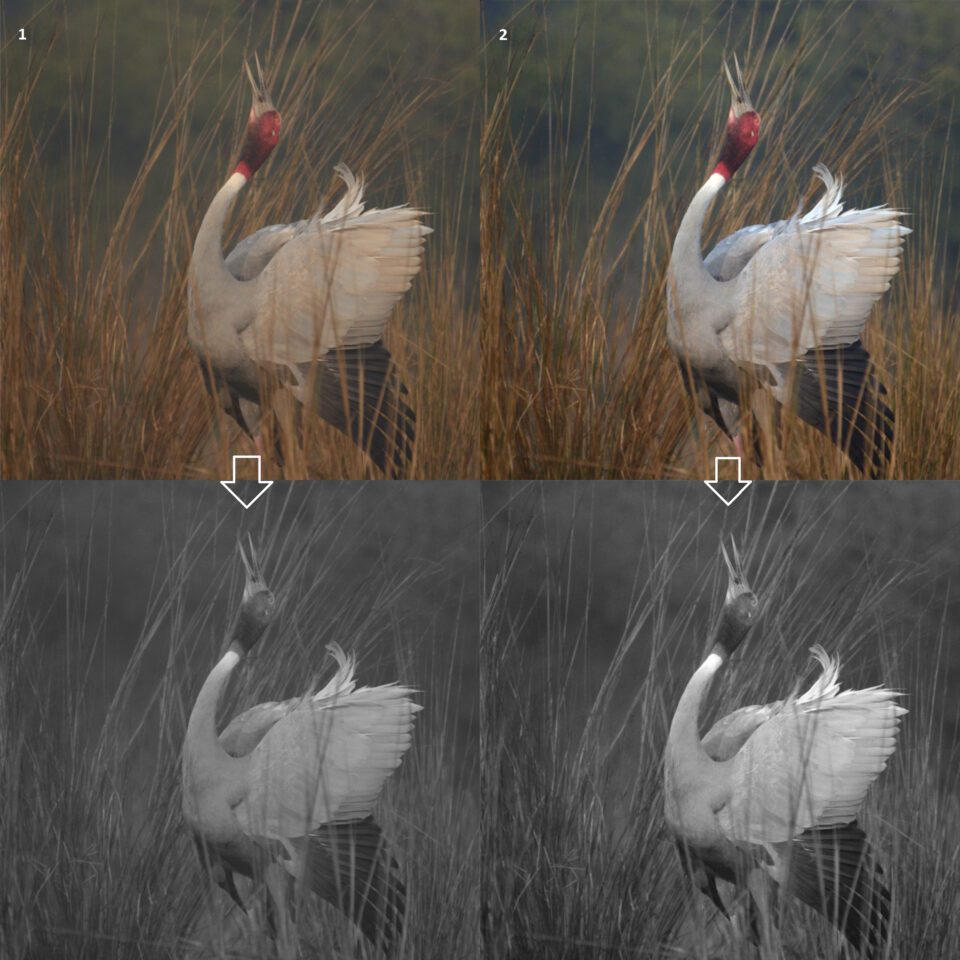
Taking a look at both black and white images, you can clearly see their differences. The first one has noticeably less contrast than the second because of color cast. You can bring out the same contrast later on by using curves or any other contrast enhancing tool, but with a color-corrected image, you start working on a picture with more contrast at step one. Since color gets converted into tones in a black and white picture, having accurate colors helps in making its B&W version show more contrast.
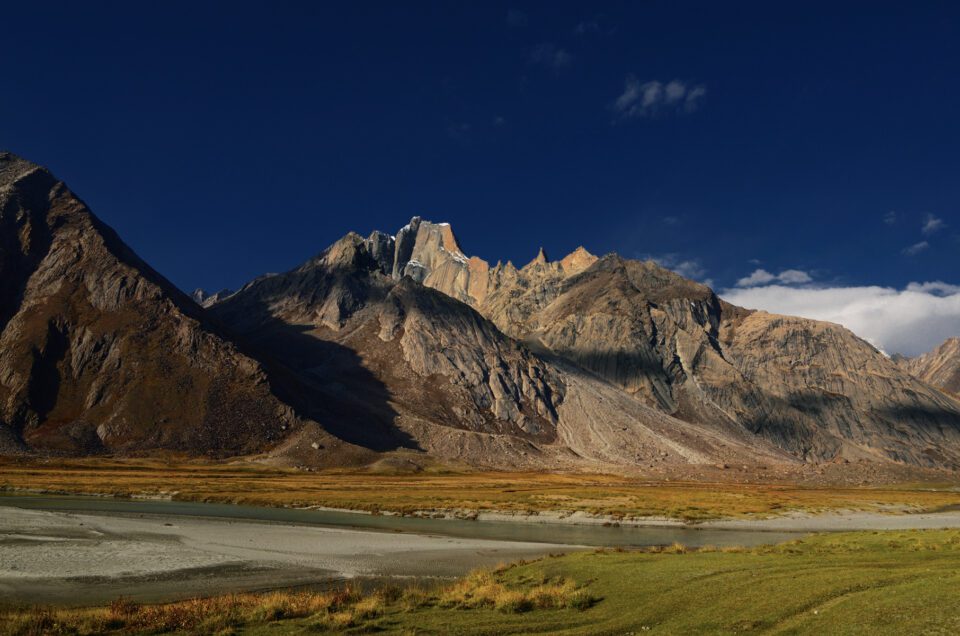
Let us understand the difference between color contrast and tonal contrast. In the picture below, you can see that the black and white version looks flatter than its colored counterpart. That is primarily because this particular picture has more color contrast (contrast in color ie., between blue and the red/orange and less tonal contrast, contrast in luminosity).
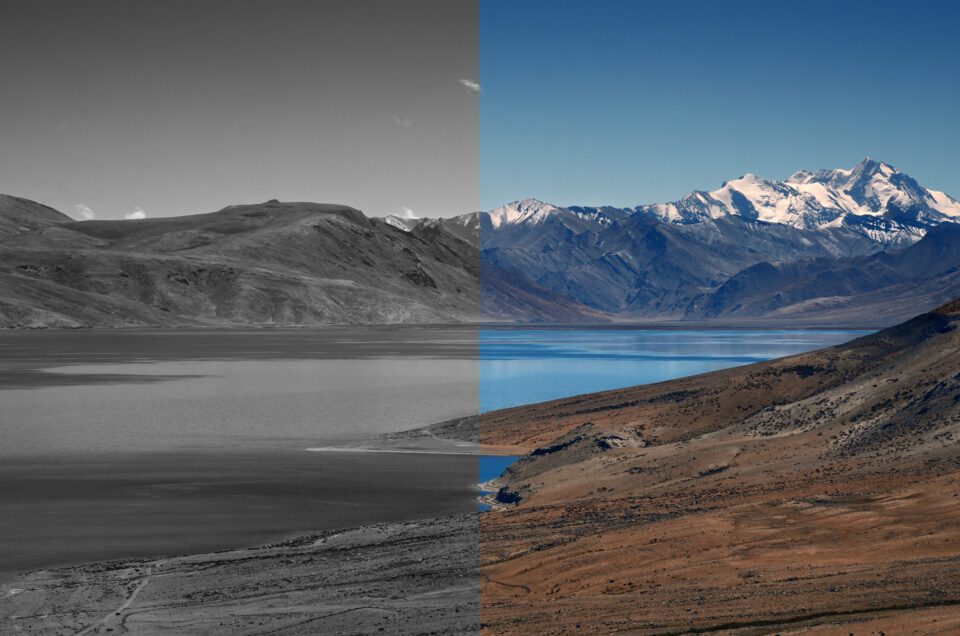 NIKON D7000 @ 85mm, ISO 100, 1/800, f/8.0
Most of us might have assumed a picture to be much better in its grey scale form, but when the conversion is done, we only feel disappointed as the picture looks way worse than what was expected. In a black and white picture, color contrast becomes literally insignificant. I have an article on Photoshop curves that has a simple “one-click” solution for color correction. Now let us take a look at the different ways in which we can convert our pictures to B&W starting from the simplest, leading to more complicated ones. The simpler ways will have the most constraints while the more advanced ways would give us increased control over our images.
في دليل التحويل إلى الأبيض والأسود باستخدام Photoshop، سننظر في إيجابيات وسلبيات الخيارات المختلفة التي يقدمها Photoshop لتحويل الصورة إلى أحادية اللون. عمليا، لا توجد طريقة واحدة تناسب الجميع، أو بشكل أكثر دقة، لا توجد طريقة واحدة تناسب كل صورة يلتقطها نفس المصور. لكن من المؤكد أن بعض الأساليب أقوى من غيرها وتمنحنا المزيد من التحكم في المخرجات. قبل متابعة هذه المقالة، يرجى إلقاء نظرة على مقالتي حول التصوير الفوتوغرافي أحادي اللون البسيط. قد تتساءل، بتحويل الصورة إلى تدرج رمادي، نقوم فقط بإزالة الألوان، فكيف تختلف إحدى الطرق عن الأخرى. دعونا نلقي نظرة على هذه الأشياء واحدة تلو الأخرى، وفي نهاية هذه المقالة، ستعرف كيف يختلف كل واحد عن الآخر، وبالتالي تقرر ما يجب تجنبه وتلك التي يجب استخدامها. ولكن قبل أن نصل إلى التحويل نفسه، هناك بعض الخطوات المهمة.
كاميرا نيكون D7000 عند 62 مم، ISO 100، 1/400، f/5.6
يجب أن تكون الخطوة الأولى في التحويل بالأبيض والأسود هي تصحيح الألوان. قد تتساءل لماذا يجب على المرء تصحيح الألوان لصورة ستنتهي بدون ألوان على أي حال؟ ألق نظرة على الرسم التوضيحي أدناه. الصورة رقم 1 خرجت مباشرة من الكاميرا ويمكنك أن ترى أنها تحتوي على مجموعة ألوان والصورة الموجودة أدناه هي نسخة بالأبيض والأسود. من ناحية أخرى، الصورة رقم 2 مصححة الألوان والصورة الموجودة أسفلها هي نسخة بالأبيض والأسود.

من خلال إلقاء نظرة على الصور بالأبيض والأسود، يمكنك رؤية الاختلافات بينهما بوضوح. الأول لديه تباين أقل بشكل ملحوظ من الثاني بسبب اللون المصبوب. يمكنك إبراز نفس التباين لاحقًا باستخدام المنحنيات أو أي أداة أخرى لتحسين التباين، ولكن باستخدام صورة تم تصحيح ألوانها، يمكنك البدء في العمل على صورة ذات تباين أكبر في الخطوة الأولى. نظرًا لأن اللون يتم تحويله إلى نغمات في صورة بالأبيض والأسود، فإن الحصول على ألوان دقيقة يساعد في جعل إصدار B&W يظهر المزيد من التباين.
دعونا نفهم الفرق بين تباين الألوان والتباين اللوني. في الصورة أدناه، يمكنك أن ترى أن النسخة بالأبيض والأسود تبدو مسطحة أكثر من نظيرتها الملونة. ويرجع ذلك في المقام الأول إلى أن هذه الصورة بالذات تحتوي على تباين ألوان أكبر (تباين في اللون، أي بين الأزرق والأحمر/البرتقالي وتباين أقل في الدرجات اللونية، وتباين في السطوع).
كاميرا نيكون D7000 عند 85 ملم، ISO 100، 1/800، f/8.0
ربما افترض معظمنا أن الصورة أفضل بكثير في شكلها ذي التدرج الرمادي، ولكن عندما يتم التحويل، نشعر بخيبة الأمل لأن الصورة تبدو أسوأ بكثير مما كان متوقعًا. في الصورة بالأبيض والأسود، يصبح تباين الألوان ضئيلًا بالمعنى الحرفي للكلمة. لدي مقالة عن منحنيات Photoshop تحتوي على حل بسيط "بنقرة واحدة" لتصحيح الألوان. الآن دعونا نلقي نظرة على الطرق المختلفة التي يمكننا من خلالها تحويل صورنا إلى الأبيض والأسود بدءًا من أبسطها، وصولاً إلى الصور الأكثر تعقيدًا. ستحتوي الطرق الأبسط على معظم القيود بينما ستمنحنا الطرق الأكثر تقدمًا تحكمًا أكبر في صورنا.
In this Guide to Black and White Conversion using Photoshop, we will look into the pros and cons of different options Photoshop offers to turn an image into monochrome. Practically, there is not one single method that suits everyone or more precisely, not one method that suits every single image shot by the same photographer. But certainly, some methods are more powerful than the others and give us more control over the output. Before you go through this article, please take a look at my article on Low-Key Monochrome Photography. You may wonder, by converting a picture into grey-scale, we are just removing the colors, then how does one method differ from the other. Let us look at these one-by-one and at the end of this article, you will know how each one is different from the other and hence decide on the ones to avoid and the ones to use. But before we get to the conversion itself, there are a few important steps.
 NIKON D7000 @ 62mm, ISO 100, 1/400, f/5.6
The first step in black and white conversion should be color correction. You may wonder why one should color correct an image that is going to end up without colors anyway? Take a look at the illustration below. Image #1 is straight out of the camera and you can see that it has a color cast and the one right below is a black and white version. On the other hand, Image #2 is color-corrected and the one below that one is a black and white version.

Taking a look at both black and white images, you can clearly see their differences. The first one has noticeably less contrast than the second because of color cast. You can bring out the same contrast later on by using curves or any other contrast enhancing tool, but with a color-corrected image, you start working on a picture with more contrast at step one. Since color gets converted into tones in a black and white picture, having accurate colors helps in making its B&W version show more contrast.
Let us understand the difference between color contrast and tonal contrast. In the picture below, you can see that the black and white version looks flatter than its colored counterpart. That is primarily because this particular picture has more color contrast (contrast in color ie., between blue and the red/orange and less tonal contrast, contrast in luminosity).
 NIKON D7000 @ 85mm, ISO 100, 1/800, f/8.0
Most of us might have assumed a picture to be much better in its grey scale form, but when the conversion is done, we only feel disappointed as the picture looks way worse than what was expected. In a black and white picture, color contrast becomes literally insignificant. I have an article on Photoshop curves that has a simple “one-click” solution for color correction. Now let us take a look at the different ways in which we can convert our pictures to B&W starting from the simplest, leading to more complicated ones. The simpler ways will have the most constraints while the more advanced ways would give us increased control over our images.
في دليل التحويل إلى الأبيض والأسود باستخدام Photoshop، سننظر في إيجابيات وسلبيات الخيارات المختلفة التي يقدمها Photoshop لتحويل الصورة إلى أحادية اللون. عمليا، لا توجد طريقة واحدة تناسب الجميع، أو بشكل أكثر دقة، لا توجد طريقة واحدة تناسب كل صورة يلتقطها نفس المصور. لكن من المؤكد أن بعض الأساليب أقوى من غيرها وتمنحنا المزيد من التحكم في المخرجات. قبل متابعة هذه المقالة، يرجى إلقاء نظرة على مقالتي حول التصوير الفوتوغرافي أحادي اللون البسيط. قد تتساءل، بتحويل الصورة إلى تدرج رمادي، نقوم فقط بإزالة الألوان، فكيف تختلف إحدى الطرق عن الأخرى. دعونا نلقي نظرة على هذه الأشياء واحدة تلو الأخرى، وفي نهاية هذه المقالة، ستعرف كيف يختلف كل واحد عن الآخر، وبالتالي تقرر ما يجب تجنبه وتلك التي يجب استخدامها. ولكن قبل أن نصل إلى التحويل نفسه، هناك بعض الخطوات المهمة.
كاميرا نيكون D7000 عند 62 مم، ISO 100، 1/400، f/5.6
يجب أن تكون الخطوة الأولى في التحويل بالأبيض والأسود هي تصحيح الألوان. قد تتساءل لماذا يجب على المرء تصحيح الألوان لصورة ستنتهي بدون ألوان على أي حال؟ ألق نظرة على الرسم التوضيحي أدناه. الصورة رقم 1 خرجت مباشرة من الكاميرا ويمكنك أن ترى أنها تحتوي على مجموعة ألوان والصورة الموجودة أدناه هي نسخة بالأبيض والأسود. من ناحية أخرى، الصورة رقم 2 مصححة الألوان والصورة الموجودة أسفلها هي نسخة بالأبيض والأسود.

من خلال إلقاء نظرة على الصور بالأبيض والأسود، يمكنك رؤية الاختلافات بينهما بوضوح. الأول لديه تباين أقل بشكل ملحوظ من الثاني بسبب اللون المصبوب. يمكنك إبراز نفس التباين لاحقًا باستخدام المنحنيات أو أي أداة أخرى لتحسين التباين، ولكن باستخدام صورة تم تصحيح ألوانها، يمكنك البدء في العمل على صورة ذات تباين أكبر في الخطوة الأولى. نظرًا لأن اللون يتم تحويله إلى نغمات في صورة بالأبيض والأسود، فإن الحصول على ألوان دقيقة يساعد في جعل إصدار B&W يظهر المزيد من التباين.
دعونا نفهم الفرق بين تباين الألوان والتباين اللوني. في الصورة أدناه، يمكنك أن ترى أن النسخة بالأبيض والأسود تبدو مسطحة أكثر من نظيرتها الملونة. ويرجع ذلك في المقام الأول إلى أن هذه الصورة بالذات تحتوي على تباين ألوان أكبر (تباين في اللون، أي بين الأزرق والأحمر/البرتقالي وتباين أقل في الدرجات اللونية، وتباين في السطوع).
كاميرا نيكون D7000 عند 85 ملم، ISO 100، 1/800، f/8.0
ربما افترض معظمنا أن الصورة أفضل بكثير في شكلها ذي التدرج الرمادي، ولكن عندما يتم التحويل، نشعر بخيبة الأمل لأن الصورة تبدو أسوأ بكثير مما كان متوقعًا. في الصورة بالأبيض والأسود، يصبح تباين الألوان ضئيلًا بالمعنى الحرفي للكلمة. لدي مقالة عن منحنيات Photoshop تحتوي على حل بسيط "بنقرة واحدة" لتصحيح الألوان. الآن دعونا نلقي نظرة على الطرق المختلفة التي يمكننا من خلالها تحويل صورنا إلى الأبيض والأسود بدءًا من أبسطها، وصولاً إلى الصور الأكثر تعقيدًا. ستحتوي الطرق الأبسط على معظم القيود بينما ستمنحنا الطرق الأكثر تقدمًا تحكمًا أكبر في صورنا.

تعليق