الاعدادات الأفضل لتصوير الماكرو Best Camera Settings for Macro Photography
تقليص
X
 
  • تصفية - فلترة
  • الوقت
  • عرض
إلغاء تحديد الكل
مشاركات جديدة

  • الاعدادات الأفضل لتصوير الماكرو Best Camera Settings for Macro Photography

    Best Camera Settings for Macro Photography


    Although macro photography is very accessible – no exotic destinations or expensive gear required – it is often tricky to choose the best camera settings for macro work. If you want sharp, well-exposed photos, you’ll have to push your camera system to its limits. Luckily, this guide covers everything you need to know about camera settings for macro photography, including camera mode, aperture, flash, shutter speed, ISO, and focusing, plus two detailed checklists at the end.

    I also just published a video explaining the same topic, so if you want to learn about these settings while watching bees take off in slow motion, check it out below:

    https://www.youtube.com/watch?v=eHmgipWPYSM

    أفضل إعدادات الكاميرا للتصوير الماكرو


    على الرغم من أن التصوير الفوتوغرافي الماكرو يمكن الوصول إليه بسهولة - فلا حاجة إلى وجهات غريبة أو معدات باهظة الثمن - إلا أنه غالبًا ما يكون من الصعب اختيار أفضل إعدادات الكاميرا للعمل الماكرو. إذا كنت تريد صورًا واضحة وجيدة التعرض للضوء، فسيتعين عليك دفع نظام الكاميرا الخاص بك إلى أقصى حدوده. لحسن الحظ، يغطي هذا الدليل كل ما تحتاج لمعرفته حول إعدادات الكاميرا للتصوير الفوتوغرافي الماكرو، بما في ذلك وضع الكاميرا، وفتحة العدسة، والفلاش، وسرعة الغالق، وISO، والتركيز، بالإضافة إلى قائمتين تفصيليتين في النهاية.

    لقد نشرت للتو أيضًا مقطع فيديو يشرح نفس الموضوع، لذا إذا كنت تريد التعرف على هذه الإعدادات أثناء مشاهدة النحل وهو يقلع بالحركة البطيئة، فراجعه أدناه:
    (نعتذر لعدم توفر الفديو باللغة العربية)

    https://www.youtube.com/watch?v=eHmgipWPYSM
    التعديل الأخير تم بواسطة غدير معروف; الساعة 10-27-2023, 08:42 PM.

  • #2
    Table of Contentsجدول المحتويات

    وضع الكاميرا
    الفتحة
    الفلاش
    سرعة الغالق
    التركيز
    ISO
    قائمة التحقق من إعدادات الكاميرا الموصى بها

    تعليق


    • #3
      Camera Mode


      There are two camera modes which are useful for macro photography, depending on the type of photos you are planning to take:
      • Aperture Priority – Useful when the source of light in your photo is the sun, or other ambient light, rather than a flash. However, keep in mind that it isn’t always realistic to do macro photography without a flash.
      • Manual Mode – Necessary when using a flash for macro photography, or when shooting from a tripod under natural light (such as focus stacking several photos together).
      نظام الكامرا

      هناك وضعان للكاميرا مفيدان للتصوير الفوتوغرافي الماكرو، اعتمادًا على نوع الصور التي تخطط لالتقاطها:

      أولوية فتحة العدسة - تكون مفيدة عندما يكون مصدر الضوء في صورتك هو الشمس أو أي ضوء محيط آخر، بدلاً من الفلاش. ومع ذلك، ضع في اعتبارك أنه ليس من الواقعي دائمًا تصوير الماكرو بدون فلاش. الوضع اليدوي - ضروري عند استخدام الفلاش لتصوير الماكرو، أو عند التصوير من حامل ثلاثي الأرجل تحت الضوء الطبيعي (مثل تجميع التركيز البؤري لعدة صور معًا) .

      تعليق


      • #4


        I recommend avoiding the “Macro” or “Close-up” scene modes that some cameras have. Although these are better than the default Auto mode, they aren’t flexible enough to deal with tricky macro scenes, especially when you are using flash.

        Also, do not use shutter priority mode for macro photography. You don’t want your aperture to change sporadically as you move in and out of shadows. It is important to control aperture for yourself.
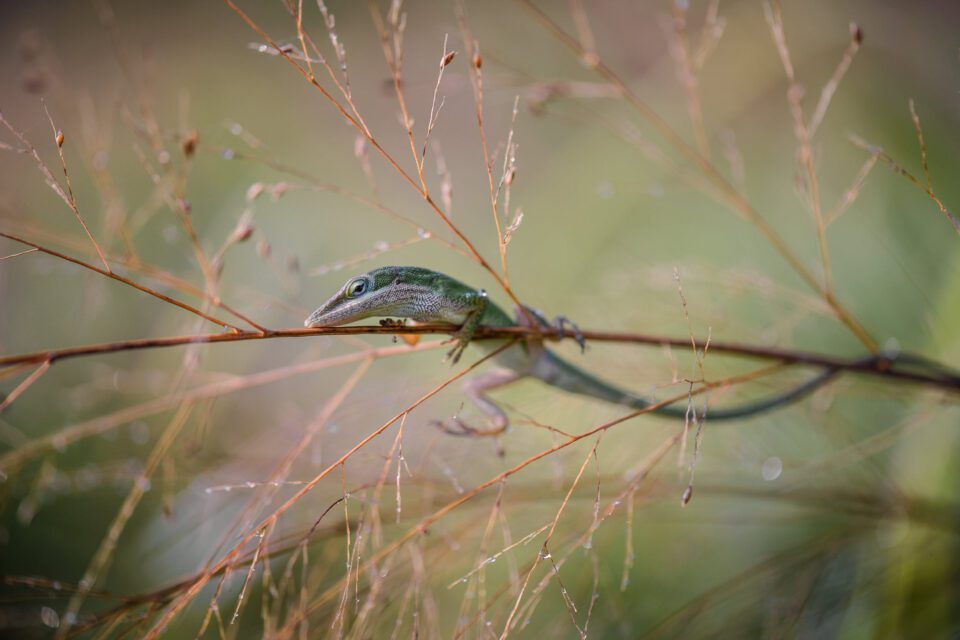
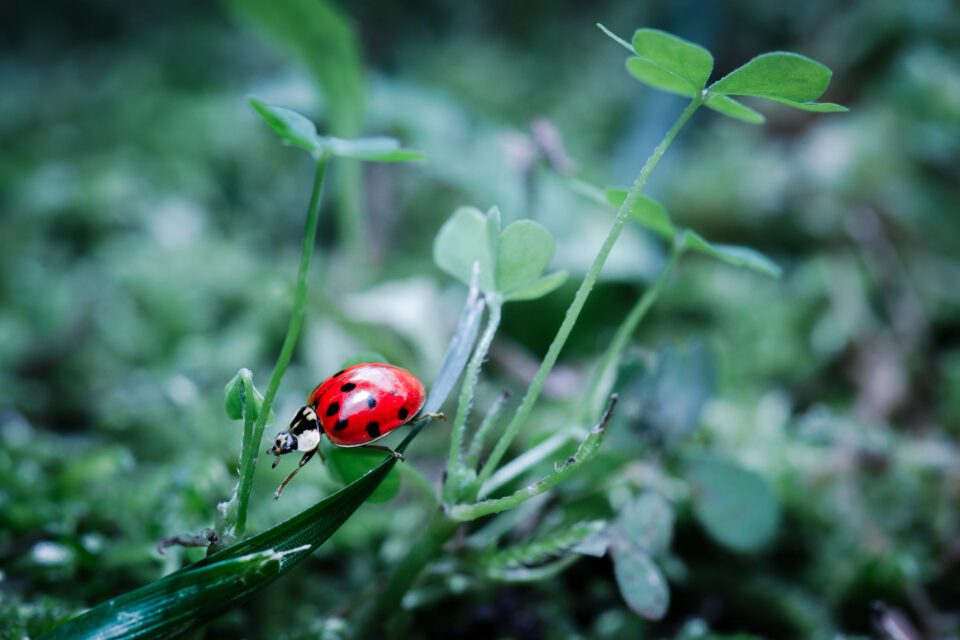
        NIKON D800E + 105mm f/2.8 @ 105mm, ISO 100, 1/800, f/3.2

        أوصي بتجنب أوضاع المشهد "الماكرو" أو "المقرب" التي تمتلكها بعض الكاميرات. على الرغم من أن هذه أفضل من الوضع التلقائي الافتراضي، إلا أنها ليست مرنة بما يكفي للتعامل مع مشاهد الماكرو الصعبة، خاصة عند استخدام الفلاش.

        أيضًا، لا تستخدم وضع أولوية الغالق للتصوير الفوتوغرافي عن قرب. لا تريد أن تتغير فتحة العدسة بشكل متقطع أثناء تحركك داخل وخارج الظل. من المهم التحكم في الفتحة بنفسك

        تعليق


        • #5
          Aperture


          The first setting you need to adjust is your aperture, also known as your f-stop. This is one of the most critical settings for macro photography, since it directly changes your depth of field.

          Macro photography has very minimal depth of field – paper thin, and it gets worse as you focus closer and closer. With macro lenses at their closest focusing distance, you’d be lucky to get an entire ant head to appear in focus at once. Your best chance of capturing sharp photos is to pick your aperture very carefully.

          So, what aperture should you use for macro photography?

          It’s a tricky question. On one hand, the optimal aperture depends on your source of light. With a flash, you’ll have enough light to use very dark apertures like f/16 or even f/22, boosting your depth of field. If you’re not using a flash, you might need to resort to a brighter aperture like f/5.6 or f/8, even though it quickly diminishes your depth of field.

          فتحة

          الإعداد الأول الذي تحتاج إلى ضبطه هو فتحة العدسة، والمعروفة أيضًا باسم f-stop. يعد هذا أحد الإعدادات الأكثر أهمية للتصوير الفوتوغرافي الماكرو، لأنه يغير عمق المجال بشكل مباشر.

          يتميز التصوير الفوتوغرافي الماكرو بعمق مجال ضئيل للغاية - ورق رقيق، ويزداد الأمر سوءًا مع التركيز أكثر فأكثر. مع وجود عدسات الماكرو في أقرب مسافة تركيز، ستكون محظوظًا إذا ظهر رأس نملة كاملًا في التركيز مرة واحدة. أفضل فرصة لالتقاط صور واضحة هي اختيار فتحة العدسة بعناية شديدة.

          إذن، ما هي الفتحة التي يجب أن تستخدمها لتصوير الماكرو؟

          إنه سؤال صعب. من ناحية، تعتمد الفتحة المثالية على مصدر الضوء لديك. باستخدام الفلاش، سيكون لديك ما يكفي من الضوء لاستخدام فتحات داكنة جدًا مثل f/16 أو حتى f/22، مما يعزز عمق المجال لديك. إذا كنت لا تستخدم الفلاش، فقد تحتاج إلى اللجوء إلى فتحة أكثر سطوعًا مثل f/5.6 أو f/8، على الرغم من أنها تقلل بسرعة من عمق المجال لديك.

          تعليق


          • #6
            The optimal aperture also depends on other factors: the size of your camera sensor, the focusing distance to your subject, and even the brand of camera you use (because Canon calculates aperture differently than other brands in high-magnification macro photography). Here is a chart of our recommended aperture settings for different macro photography subjects:
            Micro Four Thirds Sensors f/2 to f/8 – a wide range, since depth of field isn’t a big issue yet f/8 to f/11
            Canon APS-C f/2.8 to f/10 – same reason as above f/5 to f/7.1
            Nikon/Other APS-C f/2.8 to f/10 – same reason as above f/10 to f/14
            Canon Full Frame f/2.8 to f/16 – same reason as above f/8 to f/11
            Nikon/Other Full Frame f/2.8 to f/16 – same reason as above f/16 to f/22
            Feel free to experiment and test these different ranges for yourself. They aren’t set in stone, although they are good starting points. Macro photography never has as much depth of field as you would think. I took the photo below at f/22 with an APS-C Nikon camera, and it still has a very thin depth of field:
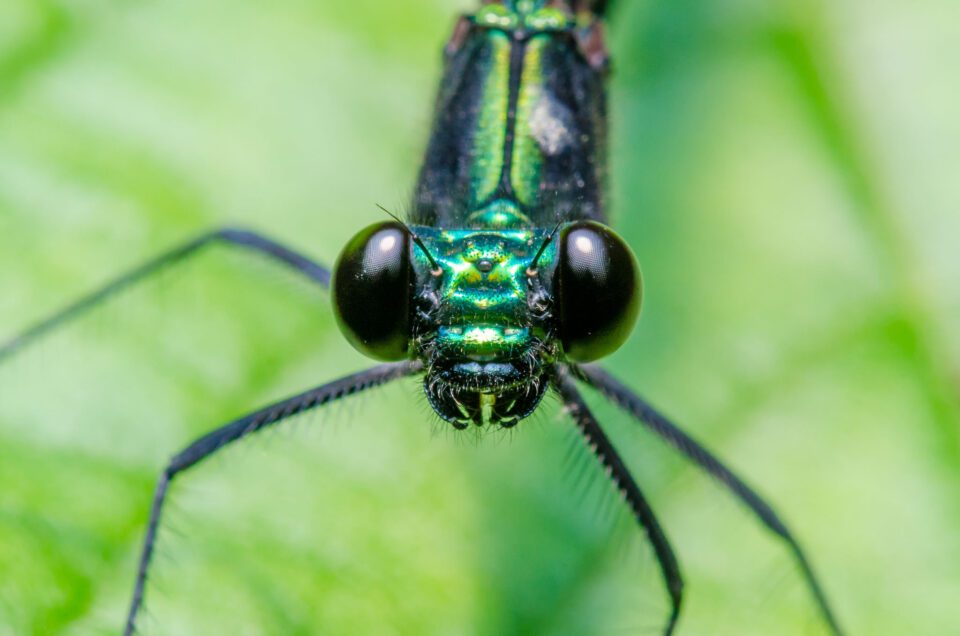
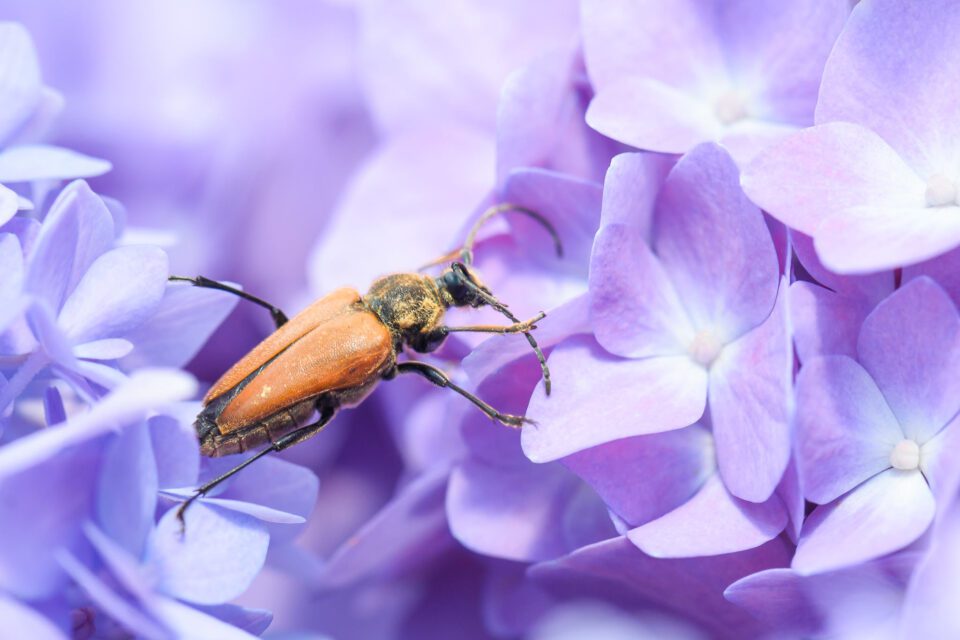
            Nikon D7000 + 105mm f/2.8 @ 105mm, ISO 800, 1/250, f/22.0

            تعتمد الفتحة المثالية أيضًا على عوامل أخرى: حجم مستشعر الكاميرا، ومسافة التركيز البؤري إلى الهدف، وحتى العلامة التجارية للكاميرا التي تستخدمها (لأن Canon تحسب الفتحة بشكل مختلف عن العلامات التجارية الأخرى في التصوير الفوتوغرافي الماكرو عالي التكبير). فيما يلي مخطط لإعدادات الفتحة الموصى بها لموضوعات تصوير الماكرو المختلفة:

            لقطات مقربة منخفضة التكبير (يبلغ عرض الهدف عدة بوصات: زهرة، يعسوب، ضفدع، جليد، إلخ.) صور ماكرو عالية التكبير (يبلغ عرض الهدف حوالي 1 بوصة/2 سم: نملة، عيون اليعسوب، ندفة ثلج، إلخ.) Micro Four مستشعرات الثلثf/2 إلى f/8 - نطاق واسع، نظرًا لأن عمق المجال ليس مشكلة كبيرة حتى الآنf/8 إلى f/11Canon APS-Cf/2.8 إلى f/10 - نفس السبب كما هو موضح أعلاهf/5 إلى f/7.1 نيكون/APS-Cf/2.8 أخرى إلى f/10 - نفس السبب المذكور أعلاه من f/10 إلى f/14Canon Full Framef/2.8 إلى f/16 - نفس السبب المذكور أعلاه من f/8 إلى f/11Nikon/Other Full Framef/2.8 إلى f /16 - نفس السبب المذكور أعلاه من f/16 إلى f/22

            لا تتردد في تجربة واختبار هذه النطاقات المختلفة بنفسك. إنها ليست ثابتة، على الرغم من أنها نقطة انطلاق جيدة. لا يتمتع التصوير الفوتوغرافي الماكرو أبدًا بعمق المجال الذي تظنه. لقد التقطت الصورة أدناه بفتحة f/22 باستخدام كاميرا APS-C Nikon، ولا تزال تتمتع بعمق مجال رفيع جدًا

            تعليق


            • #7
              Flash


              As covered above, you won’t have enough depth of field for high magnification photography unless you use dark apertures like f/16. In turn, that means you’ll want to use a flash. A flash also cuts down on motion blur, whether from your camera or your subject. It’s one of the most important pieces of equipment for macro photography.

              But what flash settings should you use? I strongly recommend using automatic (TTL) flash in combination with manual mode. That way, you pick your aperture for depth of field, but still enjoy the benefits of auto exposure to compensate for changing conditions.

              In order to capture a bright enough photo, you might need to adjust flash exposure compensation quite a bit. I often use a flash exposure compensation of +2 to +3 stops for high magnification macro photography.

              فلاش

              كما هو موضح أعلاه، لن يكون لديك عمق مجال كافٍ للتصوير الفوتوغرافي عالي التكبير إلا إذا كنت تستخدم فتحات داكنة مثل f/16. وهذا بدوره يعني أنك تريد استخدام الفلاش. يعمل الفلاش أيضًا على تقليل ضبابية الحركة، سواء من الكاميرا أو الهدف. إنها واحدة من أهم قطع المعدات لتصوير الماكرو.

              ولكن ما هي إعدادات الفلاش التي يجب عليك استخدامها؟ أوصي بشدة باستخدام الفلاش التلقائي (TTL) مع الوضع اليدوي. وبهذه الطريقة، يمكنك اختيار فتحة العدسة الخاصة بك لعمق المجال، مع الاستمتاع بفوائد التعريض التلقائي للتعويض عن الظروف المتغيرة.

              من أجل التقاط صورة ساطعة بدرجة كافية، قد تحتاج إلى ضبط تعويض التعرض للفلاش قليلاً. غالبًا ما أستخدم تعويض تعريض الفلاش من +2 إلى +3 توقفات للتصوير الفوتوغرافي الماكرو عالي التكبير.

              تعليق


              • #8
                Flash can be very harsh for macro photography. You’ll want to use a flash diffuser to soften the light and avoid specular highlights on your subject. If you’d rather not buy one, you can make a flash diffuser pretty easily out of tape, cardboard, and a paper towel. See our complete article on macro photography lighting for more details.

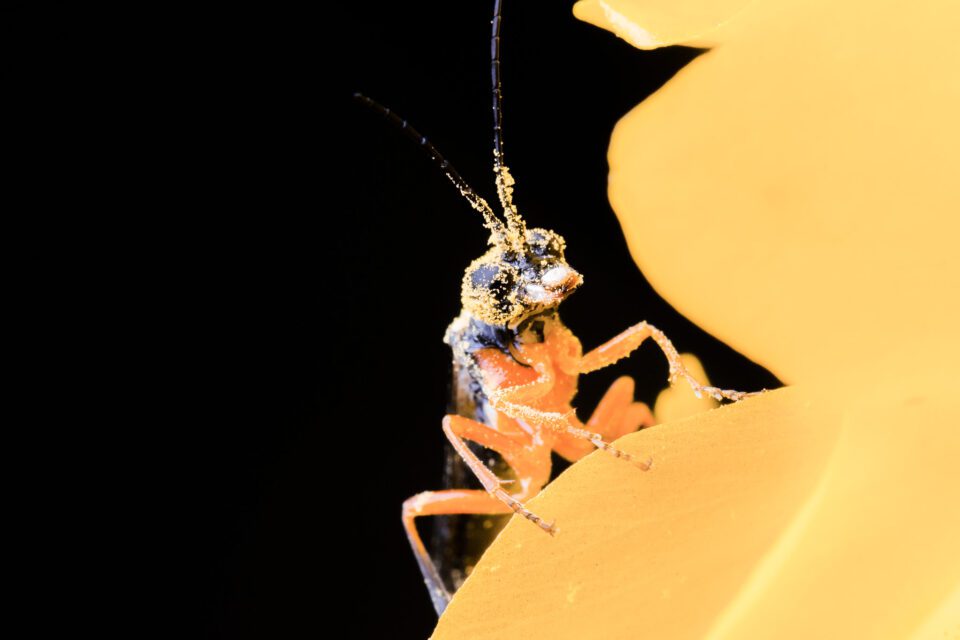
                Interestingly, when you use a flash with macro photography, the background of your photo may turn dark or even completely black. This is because the subject – being so close to your flash – receives many times more light than the background.
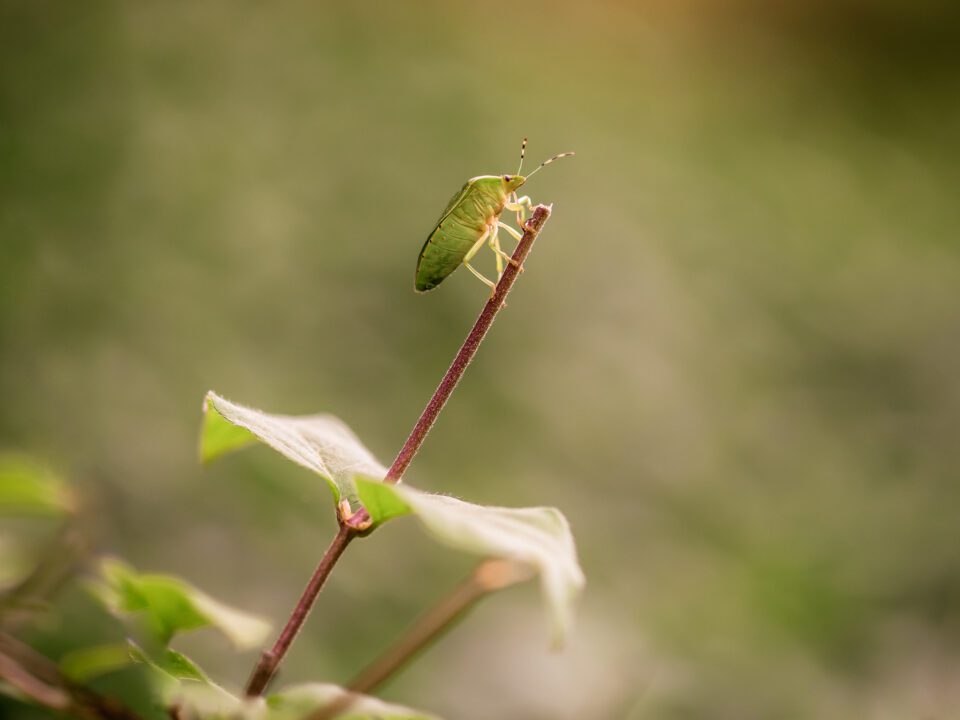
                NIKON D7000 + 105mm f/2.8 @ 105mm, ISO 1250, 1/250, f/22.0

                يمكن أن يكون الفلاش قاسيًا جدًا عند تصوير الماكرو. ستحتاج إلى استخدام ناشر فلاش لتنعيم الضوء وتجنب الإبرازات المرآوية على موضوعك. إذا كنت لا تفضل شراء واحدة، يمكنك صنع موزع للفلاش بسهولة باستخدام الشريط اللاصق والكرتون والمناشف الورقية. راجع مقالتنا الكاملة حول إضاءة التصوير الفوتوغرافي المقرب لمزيد من التفاصيل.

                ومن المثير للاهتمام، أنه عند استخدام الفلاش مع تصوير الماكرو، قد تصبح خلفية صورتك داكنة أو حتى سوداء تمامًا. وذلك لأن الهدف - الذي يكون قريبًا جدًا من الفلاش - يتلقى ضوءًا أكثر عدة مرات من الخلفية

                تعليق


                • #9
                  Shutter Speed
                  • With a flash: Your shutter speed setting is not especially important. Set it to 1/200 or 1/250 second (or whatever your fastest sync speed may be) purely to block out ambient light. It won’t affect the brightness of your flash, because your flash is over in far less than 1/250 second.
                  • Without a flash: It is critical that your shutter speed is fast enough to prevent blur from camera shake and subject motion. I recommend using 1/320 second or even faster if possible. You might get away with a longer shutter speed if you have image stabilization and your subject is large, but don’t push it too far. I can’t stress enough that blur is highly magnified for close-up photos. You certainly can get great macro pictures without a flash, but you need to watch this setting carefully.
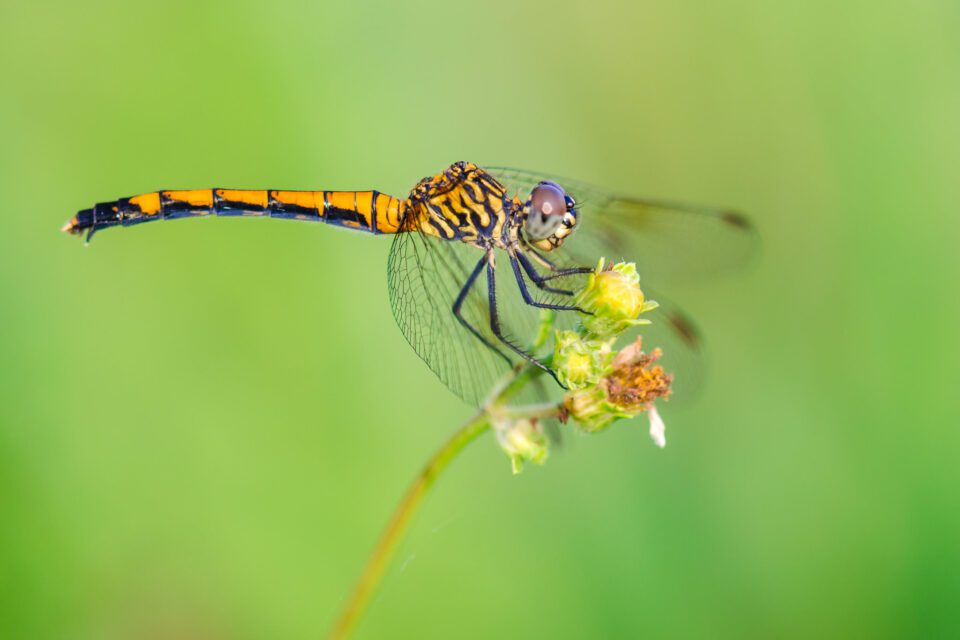
                  NIKON D7000 + 105mm f/2.8 @ 105mm, ISO 280, 1/400, f/4.0


                  سرعة مصراع الكاميرا

                  باستخدام الفلاش: إعداد سرعة الغالق ليس مهمًا بشكل خاص. اضبطه على 1/200 أو 1/250 ثانية (أو أيًا كانت أسرع سرعة مزامنة لديك) لحجب الضوء المحيط فقط. لن يؤثر ذلك على سطوع الفلاش، لأن الفلاش سينتهي في أقل من 1/250 ثانية بكثير. بدون فلاش: من المهم أن تكون سرعة الغالق سريعة بما يكفي لمنع التشويش الناتج عن اهتزاز الكاميرا وحركة الهدف. أوصي باستخدام 1/320 ثانية أو أسرع إن أمكن. قد تتمكن من الحصول على سرعة غالق أطول إذا كان لديك مثبت الصورة وكان هدفك كبيرًا، لكن لا تضغط عليه كثيرًا. لا أستطيع أن أؤكد بما فيه الكفاية أن التمويه يتم تضخيمه بشكل كبير في الصور القريبة. يمكنك بالتأكيد الحصول على صور ماكرو رائعة بدون فلاش، ولكن عليك مراقبة هذا الإعداد بعناية

                  تعليق


                  • #10
                    ISO
                    • With a flash: ISO is deeply intertwined with flash for macro photography. Specifically, it’s common for flashes to struggle outputting enough light for macro photos (since your aperture is so narrow). It’s also a bad idea to keep your flash near full power most of the time; you’d rather keep it around 1/4 power so it recycles more quickly between photos. This is where ISO comes in. Set your flash manually to 1/4 power, pick an ISO that results in a good exposure of a leaf, and then set the flash back to Auto (TTL) mode. Now you know that it will hover around 1/4 power for a typical image. Your ISO will usually be in the range of 100 to 800 for macro photography with a flash.
                    • Without a flash: You’re dealing with a fast shutter speed to eliminate motion blur, and a dark aperture to capture enough depth of field. If you don’t have a flash, that only leaves one option for capturing bright enough pictures: ISO. It’s not unusual to use ISOs in the range of 800 to 3200 for macro photography. I recommend using Auto ISO here. Set your minimum shutter speed to 1/320 second and your ISO to 100. This will keep your shutter speed fast enough for sharp photos, while keeping your ISO at a reasonable value, without any mental energy expended worrying about sharpness and ISO for a given photo.


                    ايزو

                    باستخدام الفلاش: يتشابك ISO بشكل وثيق مع الفلاش لتصوير الماكرو. على وجه التحديد، من الشائع أن تواجه وحدات الفلاش صعوبات في إخراج ما يكفي من الضوء لالتقاط صور الماكرو (نظرًا لأن فتحة العدسة ضيقة جدًا). إنها أيضًا فكرة سيئة أن تبقي الفلاش بالقرب من الطاقة الكاملة في معظم الأوقات؛ تفضل الاحتفاظ بها بحوالي ربع الطاقة حتى يتم إعادة تدويرها بسرعة أكبر بين الصور. هذا هو المكان الذي يأتي فيه ISO. اضبط الفلاش يدويًا على 1/4 طاقة، واختر ISO الذي ينتج عنه تعريض ضوئي جيد للورقة، ثم اضبط الفلاش مرة أخرى على الوضع التلقائي (TTL). الآن أنت تعلم أنه سوف يحوم حول 1/4 من الطاقة للحصول على صورة نموذجية. عادةً ما يكون معدل ISO الخاص بك في نطاق 100 إلى 800 للتصوير الماكرو باستخدام الفلاش. بدون فلاش: أنت تتعامل مع سرعة غالق سريعة للتخلص من ضبابية الحركة، وفتحة داكنة لالتقاط عمق المجال الكافي. إذا لم يكن لديك فلاش، فهذا لا يترك سوى خيار واحد لالتقاط صور ساطعة بدرجة كافية: ISO. ليس من غير المعتاد استخدام ISO في نطاق 800 إلى 3200 للتصوير الكلي. أوصي باستخدام Auto ISO هنا. اضبط الحد الأدنى لسرعة الغالق على 1/320 ثانية وISO على 100. سيؤدي ذلك إلى إبقاء سرعة الغالق لديك سريعة بما يكفي لالتقاط صور حادة، مع الحفاظ على ISO عند قيمة معقولة، دون إنفاق أي طاقة عقلية للقلق بشأن الحدة وISO لفترة معينة. صورة.

                    تعليق


                    • #11
                      Focusing


                      The good news is that all the settings so far will remain fairly constant from photo to photo. They are difficult to set, sure – once. But when you’ve set them properly, you’re pretty much done. I take almost all my high-magnification macro photos around f/16, 1/250 second, ISO 400, TTL flash. And for my low-magnification macro photos, I default to aperture-priority mode with Auto ISO 100, minimum shutter speed 1/320 second.

                      Unfortunately, focusing can be more complicated. You’re trying to maneuver a paper-thin depth of field to match your subject, sometimes when it’s moving quickly, all while keeping the composition you want. It’s a bit of an art form, and even the most skilled practitioners will come across subjects with meager of success rates
                      التركيز

                      والخبر السار هو أن جميع الإعدادات حتى الآن ستبقى ثابتة إلى حد ما من صورة إلى أخرى. من الصعب ضبطها بالتأكيد - مرة واحدة. ولكن عندما تقوم بتعيينها بشكل صحيح، تكون قد انتهيت إلى حد كبير. ألتقط جميع صور الماكرو عالية التكبير تقريبًا بمعدل f/16، و1/250 ثانية، وISO 400، وفلاش TTL. وبالنسبة لصور الماكرو منخفضة التكبير، أختار الوضع الافتراضي لفتحة العدسة باستخدام Auto ISO 100، والحد الأدنى لسرعة الغالق 1/320 ثانية.

                      لسوء الحظ، يمكن أن يكون التركيز أكثر تعقيدًا. أنت تحاول المناورة بعمق مجال صغير ليتناسب مع هدفك، أحيانًا عندما يتحرك بسرعة، كل ذلك مع الحفاظ على التركيبة التي تريدها. إنه نوع من الفن، وحتى أكثر الممارسين مهارة سيواجهون موضوعات ذات معدلات نجاح ضئيلة

                      تعليق


                      • #12
                        My main recommendation is to use continuous autofocus for larger subjects at lower magnification. Once you get to high-magnification flash photography, autofocus simply won’t work well enough. Instead, set your camera lens to a given focusing distance, and then sway forward and backward until your subject looks sharp (not easy). Take the photo, and then take several more so you have the best chance of getting a sharp result!

                        We also have a detailed guide to focusing in macro photography that covers these techniques and more.
                        NIKON D7000 + 105mm f/2.8 @ 105mm, ISO 800, 1/250, f/8.0

                        توصيتي الرئيسية هي استخدام التركيز البؤري التلقائي المستمر للأهداف الأكبر حجمًا بتكبير أقل. بمجرد الوصول إلى التصوير الفوتوغرافي باستخدام الفلاش عالي التكبير، لن يعمل التركيز التلقائي بشكل جيد بما فيه الكفاية. بدلاً من ذلك، اضبط عدسة الكاميرا على مسافة تركيز معينة، ثم تأرجح للأمام والخلف حتى يبدو هدفك واضحًا (ليس سهلاً). التقط الصورة، ثم التقط المزيد منها حتى تحصل على أفضل فرصة للحصول على نتيجة واضحة!

                        لدينا أيضًا دليل تفصيلي للتركيز على التصوير الفوتوغرافي الماكرو الذي يغطي هذه التقنيات والمزيد

                        تعليق


                        • #13
                          Recommended Camera Settings Checklist


                          That’s a lot of information to digest. Here is a checklist that you might find useful, based on the one in our complete guide to macro photography. Note that these camera settings are for high-magnification macro photography, with a flash:
                          1. Buy a monopod or find a stick.
                          2. Get a strong flash, and use a diffuser to soften the light. If you don’t have a diffuser, the best solution is often to make one yourself. Check out our comprehensive tutorial on macro photography lighting for more details.
                          3. Put a macro lens on your camera and set it to manual focus at your intended magnification.
                          4. Pick the correct exposure settings so that you capture the enough light. If the flash is your main source of light, and you’re shooting at 1:1 magnification, it is a good idea to use the fastest shutter speed that still syncs with your flash (typically 1/200 or 1/250 second). Use an aperture from f/16 to f/22.
                          5. Set your flash power manually to 1/4, and manually set the ISO to whatever value exposes ordinary subjects properly, like a leaf. This may take some experimentation.
                          6. Switch the flash to TTL (automatic) mode. However, even though it’s in automatic mode, you know it will tend to hover around 1/4 power, thanks to step 5.
                          قائمة التحقق من إعدادات الكاميرا الموصى بها

                          هذه معلومات كثيرة يجب استيعابها. فيما يلي قائمة مرجعية قد تجدها مفيدة، استنادًا إلى القائمة الموجودة في دليلنا الكامل لتصوير الماكرو. لاحظ أن إعدادات الكاميرا هذه مخصصة لتصوير الماكرو عالي التكبير باستخدام الفلاش:

                          قم بشراء حامل أحادي أو ابحث عن عصا. احصل على وميض قوي واستخدم موزعًا لتنعيم الضوء. إذا لم يكن لديك موزع روائح، فغالبًا ما يكون الحل الأفضل هو أن تصنع واحدًا بنفسك. اطلع على برنامجنا التعليمي الشامل حول إضاءة التصوير الفوتوغرافي عن قرب للحصول على مزيد من التفاصيل. ضع عدسة ماكرو على الكاميرا واضبطها على التركيز البؤري اليدوي عند مستوى التكبير المقصود. اختر إعدادات التعريض الضوئي الصحيحة حتى تتمكن من التقاط الضوء الكافي. إذا كان الفلاش هو مصدر الضوء الرئيسي لديك، وكنت تقوم بالتصوير بمعدل تكبير 1:1، فمن الجيد استخدام أسرع سرعة غالق والتي لا تزال تتزامن مع الفلاش (عادةً 1/200 أو 1/250 ثانية). استخدم فتحة من f/16 إلى f/22. اضبط طاقة الفلاش يدويًا على 1/4، واضبط ISO يدويًا على أي قيمة تعرض الأهداف العادية بشكل صحيح، مثل ورقة الشجر. قد يستغرق هذا بعض التجارب. قم بتحويل الفلاش إلى وضع TTL (تلقائي). ومع ذلك، على الرغم من أنه في الوضع التلقائي، فأنت تعلم أنه سيميل إلى التحويم حول 1/4 من الطاقة، وذلك بفضل الخطوة 5.

                          تعليق


                          • #14
                            1. To get an accurate exposure, you will need to adjust your flash exposure compensation, potentially by as much as a few stops. It is not uncommon to have a flash compensation in macro photography of +2 or even +3, but it depends on the flash.
                            2. At this point, the only “automatic” setting you’re using is auto flash, which will adjust itself depending upon the reflectiveness of your subject. All your other settings – aperture, shutter speed, and ISO – will stay constant. Don’t worry about changing them.
                            3. Put your camera on a monopod or a stick, assuming that it doesn’t interfere with reaching your subject at the right height.
                            4. Find a bug that lands long enough for you to photograph it – hopefully, one that is the size of a housefly or larger.
                            5. Focus manually by swaying forward and backward until your subject looks sharp, then take the picture. Continue taking photos to maximize your chances of success.
                            6. Watch out for dust spots in the editing stage, and you’re done.
                            NIKON D7000 + 105mm f/2.8 @ 105mm, ISO 800, 1/250, f/8.0

                            للحصول على تعريض ضوئي دقيق، ستحتاج إلى ضبط تعويض التعريض الضوئي للفلاش، ربما بما يصل إلى بضع توقفات. ليس من غير المألوف أن يكون هناك تعويض للفلاش في تصوير الماكرو بقيمة +2 أو حتى +3، لكن ذلك يعتمد على الفلاش. عند هذه النقطة، الإعداد "التلقائي" الوحيد الذي تستخدمه هو الفلاش التلقائي، والذي سيضبط نفسه اعتمادًا على الفلاش. على انعكاس الموضوع الخاص بك. ستظل جميع إعداداتك الأخرى – فتحة العدسة، وسرعة الغالق، وISO – ثابتة. لا تقلق بشأن تغييرها. ضع الكاميرا على حامل أحادي أو عصا، على افتراض أنها لا تتداخل مع الوصول إلى هدفك على الارتفاع الصحيح. ابحث عن خلل يصل إلى مسافة كافية لتتمكن من تصويره - ونأمل أن يتم ذلك هذا هو حجم الذبابة المنزلية أو أكبر. ركز يدويًا عن طريق التأرجح للأمام والخلف حتى يبدو هدفك حادًا، ثم التقط الصورة. استمر في التقاط الصور لتعظيم فرص نجاحك. انتبه إلى بقع الغبار في مرحلة التحرير، وبذلك تكون قد انتهيت.

                            تعليق


                            • #15
                              Here is a similar checklist for lower magnification close-up photography without a flash:
                              1. Set aperture-priority mode, and pick an aperture that gives you the desired depth of field. This could be almost anything, although I recommend an f-stop around f/2.8 to f/5.6 if you want an especially blurry background.
                              2. Turn on Auto ISO, and set your Minimum Shutter Speed to 1/320 second. Set Max ISO to 3200. This way, your shutter speed won’t drop below 1/320 second unless you’re in a very dark environment, minimizing motion blur.
                              3. However, if your subject is moving quickly (like a dragonfly in flight), set Minimum Shutter Speed to 1/1000 or 1/2000 second instead. In those cases, 1/320 will not be enough to freeze motion completely.
                              4. Set ISO to your base value, usually 100 with most cameras. Chances are good that Auto ISO will raise your ISO higher than this, but you might as well set the default to be as low as possible.
                              5. If your photos are turning out too bright or dark, just change exposure compensation.
                              6. Use continuous autofocus (AF-C or Continuous Servo) with the focus point placed on your subject, and take the picture. Again, take multiple photos to improve your odds of getting one that is completely sharp.
                              NIKON D800E + 105mm f/2.8 @ 105mm, ISO 400, 1/1000, f/3.5

                              تعليق

                              يعمل...
                              X