اعدادت الكامرا الأفضل لتصوير الطيور Best Camera Settings for Bird Photography

تقليص
X
 
  • تصفية - فلترة
  • الوقت
  • عرض
إلغاء تحديد الكل
مشاركات جديدة

  • اعدادت الكامرا الأفضل لتصوير الطيور Best Camera Settings for Bird Photography

    Best Camera Settings for Bird Photography

    Imagine that you’re on a beautiful beach and you see an unusual bird fly towards you. The sun is low in the sky and golden light washes over delicately patterned wings. You raise your camera, unsure of what settings to use. When you get back home, you realize the shots are blurry and overexposed – and worse, the pictures have just enough detail to identify the bird as a Far Eastern Curlew, a species you’ve been trying to photograph for years. How can you avoid this disaster?

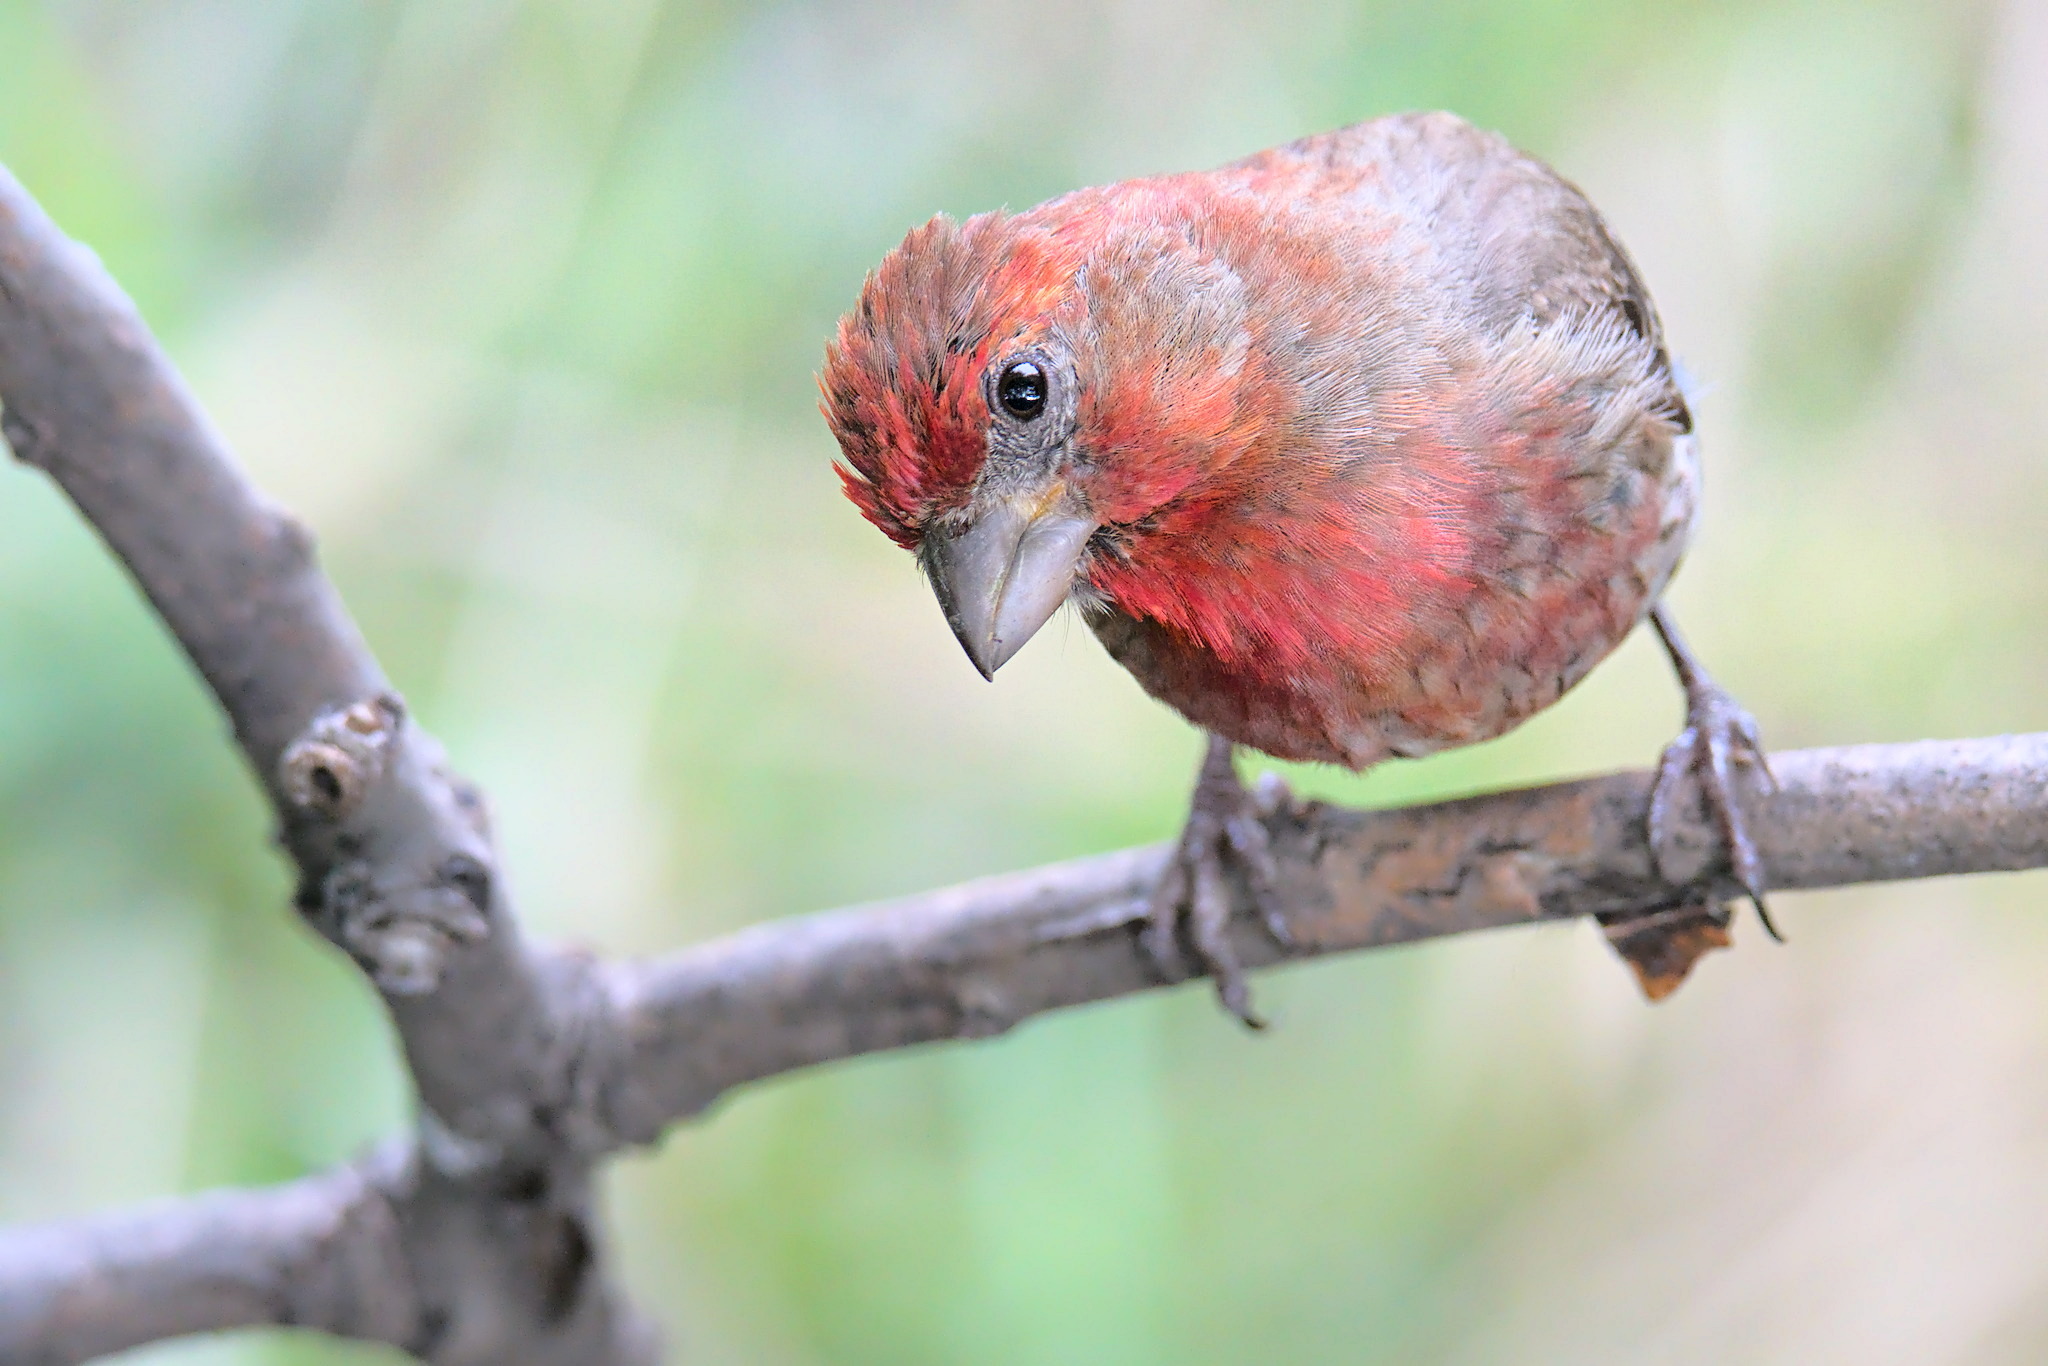
    House Finch, Nikon D500 + Tamron 150-600 G2 @ 400mm, ISO 3600, 1/250, f/7.1
    In bird photography, there are some commonly used camera settings that are a great starting point for almost any situation. No matter how rushed you are, you should be able to capture good, sharp images of birds. Below, I’ll introduce these settings and when to use them.

  • #2
    تخيل أنك على شاطئ جميل ورأيت طائرًا غير عادي يطير نحوك. الشمس منخفضة في السماء ويغسل الضوء الذهبي فوق الأجنحة المنقوشة بدقة. قمت برفع الكاميرا، غير متأكد من الإعدادات التي يجب استخدامها. عندما تعود إلى المنزل، تدرك أن اللقطات ضبابية ومتعرضة للضوء بشكل مفرط - والأسوأ من ذلك، أن الصور تحتوي على تفاصيل كافية لتعريف الطائر على أنه طائر الكروان الشرقي الأقصى، وهو نوع كنت تحاول تصويره لسنوات. كيف يمكنك تجنب هذه الكارثة؟


    اضغط على الصورة لعرض أكبر. 

الإسم:	DSC_4028.jpg 
مشاهدات:	29 
الحجم:	89.4 كيلوبايت 
الهوية:	173590
    هاوس فينش، كاميرا Nikon D500 + Tamron 150-600 G2 @ 400 مم، ISO 3600، 1/250، f/7.1

    في تصوير الطيور، هناك بعض إعدادات الكاميرا شائعة الاستخدام والتي تعد نقطة انطلاق رائعة لأي موقف تقريبًا. بغض النظر عن مدى استعجالك، يجب أن تكون قادرًا على التقاط صور جيدة وحادة للطيور. أدناه، سأقدم هذه الإعدادات ومتى يجب استخدامها.

    تعليق


    • #3
      Table of Contents

      تعليق


      • #4
        جدول المحتويات

        سرعة الغالق
        فتحة العدسة
        قياس iso
        أوضاع الكاميرا
        هل يجب عليك استخدام التركيز التلقائي للزر الخلفي؟
        rae مقابل jpeg
        التركيز التلقائي ووضع الاندفاع
        خاتمة

        تعليق


        • #5
          Shutter Speed


          Shutter speed is the most crucial variable for bird photography because birds are almost always moving, and you need a fast enough shutter speed to freeze that motion. But in the opposite direction, you also want to use the longest shutter speed possible because there is never enough light! The right shutter speed for a stationary hawk perched on a branch at sunset may be something like 1/200 second, but if it takes off, you’ll need closer to 1/2000 to avoid blur.

          The best shutter speed also depends somewhat on your focal length and how close you are to the bird. To simplify matters, I have created the following table. It gives good starting points for a recommended shutter speed for focal lengths of about 500-600mm (full frame) and the bird taking up most of the composition:
          Perched, still birds 1/400 1/40-1/640
          Walking or slowly moving birds 1/800 1/500-1/1500
          Running and darting birds 1/1200 1/800-1/1500
          Birds in flight, slow 1/2500 1/2000-1/3200
          Birds in flight, fast 1/3200 1/2500-1/8000
          These values are typical, but not universal, and there is room for experimentation. For example, I specified a huge range for perched birds because different species behave differently. Owls and herons can stay very still. If you have time to brace yourself or use a monopod, you can achieve incredibly low shutter speeds with these species, especially if your lens has optical stabilization enabled. On the other hand, if the bird has feathers waving in the wind, you will have to use a much faster shutter speed to get a razor-sharp look.

          For rarer birds, I always start with a safe value, and if I have time, I will start taking risks. If your shutter speed is risky, you will increase the probability of getting at least one sharp shot if you take a series of multiple photos in a row.

          Once birds start moving, you need to use a faster shutter speed. I recommend a starting value of 1/800 for slow-moving birds. Such birds often pause, and you want to get them at around that time. Keep in mind that certain bird species, such as rails, have quick twitches like tail-flicking even when they are walking slowly, so if you are photographing such a bird, you’ll need to use even faster speeds.
          Ring-billed Gull, Nikon D500 + 500mm f/5.6 PF @ 500mm, ISO 450, 1/2500, f/5.6
          With birds in flight, I’m almost always at 1/2500-1/3200 for larger birds and 1/4000 or faster for smaller birds. However, with larger birds in flight, you can also pan at much slower speeds such as 1/250, following the bird as it flies. This creates a dreamy background with motion blur that is worth exploring.


          سرعة مصراع الكاميرا

          تعد سرعة الغالق المتغير الأكثر أهمية لتصوير الطيور لأن الطيور تتحرك دائمًا تقريبًا، وتحتاج إلى سرعة غالق سريعة بما يكفي لتجميد هذه الحركة. ولكن في الاتجاه المعاكس، فأنت تريد أيضًا استخدام أطول سرعة غالق ممكنة لأنه لا يوجد ضوء كافٍ على الإطلاق! قد تكون سرعة الغالق المناسبة لصقر ثابت يجلس على فرع عند غروب الشمس حوالي 1/200 ثانية، ولكن إذا أقلعت، فستحتاج إلى سرعة أقرب إلى 1/2000 لتجنب الضبابية.

          تعتمد أفضل سرعة مصراع الكاميرا أيضًا إلى حد ما على البعد البؤري ومدى قربك من الطائر. لتبسيط الأمور، قمت بإنشاء الجدول التالي. إنه يوفر نقاط بداية جيدة لسرعة الغالق الموصى بها للأطوال البؤرية التي تبلغ حوالي 500-600 مم (إطار كامل) ويشغل الطائر معظم التكوين:

          الوضع التوصية الآمنة النطاق النموذجي الذي أستخدمه الطيور الجاثمة والثابتة 1/4001/40-1/640 الطيور التي تمشي أو تتحرك ببطء 1/8001/500-1/1500 الطيور الجارية والمندفعة 1/12001/800-1/1500 الطيور أثناء الطيران، بطيئة 1/25001/2000-1/ 3200طيور في الرحلة، سريع1/32001/2500-1/8000

          وهذه القيم نموذجية، ولكنها ليست عالمية، وهناك مجال للتجريب. على سبيل المثال، قمت بتحديد نطاق كبير للطيور الجاثمة لأن الأنواع المختلفة تتصرف بشكل مختلف. يمكن للبوم ومالك الحزين البقاء ساكنين للغاية. إذا كان لديك الوقت الكافي لتجهيز نفسك أو استخدام حامل أحادي، فيمكنك تحقيق سرعات غالق منخفضة بشكل لا يصدق باستخدام هذه الأنواع، خاصة إذا تم تمكين التثبيت البصري في عدستك. من ناحية أخرى، إذا كان ريش الطائر يتطاير في مهب الريح، فسيتعين عليك استخدام سرعة غالق أسرع بكثير للحصول على مظهر حاد للغاية.

          بالنسبة للطيور النادرة، أبدأ دائمًا بقيمة آمنة، وإذا كان لدي الوقت، سأبدأ بالمخاطرة. إذا كانت سرعة الغالق لديك محفوفة بالمخاطر، فسوف تزيد من احتمالية الحصول على لقطة واضحة واحدة على الأقل إذا التقطت سلسلة من الصور المتعددة على التوالي.

          بمجرد أن تبدأ الطيور في التحرك، ستحتاج إلى استخدام سرعة غالق أسرع. أوصي بقيمة تبدأ من 1/800 للطيور بطيئة الحركة. غالبًا ما تتوقف هذه الطيور مؤقتًا، وتريد الحصول عليها في ذلك الوقت تقريبًا. ضع في اعتبارك أن بعض أنواع الطيور، مثل القضبان، لديها تشنجات سريعة مثل نقر الذيل حتى عندما تمشي ببطء، لذلك إذا كنت تقوم بتصوير مثل هذا الطائر، فستحتاج إلى استخدام سرعات أعلى.


          مع الطيور أثناء الطيران، أكون دائمًا عند 1/2500-1/3200 للطيور الأكبر حجمًا و1/4000 أو أسرع للطيور الصغيرة. ومع ذلك، مع الطيور الكبيرة أثناء الطيران، يمكنك أيضًا التحريك بسرعات أبطأ بكثير، مثل 1/250، وتتبع الطائر أثناء طيرانه. يؤدي هذا إلى إنشاء خلفية حالمة مع ضبابية الحركة التي تستحق الاستكشاف.

          تعليق


          • #6
            Aperture


            If the aperture mechanism of my birding lens were broken and stuck wide open, I probably wouldn’t even notice. Maybe it seems sacrilegious how little I care about changing aperture, but there’s a good reason for that. There never seems to be enough light to use the fast shutter speeds I need, so I think it’s helpful to shoot with my aperture wide open whenever possible.

            Stopping down for depth of field does makes sense, but from my experience, when a bird is in the optimal pose and the eye is sharp, the depth of field wide open (f/4 or f/5.6) is already good enough. For larger birds, I have noticed that on some rare occasions I do stop down, such as shooting ducks when the body is in a slightly different focus plane than the head.
            American Robin, Nikon D500 + 500mm f/5.6 PF @ 500mm, ISO 1800, 1/400, f/5.6
            With some lenses, stopping down one stop can improve sharpness, but the latest supertelephoto primes are typically near or at their maximum sharpness wide open.

            Therefore, my recommendation is to shoot wide open and only stop down when necessary to get more depth of field. Personally, over 95% of my shots are wide open.

            فتحة

            إذا كانت آلية فتحة عدسة الطيور الخاصة بي مكسورة ومفتوحة على مصراعيها، فربما لن ألاحظ ذلك. ربما يبدو الأمر تدنيسًا لمدى قلة اهتمامي بتغيير فتحة العدسة، لكن هناك سببًا وجيهًا لذلك. لا يبدو أن هناك ما يكفي من الضوء لاستخدام سرعات الغالق السريعة التي أحتاجها، لذلك أعتقد أنه من المفيد التصوير بفتحة عدسة مفتوحة على مصراعيها كلما أمكن ذلك.

            إن التوقف لعمق المجال أمر منطقي، ولكن من تجربتي، عندما يكون الطائر في الوضع الأمثل وتكون العين حادة، فإن عمق المجال مفتوحًا على مصراعيه (f/4 أو f/5.6) يكون جيدًا بالفعل بما فيه الكفاية. بالنسبة للطيور الأكبر حجمًا، لاحظت أنه في بعض المناسبات النادرة أتوقف، مثل إطلاق النار على البط عندما يكون الجسم في مستوى تركيز مختلف قليلاً عن الرأس.


            مع بعض العدسات، يمكن أن يؤدي التوقف عن التوقف مرة واحدة إلى تحسين الحدة، ولكن أحدث عدسات التقريب الفائقة عادةً ما تكون قريبة من الحدة القصوى أو مفتوحة على مصراعيها.

            ولذلك، فإن توصيتي هي التصوير بشكل مفتوح على مصراعيه والتوقف فقط عند الضرورة للحصول على مزيد من عمق المجال. شخصيًا، أكثر من 95% من لقطاتي مفتوحة على مصراعيها.

            تعليق


            • #7
              ISO


              There are two ways to choose the ISO. You can use Auto ISO (then fine tune it with exposure compensation), or else choose it manually. In practice, as long as I have easy access to a dial to change the exposure compensation, I find Auto ISO to work well. This is especially true with mirrorless cameras where the exposure preview is immediately apparent through the electronic viewfinder.

              However, there are some situations where you can use true manual mode. If you are in one place where the light is fairly constant and you are not varying your shutter speed either, such as by a river shooting birds in flight, you can set the ISO manually. The reason why this can be worthwhile is that some birds have very small spots of bright feathers, and the camera may suggest different exposures based on which direction the bird faces, when you’d rather the exposure settings remain constant. By fixing a safe ISO value, you can avoid the camera metering somewhat randomly.

              A “safe” ISO is one that doesn’t blow out any important highlight values. You can determine this ISO value by photographing the brightest birds at the beginning of the shooting session and finding an ISO that doesn’t overexpose them. However, this comes with the caveat that your scene will slowly get brighter if you are shooting in the early morning, and you may gradually end up with overexposed images.

              If your camera has an overexposure indicator (such as the “blinkies” on overexposed areas), this can be helpful to watch – whether directly in the EVF on a mirrorless camera or when reviewing your images on a DSLR.

              تعليق


              • #8
                ايزو

                هناك طريقتان لاختيار ISO. يمكنك استخدام Auto ISO (ثم ضبطه باستخدام تعويض التعريض الضوئي)، أو اختياره يدويًا. من الناحية العملية، طالما أنه يمكنني الوصول بسهولة إلى القرص لتغيير تعويض التعريض الضوئي، أجد أن Auto ISO يعمل بشكل جيد. وينطبق هذا بشكل خاص على الكاميرات غير المزودة بمرآة حيث تظهر معاينة التعريض على الفور من خلال عدسة الكاميرا الإلكترونية.

                ومع ذلك، هناك بعض المواقف حيث يمكنك استخدام الوضع اليدوي الحقيقي. إذا كنت في مكان واحد حيث يكون الضوء ثابتًا إلى حد ما ولا تقوم بتغيير سرعة الغالق أيضًا، مثل إطلاق النار على الطيور أثناء طيران النهر، فيمكنك ضبط ISO يدويًا. السبب وراء كون ذلك جديرًا بالاهتمام هو أن بعض الطيور لديها بقع صغيرة جدًا من الريش اللامع، وقد تقترح الكاميرا تعريضات مختلفة بناءً على الاتجاه الذي يواجهه الطائر، عندما تفضل أن تظل إعدادات التعريض ثابتة. من خلال تثبيت قيمة ISO آمنة، يمكنك تجنب قياس الكاميرا بشكل عشوائي إلى حد ما.

                إن ISO "الآمن" هو الذي لا يؤدي إلى إبراز أي قيم مهمة. يمكنك تحديد قيمة ISO هذه من خلال تصوير الطيور الأكثر سطوعًا في بداية جلسة التصوير والعثور على ISO لا يفرط في تعريضها للضوء. ومع ذلك، يأتي هذا مع التحذير من أن مشهدك سيصبح أكثر سطوعًا ببطء إذا كنت تقوم بالتصوير في الصباح الباكر، وقد ينتهي بك الأمر تدريجيًا إلى الحصول على صور ذات تعريض زائد.

                إذا كانت الكاميرا الخاصة بك تحتوي على مؤشر تعريض زائد (مثل "الوميض" في المناطق شديدة التعريض)، فقد يكون من المفيد مشاهدته - سواء مباشرة في معين المنظر الإلكتروني على كاميرا غير مزودة بمرآة أو عند مراجعة صورك على كاميرا DSLR.

                تعليق


                • #9
                  Metering


                  If any of the three variables above – shutter speed, aperture, and ISO – are set automatically by the camera, you will be relying heavily on the camera’s metering system to determine the proper exposure. Even if you’re setting all three values manually, the meter will still appear in the viewfinder to tell you whether the camera estimates you are over, under, or properly exposed.

                  I tend to use spot or center-weighted metering for most bird portraits since these tend to produce the most consistent exposures for me. Different cameras meter differently so you might need to experiment a little. Matrix/evaluative metering is usually the most advanced and hands-off metering system on a camera, but I tend to prefer the predictability of spot and center-weighted for my bird photography.
                  A quick-moving Black-capped Chickadee, Nikon D500 + 500mm f/5.6 PF @ 500mm, ISO 3200, 1/800, f/5.6
                  Regardless of what metering mode you use, I also suggest having exposure compensation very easily accessible so that you can adjust exposure quickly (though it only affects your exposure one or more of shutter speed, aperture, or ISO is set automatically by the camera).

                  Finally, I can get exposure pretty close following these methods, but in unusual situations, I always err on the side of caution. Bird photography does not usually require intense shadow lifting in post-production, so slightly underexposed shots will not suffer much. In most modern cameras, it makes little difference to the end result if you underexpose your images by a stop (or even multiple stops) and correct the exposure in post, compared to using a higher ISO in the first place.

                  القياس

                  إذا تم ضبط أي من المتغيرات الثلاثة المذكورة أعلاه - سرعة الغالق، وفتحة العدسة، وISO - تلقائيًا بواسطة الكاميرا، فسوف تعتمد بشكل كبير على نظام قياس الكاميرا لتحديد التعريض الضوئي المناسب. حتى إذا كنت تقوم بتعيين القيم الثلاث يدويًا، فسيظل المقياس يظهر في عدسة الكاميرا ليخبرك ما إذا كانت الكاميرا تقدر أنك قد تجاوزت، أو أقل، أو تم تعريضك بشكل صحيح.

                  أميل إلى استخدام القياس الموضعي أو قياس المنتصف لمعظم صور الطيور نظرًا لأن هذه تميل إلى إنتاج التعريضات الضوئية الأكثر اتساقًا بالنسبة لي. تختلف قياسات الكاميرات المختلفة، لذا قد تحتاج إلى التجربة قليلاً. عادةً ما يكون قياس المصفوفة/التقييم هو نظام القياس الأكثر تقدمًا وعدم التدخل في الكاميرا، لكنني أميل إلى تفضيل إمكانية التنبؤ بالنقطة ووزن المنتصف في التصوير الفوتوغرافي للطيور.

                   طائر طائر أسود اللون سريع الحركة، كاميرا Nikon D500 + 500 مم f/5.6 PF @ 500 مم، ISO 3200، 1/800، f/5.6

                  بغض النظر عن وضع القياس الذي تستخدمه، أقترح أيضًا أن يسهل الوصول إلى تعويض التعريض الضوئي بحيث يمكنك ضبط التعريض الضوئي بسرعة (على الرغم من أنه يؤثر فقط على التعريض الضوئي الخاص بك، حيث يتم ضبط واحد أو أكثر من سرعة الغالق أو الفتحة أو ISO تلقائيًا بواسطة الكاميرا).

                  أخيرًا، يمكنني الحصول على التعرض بشكل قريب جدًا باتباع هذه الأساليب، لكن في المواقف غير العادية، أخطئ دائمًا في جانب الحذر. لا يتطلب تصوير الطيور عادةً رفعًا مكثفًا للظل في مرحلة ما بعد الإنتاج، لذا فإن اللقطات قليلة التعرض للضوء لن تعاني كثيرًا. في معظم الكاميرات الحديثة، لن يحدث فرق كبير في النتيجة النهائية إذا قمت بتعريض صورك بشكل ناقص عن طريق التوقف (أو حتى التوقفات المتعددة) وتصحيح التعريض الضوئي بعد ذلك، مقارنةً باستخدام حساسية ISO أعلى في المقام الأول.

                  تعليق


                  • #10
                    Camera Modes


                    Given that the optimal shutter speed can vary wildly in bird photography, you need to be in a camera mode that allows you to control shutter speed. I recommend full Manual Mode – or Manual Mode with Auto ISO and exposure compensation – to make quick adjustments.
                    Mallard, Nikon D500 + 500mm f/5.6 PF @ 500mm, ISO 1600, 1/500, f/5.6
                    The only downside to Manual Mode + Auto ISO is that if suddenly the light becomes too bright so that there is overexposure at base ISO, the camera has no way to compensate automatically. In this case, there are two solutions. The first solution is to recognize what’s happening and use a faster shutter speed. The other solution is quickly switching to aperture priority mode and setting your widest aperture, at which point the camera will set base ISO and a good shutter speed.

                    Some photographers actually shoot in aperture priority mode for almost all their bird photography for this reason. They’re still able to control the shutter speed via a careful dance with Auto ISO, but this is a more complex technique (discussed in detail in Nasim’s article How to Photograph Birds, under the header “Camera Settings.”)

                    As for Shutter Priority mode, I would not recommend it for bird photography even though it may be tempting. The reason is that in brighter light, if you forget to change your shutter speed, the camera can stop down the aperture too much. Most modern birding lenses are sharpest at or near wide open, and I would not want to lose sharpness – not to mention the shallow depth of field I like – by letting the camera stop down to something narrower like f/11.

                    أوضاع الكاميرا

                    نظرًا لأن سرعة الغالق المثالية يمكن أن تختلف بشكل كبير في تصوير الطيور، يجب أن تكون في وضع الكاميرا الذي يسمح لك بالتحكم في سرعة الغالق. أوصي بالوضع اليدوي الكامل – أو الوضع اليدوي مع ISO التلقائي وتعويض التعريض الضوئي – لإجراء تعديلات سريعة.


                    الجانب السلبي الوحيد للوضع اليدوي + ISO التلقائي هو أنه إذا أصبح الضوء فجأة ساطعًا جدًا بحيث يكون هناك تعريض زائد عند ISO الأساسي، فلن يكون لدى الكاميرا طريقة للتعويض تلقائيًا. في هذه الحالة، هناك حلان. الحل الأول هو التعرف على ما يحدث واستخدام سرعة غالق أسرع. الحل الآخر هو التبديل سريعًا إلى وضع أولوية فتحة العدسة وتعيين فتحة العدسة الأوسع، وعند هذه النقطة ستقوم الكاميرا بتعيين ISO الأساسي وسرعة غالق جيدة.

                    يقوم بعض المصورين بالتصوير في وضع أولوية الفتحة لجميع صور الطيور تقريبًا لهذا السبب. لا يزال بإمكانهم التحكم في سرعة الغالق من خلال التنقل الدقيق باستخدام Auto ISO، ولكن هذه تقنية أكثر تعقيدًا (تمت مناقشتها بالتفصيل في مقالة نسيم كيفية تصوير الطيور، تحت عنوان "إعدادات الكاميرا".)

                    أما بالنسبة لوضع أولوية الغالق فلا أنصح به لتصوير الطيور رغم أنه قد يكون مغريا. والسبب هو أنه في الضوء الساطع، إذا نسيت تغيير سرعة الغالق، يمكن للكاميرا إيقاف الفتحة كثيرًا. تكون معظم عدسات الطيور الحديثة أكثر وضوحًا عند الفتح الواسع أو بالقرب منه، ولا أريد أن أفقد الحدة - ناهيك عن عمق المجال الضحل الذي أحبه - من خلال السماح للكاميرا بالتوقف إلى شيء أضيق مثل f/11.

                    تعليق


                    • #11
                      Should You Use Back-Button Autofocus?


                      Back-button autofocus refers to assigning the back AF button, usually labeled AF-On, to initiate autofocus, and (usually) disabling autofocus from the half-press of the shutter button. Is this useful in bird photography?

                      For DSLRs, I feel the back-button autofocus is very useful, and I use it instead of half-pressing the shutter button on my D500. It can be useful to press the AF-On button to initiate focus, shift the composition a little, and then take my photo. In cases like that, I do not want to activate autofocus by pressing the shutter button.
                      House Wren, Nikon D500 + 500mm f/5.6 PF @ 500mm, ISO 2200, 1/1000, f/5.6
                      On the other hand, with the latest mirrorless cameras, the autofocus systems have very intelligent tracking and can follow a subject across almost the entire frame, rather than a small portion in the center of the viewfinder. This reduces two of the big reasons to use back-button autofocus exclusively. I also find it ergonomically more comfortable sometimes for low-angle shots (like birds on the ground or in the water) to press the shutter button to focus rather than using a button on the rear of the camera.

                      Whether this is worth keeping half-press autofocus available is up to you, but I at least recommend familiarizing yourself with back-button focus if you’ve never used it before. I do tend to leave half-press autofocus enabled these days, but only after I know the benefits of using back-button.

                      On some cameras, you can even get the best of both worlds by programming the AF-On button to focus in a different mode as half-pressing the shutter button, making it very quick to switch autofocus modes. So, it’s absolutely worth learning the details of AF-On and practicing with it for a while even if you plan to keep half-press autofocus enabled.

                      هل يجب عليك استخدام التركيز التلقائي للزر الخلفي؟

                      يشير التركيز البؤري التلقائي لزر الرجوع إلى تعيين زر التركيز البؤري التلقائي الخلفي، والذي يُسمى عادةً تشغيل التركيز البؤري التلقائي، لبدء التركيز البؤري التلقائي، و(عادةً) تعطيل التركيز البؤري التلقائي من خلال نصف ضغطة على زر الغالق. هل هذا مفيد في تصوير الطيور؟

                      بالنسبة لكاميرات DSLR، أشعر أن التركيز التلقائي للزر الخلفي مفيد جدًا، وأستخدمه بدلاً من الضغط نصف الضغط على زر الغالق في كاميرا D500. قد يكون من المفيد الضغط على زر AF-On لبدء التركيز، وتغيير التركيبة قليلاً، ثم التقاط الصورة. في مثل هذه الحالات، لا أريد تفعيل التركيز التلقائي بالضغط على زر الغالق.


                      من ناحية أخرى، مع أحدث الكاميرات غير المزودة بمرآة، تتمتع أنظمة التركيز التلقائي بتتبع ذكي للغاية ويمكنها متابعة الهدف عبر الإطار بأكمله تقريبًا، بدلاً من جزء صغير في وسط عدسة الكاميرا. يؤدي هذا إلى تقليل اثنين من الأسباب الرئيسية لاستخدام التركيز التلقائي للزر الخلفي حصريًا. أجد أيضًا أنه من المريح أحيانًا بالنسبة للقطات ذات الزاوية المنخفضة (مثل الطيور على الأرض أو في الماء) الضغط على زر الغالق للتركيز بدلاً من استخدام زر في الجزء الخلفي من الكاميرا.

                      إن ما إذا كان هذا يستحق الاحتفاظ بالتركيز البؤري التلقائي بنصف الضغطة هو أمر متروك لك، لكنني على الأقل أوصي بالتعرف على التركيز على زر الرجوع إذا لم تستخدمه من قبل. أنا أميل إلى ترك التركيز البؤري التلقائي مع الضغط على نصف زر ممكّنًا هذه الأيام، ولكن فقط بعد أن أعرف فوائد استخدام زر الرجوع.

                      في بعض الكاميرات، يمكنك حتى الحصول على أفضل ما في كلا العالمين من خلال برمجة زر AF-On للتركيز في وضع مختلف مثل الضغط نصف زر على زر الغالق، مما يجعل التبديل بين أوضاع التركيز البؤري التلقائي سريعًا جدًا. لذا، من المفيد تمامًا معرفة تفاصيل تشغيل التركيز البؤري التلقائي والتدرب عليه لفترة من الوقت حتى إذا كنت تخطط للحفاظ على تمكين التركيز البؤري التلقائي بنصف ضغطة.

                      تعليق


                      • #12
                        Raw vs JPEG


                        Bird photography is very unpredictable, and at times, you will need to squeeze every last drop out of your files. That’s why I recommend shooting in Raw. Raw makes it easier to change white balance in post-processing. It also makes it easier to reduce noise if you were shooting in low light conditions – very common in bird photography. I use custom noise reduction techniques in post-processing, and I feel much safer knowing I have the best starting point in a Raw rather than JPEG file.
                        Double-crested Cormorant, Nikon D500 + 500mm f/5.6 PF @ 500mm, ISO 200, 1/500, f/5.6
                        Even with a properly-exposed shot, I still like to manipulate tone curves to bring out the subtle gradations on the subject itself, and this is where Raw shines. JPEG files can look perfectly good unedited, but they’ll quickly start to show compression artifacts as you edit them more and more.

                        For more a more detailed comparison, I suggest consulting our article on Raw vs JPEG.

                        تعليق


                        • #13
                          RAW مقابل JPEG

                          لا يمكن التنبؤ بتصوير الطيور، وفي بعض الأحيان، ستحتاج إلى الضغط على كل قطرة أخيرة من ملفاتك. لهذا السبب أوصي بالتصوير في Raw. يسهل Raw تغيير توازن اللون الأبيض في مرحلة ما بعد المعالجة. كما أنه يجعل من السهل تقليل الضوضاء إذا كنت تقوم بالتصوير في ظروف الإضاءة المنخفضة - وهو أمر شائع جدًا في تصوير الطيور. أستخدم تقنيات مخصصة لتقليل الضوضاء في مرحلة ما بعد المعالجة، وأشعر بأمان أكبر عندما أعلم أن لدي أفضل نقطة بداية في ملف Raw بدلاً من ملف JPEG.

                          حتى مع اللقطة التي تم تعريضها للضوء بشكل صحيح، ما زلت أحب التعامل مع منحنيات الألوان لإبراز التدرجات اللونية الدقيقة على الهدف نفسه، وهذا هو المكان الذي يتألق فيه Raw. يمكن أن تبدو ملفات JPEG جيدة تمامًا بدون تحريرها، ولكنها ستبدأ سريعًا في إظهار عناصر الضغط أثناء قيامك بتحريرها أكثر فأكثر.

                          للحصول على مقارنة أكثر تفصيلاً، أقترح الرجوع إلى مقالتنا حول Raw مقابل JPEG.

                          تعليق


                          • #14
                            Autofocus and Burst Mode


                            I can only scratch the surface of autofocus since each camera is different and I am not an expert in every camera. With birds, I find it crucial to be in continuous autofocus mode all the time for tracking movement.

                            Almost every camera system will have a continuous autofocus mode with some way of selecting or tracking a subject. Newer mirrorless cameras often have animal eye AF modes that actually do work for birds, so I suggest experimenting with those. Chances are, you will also need to switch between a couple different modes from time to time, so it is worthwhile to program a few buttons near your right hand to do this. Nasim’s article on Autofocus Modes can introduce you to some of the different options if you aren’t already familiar.
                            Caspian Tern, Nikon D500 + 500mm f/5.6 PF @ 500mm, ISO 360, 1/3200, f/5.6
                            Burst mode or high FPS mode instructs the camera to keep taking shots as long as the shutter button is held down. The rate of shooting is typically between 10-30 frames per second if you have a camera geared toward wildlife photography. This mode is useful for action shots, especially birds in flight. The only downside is that you might take more images than you realize (or intended) and thus end up with thousands more shots to go through at home. To save space on my memory card, I will often turn it off if I’m not photographing birds in flight.

                            تعليق


                            • #15
                              التركيز التلقائي ووضع الاندفاع

                              لا يمكنني سوى خدش سطح التركيز البؤري التلقائي نظرًا لأن كل كاميرا مختلفة ولست خبيرًا في كل كاميرا. مع الطيور، أجد أنه من الضروري أن أكون في وضع التركيز التلقائي المستمر طوال الوقت لتتبع الحركة.

                              سيكون لكل نظام كاميرا تقريبًا وضع التركيز التلقائي المستمر مع طريقة ما لاختيار الهدف أو تتبعه. غالبًا ما تحتوي الكاميرات الأحدث غير المزودة بمرآة على أوضاع التركيز البؤري التلقائي لعين الحيوان والتي تعمل بالفعل مع الطيور، لذا أقترح تجربة هذه الأوضاع. من المحتمل أنك ستحتاج أيضًا إلى التبديل بين وضعين مختلفين من وقت لآخر، لذلك من المفيد برمجة بعض الأزرار بالقرب من يدك اليمنى للقيام بذلك. يمكن أن تقدم لك مقالة نسيم حول أوضاع التركيز التلقائي بعضًا من الخيارات المختلفة إذا لم تكن على دراية بها بالفعل.


                              يوجه وضع الاندفاع أو وضع fps العالي الكاميرا إلى الاستمرار في التقاط اللقطات طالما تم الضغط على زر الغالق. يتراوح معدل التصوير عادةً بين 10-30 إطارًا في الثانية إذا كان لديك كاميرا موجهة نحو تصوير الحياة البرية. يعد هذا الوضع مفيدًا للقطات الحركة، خاصة الطيور أثناء الطيران. الجانب السلبي الوحيد هو أنك قد تلتقط صورًا أكثر مما تدرك (أو تقصده) وبالتالي ينتهي بك الأمر مع آلاف اللقطات الإضافية في المنزل. لتوفير المساحة على بطاقة الذاكرة الخاصة بي، غالبًا ما أقوم بإيقاف تشغيلها إذا لم أقم بتصوير الطيور أثناء الطيران.

                              تعليق

                              يعمل...
                              X