When to Use Bracketing for the Best Results عندم تستخدم تعدد اللقطات لنتائج أفضل

تقليص
X
 
  • تصفية - فلترة
  • الوقت
  • عرض
إلغاء تحديد الكل
مشاركات جديدة

  • #16
    Shutter Speed: Third is shutter speed – the exposure setting you should always adjust first if possible. Especially if you’re shooting from a tripod, and your subject isn’t moving, it’s a no-brainer; shutter speed is the way to go. However, in scenes with quickly-moving subjects and the potential for motion blur, you might not have the flexibility to bracket shutter speed. In those cases, ISO is often the better choice. I still wouldn’t bracket aperture – although perhaps you can use a wider aperture for all your photos so you no longer have a problem bracketing shutter speed.

    As a side note, I recommend using either manual or aperture-priority mode (with Auto ISO turned off) for bracketing exposure. Otherwise, you might end up bracketing aperture or ISO unintentionally, when you intended to adjust shutter speed instead.

    تعليق


    • #17
      سرعة الغالق: الثالثة هي سرعة الغالق - يجب عليك دائمًا ضبط إعداد التعريض أولاً إن أمكن. خاصة إذا كنت تقوم بالتصوير من حامل ثلاثي الأرجل، وكان هدفك لا يتحرك، فهذا أمر بديهي؛ سرعة الغالق هي الطريق الصحيح. ومع ذلك، في المشاهد التي تحتوي على أهداف سريعة الحركة واحتمالية ضبابية الحركة، قد لا تكون لديك المرونة في ضبط سرعة الغالق. في تلك الحالات، غالبًا ما يكون iso هو الخيار الأفضل. ما زلت لا أضع قوسًا بين فتحة العدسة - على الرغم من أنه ربما يمكنك استخدام فتحة أوسع لجميع صورك حتى لا تواجه مشكلة في ضبط سرعة الغالق بين قوسين.

      كملاحظة جانبية، أوصي باستخدام الوضع اليدوي أو وضع أولوية فتحة العدسة (مع إيقاف تشغيل iso التلقائي) لضبط التعريض الضوئي. وإلا، فقد ينتهي بك الأمر إلى تصحيح فتحة العدسة أو iso دون قصد، عندما كنت تنوي ضبط سرعة الغالق بدلاً من ذلك.

      تعليق


      • #18
        How to Do Focus Bracketing


        Focus bracketing is easier than exposure bracketing, since there is only one setting under consideration: focus distance. Here, your goal usually involves focus stacking the images in post-processing later. However, in some cases – like a group photo where you need everyone sharp, but don’t know exactly where to focus for the best result – there is still an element of playing it safe.

        Focus bracketing works best when you overlap your depth of field from shot to shot. If your “steps” are too wide, you might end up with a final photo that looks very odd: sharp, blurry, sharp, blurry, sharp, and so on from the front of the frame to the back.

        When you’re bracketing focus manually, I recommend taking photos with smaller focus increments than you would expect. If you have time, magnify live view and then review each photo afterwards to double check that the transitions are smooth. However, be aware that previews on the camera’s rear LCD look very different than full-size images on a large, high-resolution monitor. For optimal results, you might need to be even more cautious than you’d expect.

        A lot of cameras today have a built-in focus stack feature to simplify this process. Just focus on your nearest subject, tell the camera how many photos to take, and select a step size. Again, I recommend selecting a lower step size than you might expect, just to be safe. It’s also a good idea to test this feature ahead of time so you know how to use it correctly when the photo really matters.
        30 image focus stack, automated on the Nikon Z7
        NIKON Z7 + NIKKOR 70-200mm f/4 @ 200mm, ISO 64, 1/20, f/10.0

        تعليق


        • #19
          كيفية القيام بالتركيز بين قوسين

          يعد تصحيح التركيز البؤري أسهل من تصحيح التعريض الضوئي، نظرًا لوجود إعداد واحد فقط قيد الاعتبار: مسافة التركيز البؤري. هنا، يتضمن هدفك عادةً التركيز على تكديس الصور في مرحلة ما بعد المعالجة لاحقًا. ومع ذلك، في بعض الحالات - مثل صورة جماعية حيث تحتاج إلى الجميع في حالة انتباه، ولكن لا تعرف بالضبط أين يجب التركيز للحصول على أفضل نتيجة - لا يزال هناك عنصر من اللعب الآمن.

          يعمل تصحيح التركيز البؤري بشكل أفضل عند تداخل عمق المجال من لقطة إلى أخرى. إذا كانت "خطواتك" واسعة جدًا، فقد ينتهي بك الأمر إلى الحصول على صورة نهائية تبدو غريبة جدًا: حادة، ضبابية، حادة، ضبابية، حادة، وما إلى ذلك من مقدمة الإطار إلى الخلف.

          عند ضبط التركيز يدويًا، أوصي بالتقاط صور بزيادات تركيز أصغر مما تتوقع. إذا كان لديك الوقت، فقم بتكبير العرض المباشر ثم قم بمراجعة كل صورة بعد ذلك للتأكد من أن التحولات سلسة. ومع ذلك، انتبه إلى أن المعاينات على شاشة LCD الخلفية للكاميرا تبدو مختلفة تمامًا عن الصور بالحجم الكامل على شاشة كبيرة عالية الدقة. للحصول على أفضل النتائج، قد تحتاج إلى أن تكون أكثر حذرًا مما تتوقع.

          تحتوي الكثير من الكاميرات اليوم على ميزة مكدس التركيز البؤري المضمنة لتبسيط هذه العملية. ما عليك سوى التركيز على أقرب موضوع لك، وإخبار الكاميرا بعدد الصور التي تريد التقاطها، وتحديد حجم الخطوة. مرة أخرى، أوصي باختيار حجم خطوة أقل مما قد تتوقعه، فقط لتكون آمنًا. إنها لفكرة جيدة أيضًا اختبار هذه الميزة مسبقًا حتى تعرف كيفية استخدامها بشكل صحيح عندما تكون الصورة مهمة حقًا.

           مجموعة تركيز بؤري مكونة من 30 صورة، آلية على كاميرا Nikon Z7
          نيكون Z7 + عدسة NIKKOR مقاس 70-200 مم f/4 @ 200 مم، ISO 64، 1/20، f/10.0

          تعليق


          • #20
            Other Types of Bracketing


            In theory, bracketing can refer to pretty much any variable in photography. You can bracket white balance, JPEG settings, long exposure noise reduction, flash settings, focal length, and much more.

            For example, if you don’t know exactly what depth of field you want, it might be worth bracketing your aperture just in case (compensating with shutter speed so your overall exposure doesn’t change). Or, for Milky Way photography, you may take photos at different ISO and shutter speed settings to get the best combination of noise performance and minimal star trails.

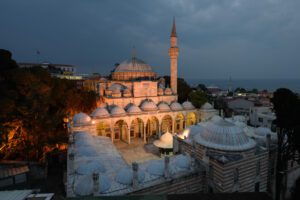
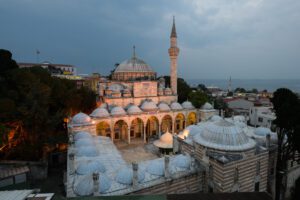
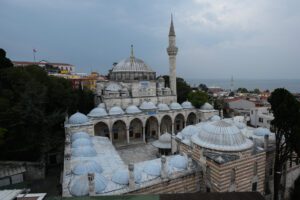
            Personally, I even consider composition to be a part of bracketing, and same with other variables like the time of day when you take a picture. Sometimes, you’ll end up taking two or three photos from the same tripod position, but thirty minutes apart – one at night, one at blue hour, and one at sunrise. (Click on the three images below for one such example.) Some photographers may not consider this to be “bracketing” in the true sense, but I don’t really care what you call it. After all, your goal – to hedge your bets and improve the odds of getting a successful image – remains the same in either case.


            تعليق


            • #21
              أنواع أخرى من الأقواس

              من الناحية النظرية، يمكن أن يشير الأقواس إلى أي متغير في التصوير الفوتوغرافي تقريبًا. يمكنك ضبط توازن اللون الأبيض وإعدادات jpeg وتقليل ضوضاء التعرض الطويل وإعدادات الفلاش والبعد البؤري وغير ذلك الكثير.

              على سبيل المثال، إذا كنت لا تعرف بالضبط عمق المجال الذي تريده، فقد يكون من المفيد وضع فتحة العدسة بين قوسين تحسبًا (التعويض بسرعة الغالق حتى لا يتغير التعريض الضوئي الإجمالي). أو، بالنسبة للتصوير الفوتوغرافي لدرب التبانة، يمكنك التقاط صور بإعدادات iso وسرعة غالق مختلفة للحصول على أفضل مزيج من أداء الضوضاء والحد الأدنى من آثار النجوم.

              أنا شخصياً أعتبر التركيب جزءًا من التصحيح، وينطبق الشيء نفسه على المتغيرات الأخرى مثل الوقت من اليوم الذي تلتقط فيه صورة. في بعض الأحيان، سينتهي بك الأمر بالتقاط صورتين أو ثلاث صور من نفس موضع الحامل ثلاثي القوائم، ولكن بفارق ثلاثين دقيقة - واحدة في الليل، وواحدة في الساعة الزرقاء، وواحدة عند شروق الشمس. (انقر على الصور الثلاث أدناه للحصول على أحد هذه الأمثلة.) قد لا يعتبر بعض المصورين هذا بمثابة "قوسين" بالمعنى الحقيقي، لكنني لا أهتم حقًا بما تسميه. بعد كل شيء، هدفك - التحوط على رهاناتك وتحسين احتمالات الحصول على صورة ناجحة - يظل هو نفسه في كلتا الحالتين

              تعليق


              • #22
                When You Should and Shouldn’t Bracket


                As useful as bracketing is, it won’t always be worth doing in the field. Exposure bracketing, especially, doesn’t help if you already know exactly what exposure you want. It just fills up your memory card faster. On top of that, bracketing can take up extra time if you’re trying to work quickly, even if you use the camera’s built-in bracketing feature. (After all, if your metered exposure is a 15 second shutter speed, bracketing one stop over will make you wait another 30 seconds per shot.)

                The biggest reason to avoid bracketing, though, is when you’re photographing action. For example, say that you’re a wildlife photographer with a bird flying toward your camera. You probably have a good “safe” exposure in mind that is unlikely to blow out any details. Bracketing, in this case, means that you’re missing two of every three exposures in your sequence – including, quite possibly, the best moment of action – just to reduce the already small chance that your safe exposure is incorrect. That’s not a tradeoff I’d make.

                تعليق


                • #23
                  عندما يجب عليك ولا ينبغي أن قوس

                  على الرغم من فائدة التصحيح، إلا أنه لن يكون دائمًا يستحق القيام به في الميدان. لا يساعد تصحيح التعريض الضوئي، على وجه الخصوص، إذا كنت تعرف بالفعل نوع التعريض الذي تريده بالضبط. إنه يملأ بطاقة الذاكرة الخاصة بك بشكل أسرع. علاوة على ذلك، يمكن أن يستغرق التصحيح وقتًا إضافيًا إذا كنت تحاول العمل بسرعة، حتى إذا كنت تستخدم ميزة التصحيح المضمنة في الكاميرا. (بعد كل شيء، إذا كان التعريض الضوئي الذي تم قياسه هو سرعة غالق تبلغ 15 ثانية، فإن وضع نقطة توقف واحدة بين قوسين سيجعلك تنتظر 30 ثانية أخرى لكل لقطة.)

                  ومع ذلك، فإن السبب الأكبر لتجنب وضع الأقواس هو عندما تقوم بتصوير الأحداث. على سبيل المثال، لنفترض أنك مصور للحياة البرية وطائر يطير باتجاه الكاميرا. من المحتمل أن يكون لديك تعرض جيد "آمن" في ذهنك ومن غير المرجح أن يؤدي إلى تفجير أي تفاصيل. يعني التصحيح، في هذه الحالة، أنك تفتقد اثنين من كل ثلاث تعريضات في التسلسل - بما في ذلك، على الأرجح، أفضل لحظة عمل - فقط لتقليل الاحتمال الضئيل بالفعل بأن يكون التعريض الآمن الخاص بك غير صحيح. هذه ليست مقايضة سأقوم بها.

                  تعليق


                  • #24
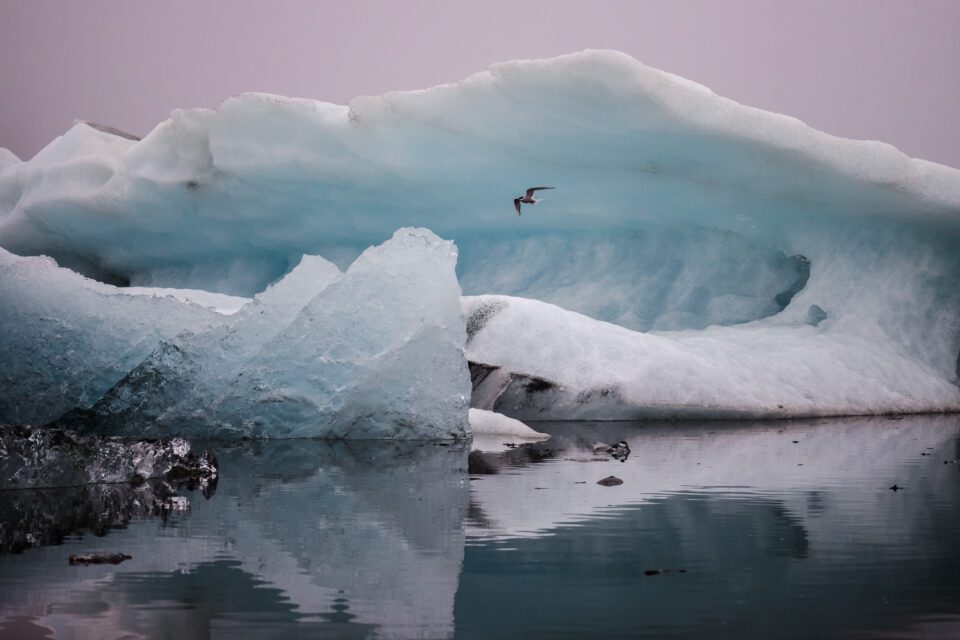
                    NIKON D800E + 105mm f/2.8 @ 105mm, ISO 800, 1/800, f/2.8
                    Bracketing here wouldn’t have been a good idea, since it would have increased my odds of a poor exposure while the

                    تعليق


                    • #25
                      كاميرا نيكون D800E + 105 مم f/2.8 @ 105 مم، ISO 800، 1/800، f/2.8
                      لم يكن التعريض هنا فكرة جيدة، لأنه كان سيزيد من احتمالات التعرض الضعيف أثناء

                      تعليق


                      • #26
                        Instead, I recommend leave bracketing to situations that are not so fast-paced. Architectural photography, landscape photography, studio photography, and so on – these are all good times to bracket your photos. Also, in some time-sensitive cases, you may wish to enable bracketing after you’ve already captured what you think is the right shot. For example, once you’ve taken the wildlife photo you want, it’s not a bad idea to enable bracketing and keep taking pictures just in case.

                        تعليق


                        • #27
                          وبدلاً من ذلك، أوصي بترك الوضع بين قوسين معقوفين للمواقف التي لا تحدث بسرعة كبيرة. التصوير الفوتوغرافي المعماري، وتصوير المناظر الطبيعية، والتصوير الفوتوغرافي في الاستوديو، وما إلى ذلك - كلها أوقات جيدة لوضع صورك بين قوسين. وأيضًا، في بعض الحالات الحساسة للوقت، قد ترغب في تمكين التصحيح بعد أن قمت بالفعل بالتقاط ما تعتقد أنه اللقطة الصحيحة. على سبيل المثال، بمجرد التقاط صورة الحياة البرية التي تريدها، فليس من الجيد تمكين التصحيح والاستمرار في التقاط الصور تحسبًا.

                          تعليق


                          • #28
                            Summary


                            Although it is not a tool you should use for every photo, bracketing has the potential to improve your number of keepers significantly under the right conditions. As a landscape photographer, I bracket my exposures very often in tricky conditions, whether to play it safe or to create an HDR later. I also bracket focus for certain images, and – if you’ll count it as bracketing – I vary my composition and shoot at different times of day for a huge number of important photos.

                            Bracketing is no substitute for learning how to take good pictures the first time around. But no one gets the perfect exposure every time, and it’s worth a small bit of effort to improve your chances of a good result. Hopefully, if you rarely or never used bracketing before reading this article, you now have a good idea of when to try it for your own photography.

                            تعليق


                            • #29
                              ملخص
                              على الرغم من أنها ليست أداة يجب عليك استخدامها لكل صورة، إلا أن التصحيح لديه القدرة على تحسين عدد الحراس بشكل كبير في ظل الظروف المناسبة. باعتباري مصورًا للمناظر الطبيعية، أضع قوسين للتعريضات الضوئية في كثير من الأحيان في ظروف صعبة، سواء للعمل بشكل آمن أو لإنشاء hdr لاحقًا. أقوم أيضًا بالتركيز على صور معينة بين قوسين، و- إذا كنت ستعتبرها بين قوسين - أقوم بتغيير تكويني والتصوير في أوقات مختلفة من اليوم لعدد كبير من الصور المهمة.

                              لا يعد التعريض الضوئي بديلاً عن تعلم كيفية التقاط صور جيدة في المرة الأولى. لكن لا أحد يحصل على التعرض المثالي في كل مرة، ويستحق الأمر القليل من الجهد لتحسين فرصك في الحصول على نتيجة جيدة. نأمل، إذا كنت نادرًا ما تستخدم التصحيح قبل قراءة هذه المقالة أو لم تستخدمه مطلقًا، أن يكون لديك الآن فكرة جيدة عن الوقت المناسب لتجربته في التصوير الفوتوغرافي الخاص بك.

                              تعليق

                              يعمل...
                              X